
Last updated 2026-07-10
TL;DR
For even heat, mount infrared panels on opposite walls at shoulder-to-head height (roughly 4 to 5 feet off the floor), angled 10 to 15 degrees toward the occupant. Ceiling panels work best centered overhead or offset toward seating. Never cluster panels on one wall. Most home saunas need 2 to 4 panels to kill cold spots, depending on room size and wattage.
Why does infrared panel placement matter so much?
Infrared heat is radiant, not convective. That one distinction changes everything about where you put the source.
In a traditional Finnish sauna, hot air rises and circulates, so a single stove in a corner can eventually warm the whole room through convection. Infrared panels do not work that way. They emit electromagnetic radiation in the near-, mid-, or far-infrared spectrum, and that radiation travels in straight lines until it hits a solid object, which absorbs it and turns it to heat [1]. Anything outside the panel's line of sight stays cooler. Mount all your panels on one wall and your back gets scorched while your front stays cold.
Placement is the fix. The goal is simple to state and easy to botch: keep every part of the occupant's body within a reasonable view angle of at least one panel at any moment, without any single panel so close it creates a hot spot or skin discomfort. Most manufacturers want a minimum clearance of 8 to 12 inches between a panel face and the nearest surface, and a comfortable viewing distance of 18 to 36 inches from panel to skin for typical far-infrared emitters.
Get it right and the room feels like warm sun on a clear day. Get it wrong and one shoulder sweats while the other arm goes cold.
What are the main infrared panel placement configurations?
Four layouts show up in real home installations. Each has a sweet spot and a failure mode.
| Configuration | Best for | Common failure mode |
|---|---|---|
| Opposite-wall facing | 2-person benched saunas | Panels too high, miss the torso |
| Corner bracket (angled) | Small 1-person cabins | Narrow angle creates hot spot on nearest shoulder |
| Ceiling mount (overhead) | Yoga/meditation layouts, no bench | Glare discomfort if panel is too bright or near-IR |
| Hybrid (wall + ceiling) | Larger rooms, full-body coverage | Wiring complexity; needs circuit plan |
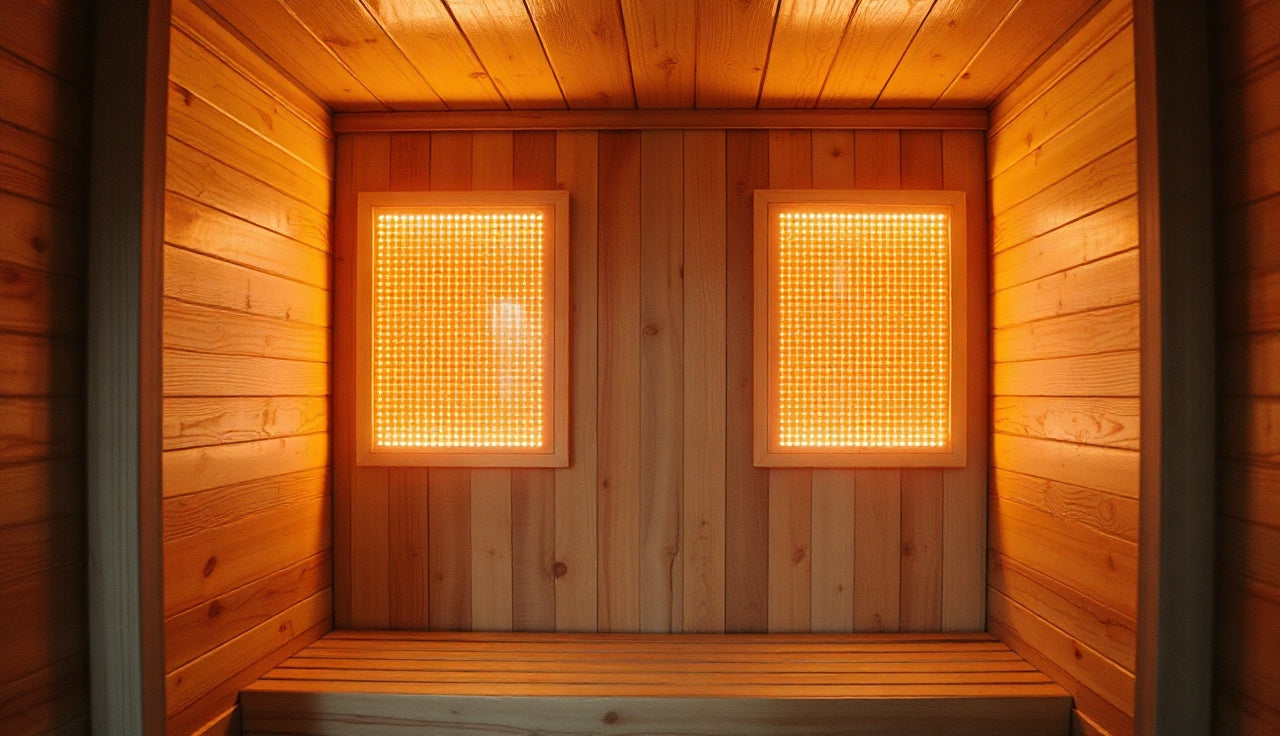
Opposite-wall facing is the most forgiving layout for a standard benched sauna. You mount one panel (or a bank of panels) on the wall behind the bench and another on the wall facing the bench, at roughly the same height. The occupant sits between them and takes radiant heat from both sides at once. This is the layout in most factory-built two-person far-infrared cabins.
Corner brackets earn their keep in tight spaces, like a 3x4-foot one-person cabin, where opposite-wall distance is too short to stay comfortable. The panel sits in a bracket angled about 30 to 45 degrees off the wall, pointing toward the center of the bench. You get broader coverage without a second panel, but the angle has to be right or one side of the body cooks while the other waits.
Ceiling mounts are underused. A far-infrared panel centered directly above the occupant delivers heat to the top of the head, the shoulders, and the lap without eating wall space. The catch is that it does almost nothing for the back and sides. Used alone it usually falls short. Paired with even a single wall panel, it handles the cold-zone problem pretty well.
Hybrid layouts combine ceiling and wall panels. They are the best option for rooms bigger than about 6x6 feet, or for saunas where people move around instead of sitting in one spot.
What height should infrared panels be mounted at?
The most common mistake in home infrared builds is mounting panels too high.
People treat panels like light fixtures and shove them near the ceiling. But your upper chest and shoulders drive the sweat response, and your core temperature matters more than your head temperature for the cardiovascular and thermoregulatory effects that make infrared saunas worth using [2]. A panel at 6 feet aims mostly at your shoulders and misses your core entirely when you are seated.
For a seated occupant on a standard 18-inch bench, the center of mass sits roughly 36 to 48 inches off the floor, depending on height. That is where the bulk of your infrared should land. Practical mounting height for most far-infrared panels is 4 to 5 feet (48 to 60 inches) off the floor, with the face tilted 10 to 15 degrees down toward the occupant if you have adjustable brackets.
For panels on the wall behind the bench (the backrest wall), mount them at seated torso height, roughly 30 to 42 inches off the floor, since the occupant leans back and the torso sits closer to that wall than the facing one. Some builders pair a low panel here with a full-length or taller panel on the facing wall for solid front-to-back coverage.
Ceiling panels have no height choice, obviously. In a standard 7-foot ceiling sauna they land about 5.5 to 6 feet above the bench, which is fine for far-infrared emitters. Near-infrared (NIR) emitters run much hotter and need more clearance. Check the manufacturer's minimum distance spec before you mount any NIR panel overhead.
| 1-person (3x4 ft, 12 sq ft) - low end | 300 |
| 1-person (3x4 ft, 12 sq ft) - high end | 540 |
| 2-person (4x5 ft, 20 sq ft) - low end | 500 |
| 2-person (4x5 ft, 20 sq ft) - high end | 900 |
| 3-person (5x7 ft, 35 sq ft) - low end | 875 |
| 3-person (5x7 ft, 35 sq ft) - high end | 1,575 |
| 4-person (6x8 ft, 48 sq ft) - low end | 1,200 |
| 4-person (6x8 ft, 48 sq ft) - high end | 2,160 |
Source: U.S. Department of Energy, Energy Saver (energy.gov), with standard industry sizing ratio
How many panels do you actually need for a given room size?
Panel count comes down to wattage per panel, room dimensions, and how much wall surface you want covered. The industry starting point is 25 to 45 watts of far-infrared capacity per square foot of floor area for a well-insulated cabin, and you will find manufacturer guidance dip as low as 20 W/sq ft for heavily insulated units [3].
A 4x4-foot one-person sauna (16 sq ft) needs roughly 400 to 700 watts of total panel capacity. A typical far-infrared wall panel runs 300 to 600 watts, so one or two panels usually cover it. A 5x7-foot two-person room (35 sq ft) wants 875 to 1,575 watts, which puts you at two to four panels.
Wattage alone tells you nothing about coverage uniformity. A single 1,500-watt panel on one wall heats one side of the room well and the other side badly. Three 500-watt panels on three walls heat the same room evenly at the same total wattage. More panels at lower individual wattage, spread around the room, nearly always beat fewer high-wattage panels on one surface for evenness.
Here is a rule worth taping to the wall: no part of the occupant's body should sit more than 36 inches from the nearest panel face for standard far-infrared carbon or ceramic emitters. If your room geometry pushes any body zone past that, add a panel or move one.
A home sauna built as a pre-fabricated cabin usually ships with panels already placed by the manufacturer. Custom or retrofitted rooms need this math done from scratch.
Does the type of infrared emitter (near, mid, or far) change placement rules?
Yes, a lot. The three bands behave differently and carry different safety clearances.
Far-infrared (FIR, roughly 5.6 to 1,000 microns wavelength) is what most home sauna panels emit. FIR is absorbed by water-containing tissue, which is why it heats the skin and the first few millimeters of tissue efficiently [4]. It runs at relatively low surface temperatures (typically 120 to 160 degrees F panel face) and can sit fairly close to the occupant, usually 12 to 24 inches of minimum clearance from the maker.
Mid-infrared (MIR, roughly 1.5 to 5.6 microns) runs hotter. Some hybrid emitters blend MIR and FIR. Clearance is typically 18 to 30 inches minimum.
Near-infrared (NIR, roughly 0.75 to 1.5 microns) is the intense, lamp-style radiation used in some specialty wellness panels. NIR emitters operate at very high surface temperatures (sometimes 1,800 degrees F and up for quartz halogen lamps) and throw visible red light. Minimum clearance is usually 24 to 36 inches or more, and mounting NIR panels directly overhead is a bad idea without very specific manufacturer guidance, because the direct radiation intensity at that proximity can cause discomfort or skin injury [5]. Build a NIR sauna and the placement rules tighten and the geometry matters more.
For the vast majority of home installs running far-infrared carbon fiber or ceramic panels, the guidance in this article applies directly.
Should infrared panels go on the wall, ceiling, or floor?
Walls first, ceiling as a supplement. Floor placement is almost never correct.
Wall panels do the heavy lifting. They cover the torso and core of a seated or standing occupant when mounted at the right height, and they are the easiest to wire and service. Start with walls.
Ceiling panels earn their spot in two cases: rooms where people lie down instead of sit (spa tables, meditation layouts), and rooms where a wall arrangement still leaves the top of the shoulders and head undertreated. A single ceiling panel centered over a bench adds real coverage without much extra wiring, since most sauna ceiling panels run in the 200 to 400 watt range.
Floor panels exist in some commercial products, but they are almost never worth the trouble at home. The floor is the hardest surface to keep clean and the one most likely to get wet. More to the point, the soles of your feet are not where you want infrared concentrated. You want it on the torso. A floor panel firing up at your feet while your core stays cool wastes capacity and circuit space.
Under-bench panels are a middle path some builders use to get radiant heat onto the legs without running a panel along the full lower wall. They can work, but they tend to heat the bottom of the thighs unevenly and are harder to clean.
How do you position panels in a corner or L-shaped sauna?
Corner and L-shaped layouts are genuinely harder to nail. The clean opposite-wall geometry breaks down the moment seating wraps around a corner or the room has an odd footprint.
In a corner bench arrangement (common in larger home saunas), the occupant can face several directions depending on where they sit. The safest move is a ceiling panel centered over the bench area plus a wall panel on each of the two non-bench walls, angled inward. That gives the seated person at least one wall panel and the overhead panel in view no matter which way they turn.
For a true L-shaped room (a retrofitted closet or basement alcove, say), treat each leg of the L as its own zone. Find the main seating position in each leg and put a panel facing it. The junction of the L is usually a dead zone for direct infrared because no wall panel faces it cleanly. A ceiling panel directly above that junction patch fixes it.
A basic thermal imaging camera (a handheld FLIR-type unit runs $200 to $400) turned on the walls and occupant after a 20-minute warmup is the most honest way to verify coverage. Hot spots and cold zones jump right out. You do not need it for a plain rectangular sauna, but for any strange geometry it pays for itself the first time you use it.
Building a portable sauna with fold-up walls means the geometry changes every setup, which is exactly why portable units wrap panels around the occupant in a tent-like configuration instead of relying on fixed opposite-wall spacing.
What spacing between panels produces the most even heat?
With multiple panels on the same wall, spacing decides whether you get banding: the striped pattern of hot and cool zones that shows up when panels sit too close (overlapping heat with a cool gap between) or too far apart (each panel builds its own isolated zone).
The general guidance from thermal engineers working with radiant panels is to space emitters so their coverage zones meet at roughly 50 percent intensity at the midpoint between them [6]. For far-infrared carbon panels with typical 60-degree emission angles, that works out to center-to-center spacing of about 1.0 to 1.5 times the panel-to-occupant distance. At 24 inches from panel to occupant, space panels 24 to 36 inches apart, center to center.
On a standard 6-foot-wide sauna back wall with two panels, placing them 24 inches from each side wall (about 24 inches apart from each other center to center in a 6-foot room) gives reasonable coverage for a 24-inch depth. Deeper rooms (36-plus inches from back wall to facing bench) want proportionally wider center-to-center spacing.
The simplest sanity check costs nothing. Sit in your sauna after it has run 15 to 20 minutes and have someone slide a hand slowly across your back. Cool bands mean the panels are too far apart or aimed too high. A persistent hot stripe means one panel is dominating and needs repositioning, or its output turned down if it has a dimmer.
Are there electrical or building code requirements that affect where you can mount panels?
Yes, and this is no place to guess.
Infrared sauna panels in the United States are hardwired or plug-in devices classified as fixed or portable heating appliances. The National Electrical Code (NEC), published by the National Fire Protection Association, governs installation. NEC Article 424 covers fixed electric space-heating equipment, and Article 680 comes into play if the sauna sits near a pool or spa [7]. Most jurisdictions adopt the NEC with local amendments.
The practical constraints from NEC and standard practice:
- Panels must be mounted on surfaces rated for the heat output. Uninsulated exterior walls or vapor barriers behind high-wattage panels can be a fire risk.
- Most 120V plug-in panels under 1,500 watts run on a standard 15A or 20A household circuit, but multiple panels on one circuit need load calculations. A 1,500-watt panel draws 12.5 amps at 120V, which leaves almost no headroom on a 15A circuit.
- 240V hardwired panels (common in larger installs) need a dedicated circuit, a properly sized breaker, and in many jurisdictions a permit.
- Clearance from combustible materials (wood walls, benches) must follow manufacturer specs AND local fire code. When the manufacturer spec is looser than local code, local code wins.
The Consumer Product Safety Commission has issued recall notices on several sauna heater models over the years for fire hazard from inadequate clearance or overheating components [8]. Checking the CPSC recall database before you buy any panel is a free 60-second step.
Installing a pre-fabricated cabin? The unit typically comes with a UL or ETL listing that spells out clearances. Follow those specs exactly and your code compliance is largely handled. Custom builds need an electrician to sign off. Most U.S. jurisdictions also adopt the International Residential Code, which requires permits and inspections for new electrical circuits, including those serving a sauna [11].
Planning a full outdoor sauna build? Weatherproofing and ground-fault protection (GFCI requirements) add layers to the electrical planning.
How does panel placement interact with sauna insulation and wall materials?
Infrared panels heat objects, not air. But the ambient air temperature still matters for comfort and for hitting the surface temperatures that produce a real sweat. How well the room holds that heat depends almost entirely on insulation and wall material.
A poorly insulated sauna forces panels to run harder. More panel wattage running continuously means more radiant intensity at any given spot, which shifts the comfortable placement distance. A well-insulated room (R-10 or better in walls and ceiling) reaches and holds target temperature with panels cycling on and off, which lowers the peak intensity at the occupant and makes placement less fussy.
Reflective surfaces move infrared around in ways most people do not expect. Far-infrared is heavily absorbed by wood (the standard sauna wall material) but partly reflected by metal. A foil vapor barrier inside the wall, if it faces the cabin interior instead of being buried in the wall assembly, can bounce infrared back toward the occupant. That sounds helpful and actually creates unpredictable hot spots. Foil-faced insulation should always face away from the interior.
Cedar, hemlock, and basswood (the common sauna woods) all have high far-infrared emissivity, meaning they absorb infrared well and re-radiate it gently at room temperature, warming the air and other surfaces. That secondary radiation smooths out the hot and cool zones panel placement creates. It is one reason wood-lined saunas feel more even than ceramic-tile or metal-walled spaces at the same panel wattage.
Curious how infrared stacks up against steam-based heat as an experience? There is a full breakdown in the sauna vs steam room guide.
What are the most common infrared panel placement mistakes and how do you fix them?
Knowing what goes wrong in real installs beats any idealized diagram.
Mounting everything on one wall is the top error, usually because it looks cleaner and needs less wiring. The fix: run at least one panel on the wall facing the occupant, even a smaller one.
Panels mounted too high come in second. Your torso, not your head, is the target. Lower the panel or tilt it down with an adjustable bracket. Some after-market angled brackets let you retilt an existing install without remounting.
Too much wattage crammed into one spot, usually a single high-wattage panel too close to the bench, produces the hot-side/cold-side problem and makes sessions uncomfortable. Move the panel farther back if the room allows, or swap it for two lower-wattage panels spread apart.
No panel behind the back is a gap that surprises people because it seems obvious in hindsight. The back of the torso is one of the largest surface areas for absorbing far-infrared and carries a dense network of capillaries that respond well to radiant warmth. A backrest panel mounted low on the back wall (24 to 36 inches off the floor for a seated person) is one of the highest-value placements in any sauna.
Ignoring the legs is common in small one-person units where makers dump all the capacity into the back and front panels. A low-mounted panel or under-bench panel helps if legroom and clearance allow.
SweatDecks carries a range of home sauna options and can help you match panel count and layout to your room footprint before you commit to a build.
One last trap: some builders over-index on total wattage and under-index on geometry. 3,000 watts all on one wall is less comfortable and less effective than 2,000 watts across three surfaces. More watts cannot fix bad placement.
Can you DIY an infrared panel layout, or do you need a professional?
For a pre-fabricated cabin, you do not need professional help for placement. The manufacturer already did that work. Your job is to follow the assembly manual and not wander off the specified panel positions.
For a custom build in an existing room, the placement geometry is DIY-friendly if you follow the principles here and have basic carpentry skills. The electrical portion is another story. In most U.S. jurisdictions, any hardwired 240V circuit requires a permit and inspection, and in many jurisdictions it must be done or inspected by a licensed electrician. Fines for unpermitted electrical work are real, and a wiring error in a hot, enclosed space is a genuine fire risk.
The design work (panel positions, heights, angles, spacing) is doable by any careful person with a tape measure and this article. The wiring has to follow NEC and local code, and in most cases that means pulling a permit.
Want an objective thermal audit of a finished install? Hire an energy auditor or HVAC contractor with a thermal imaging camera. An hour of their time confirms or disproves whether your placement is producing the coverage you think it is. For a custom build running $2,000 or more in panels and materials, that hour almost always pays.
Frequently asked questions
How far should an infrared panel be from the person sitting in the sauna?
For far-infrared carbon or ceramic panels, manufacturers typically specify a minimum comfortable distance of 12 to 24 inches from the panel face to the nearest body part. At that range the heat is intense but not uncomfortable. Under 12 inches on a full-output panel can cause skin discomfort. The sweet spot for most seated users is 18 to 30 inches from the facing wall panel and 8 to 14 inches from the backrest panel, since the back panel runs at a more oblique angle and lower apparent intensity.
Is it better to have more panels at lower wattage or fewer panels at higher wattage?
More panels at lower individual wattage, spread across multiple walls, almost always produces more even coverage than fewer high-wattage panels in one spot. Total wattage sets how warm the room gets; panel distribution decides whether that warmth reaches all parts of the body equally. If you can only run one circuit, two 750-watt panels on opposite walls beat one 1,500-watt panel on a single wall every time for evenness.
Do infrared panels heat the air or just the surfaces?
Infrared panels primarily heat objects and surfaces directly, not the air between the panel and the target. The air in an infrared sauna does warm up over time, but mostly through secondary conduction from the heated walls, bench, and occupant's skin. That is why infrared saunas typically run at 120 to 150 degrees F ambient air temperature rather than the 170 to 200 degrees F of a traditional Finnish sauna, while still producing a strong sweat response [12].
Can I add infrared panels to an existing traditional sauna?
Yes, with caveats. The existing sauna needs enough wall space at the right heights, and the electrical panel needs capacity for additional circuits. Traditional saunas often use 240V circuits already near capacity with the main heater. Adding far-infrared panels to an existing wood-lined sauna can work well, but the stove and infrared panels run on completely different mechanisms and will fight for thermostat control if not wired independently. Most people who retrofit end up replacing the stove entirely rather than running both systems.
What is the ideal angle for an infrared panel mounted on the wall?
Flat (perpendicular to the wall) works for most opposite-wall configurations where the panel faces the occupant directly. Angling 10 to 15 degrees downward improves coverage of the torso for a seated user when the panel is mounted at or above shoulder height. Corner-bracket installations typically angle the panel 30 to 45 degrees off the wall to broaden coverage. Beyond 45 degrees off the wall, the effective power density at the occupant drops significantly and you lose efficiency.
How do I know if my infrared sauna has uneven heat distribution?
The easiest check is sitting in the sauna for 15 to 20 minutes and noticing whether one side of your body sweats noticeably more than the other, or whether your torso feels hotter than your legs. A more objective method is a basic thermal imaging camera scan of yourself mid-session, which shows surface temperature distribution clearly. Cool bands on one side of your back usually mean a panel is aimed too high or missing from that wall.
Does ceiling height affect where I should mount infrared panels?
Yes. In a standard 7-foot ceiling sauna, mounting wall panels at 48 to 60 inches off the floor puts them well above the seated occupant's center of mass, which is good. In a room with an 8-foot or higher ceiling, panels mounted near the ceiling sit too far above the torso to be effective; you may need taller panels or a second lower row. Lower ceilings (under 6.5 feet) let ceiling panel installation work better because the occupant is closer to the overhead emitter.
Are there infrared panel placement rules specific to two-person saunas?
Two-person saunas with benches on facing walls benefit from a panel bank on each of the two non-bench side walls rather than on the bench walls themselves. That way both occupants get frontal radiant heat at once without one person's panel sitting directly behind the other person's head. If the sauna has a single bench and both occupants sit side by side, add a panel on the facing wall centered between them, plus back-wall panels behind each seating position.
Do I need a permit to install infrared sauna panels at home?
For plug-in panels under 1,500 watts on an existing 20A circuit, most U.S. jurisdictions do not require a permit. For any hardwired installation or new circuit, a permit is typically required and a licensed electrician must do or inspect the wiring under National Electrical Code Article 424 [7]. Specific requirements vary by jurisdiction; check with your local building department before starting any hardwired work. Unpermitted electrical work can void homeowner's insurance and create liability issues.
How does panel placement differ for a near-infrared versus far-infrared sauna?
Near-infrared (NIR) emitters run at much higher surface temperatures than far-infrared panels and need greater clearance from the occupant, typically 24 to 36 inches minimum and sometimes more depending on wattage [5]. NIR panels also throw a tighter, more directional beam than far-infrared panels. That makes even coverage harder and usually requires rotating or moving relative to the panel during a session. Far-infrared panels are more forgiving of fixed seating, which is why they dominate home sauna installations.
What wood or wall material works best behind infrared sauna panels?
Cedar, hemlock, and basswood are the standard choices. All three have high far-infrared emissivity, absorbing radiated energy efficiently and re-radiating it gently into the room. They are also low in aromatic oils at sauna temperatures compared to pine or spruce, which can off-gas uncomfortably when heated. Avoid foil-faced materials on the interior wall surface; they reflect far-infrared unpredictably and can create uneven heat pockets.
Can I use infrared panels in an outdoor sauna?
Yes, but the panels must be rated for the humidity and temperature range of your climate, and the electrical installation must include appropriate weatherproofing and GFCI protection per NEC requirements. An outdoor infrared sauna also needs substantially better insulation than an indoor unit to reach and hold target temperatures efficiently, especially in cold climates. Panel wattage requirements typically climb 20 to 40 percent compared to an equivalent-sized indoor installation in a cold-weather outdoor setting.
How long does it take an infrared sauna to reach operating temperature with correct panel placement?
A well-insulated far-infrared cabin typically reaches 120 to 140 degrees F in 10 to 20 minutes with panels running at full output. Because infrared heats surfaces and bodies directly, some practitioners enter the sauna right at startup rather than waiting for full air temperature, getting infrared exposure during the warmup. Correct panel placement shortens the time to full-body even coverage because all panels contribute from the first minute rather than one wall overheating while the rest of the room catches up.
Sources
- National Institutes of Health, PubMed Central: Vatansever & Hamblin (2012) Far infrared radiation and its biological effects: Far-infrared radiation travels in straight lines and is absorbed by surfaces and tissue, converting to heat on contact rather than heating air.
- National Institutes of Health, PubMed Central: Mero et al. (2015) Infrared sauna bathing in athletes: Core body temperature and cardiovascular response are the primary physiological targets of infrared sauna sessions.
- National Institutes of Health, PubMed Central: Vatansever & Hamblin (2012) Far infrared radiation: Far-infrared wavelengths (5.6-1,000 microns) are strongly absorbed by water-containing tissue, heating the skin and superficial tissue effectively.
- National Institutes of Health, PubMed Central: Hamblin (2017) Mechanisms and applications of the anti-inflammatory effects of photobiomodulation: Near-infrared emitters (0.75-1.5 microns) operate at high surface temperatures and have stricter minimum clearance requirements to avoid tissue injury.
- ASHRAE Handbook: Fundamentals, chapter on radiant heating and cooling (ASHRAE.org): Even radiant panel coverage is achieved when emitter spacing allows approximately 50 percent intensity overlap at the midpoint between panels.
- National Fire Protection Association, NFPA 70 National Electrical Code, Articles 424 and 680 (nfpa.org): NEC Article 424 governs fixed electric space-heating equipment and Article 680 applies to installations near pools or spas.
- U.S. Consumer Product Safety Commission, Recalls search: CPSC has issued recalls on sauna heater models due to fire hazards from inadequate clearance or overheating electrical components.
- National Institutes of Health, PubMed Central: Laukkanen et al. (2018) Cardiovascular and other health benefits of sauna bathing: Regular sauna sessions are associated with cardiovascular health effects; heat exposure to the torso and core is the primary mechanism.
- International Code Council, International Residential Code (iccsafe.org): Most U.S. jurisdictions adopt the IRC, which requires permits and inspections for new electrical circuits including those serving sauna installations.
- National Institutes of Health, PubMed Central: Hussain & Cohen (2018) Clinical effects of regular dry sauna bathing: Far-infrared saunas typically operate at ambient air temperatures of 120-150 degrees F while producing comparable sweat response to higher-temperature traditional saunas.

Share:
Infrared sauna wattage per square foot: what you actually need
Infrared sauna wattage per square foot: what you actually need