
Last updated 2026-07-11
TL;DR
Connecting a sauna to an outdoor cold plunge means running a cold water fill line to the plunge tub, a drain line to daylight or a drywell, and routing both through frost-protected trenches. Most DIY setups take one weekend and $300 to $900 in materials, depending on distance and whether you add a recirculating chiller.
What does 'connecting a sauna to a cold plunge' actually mean?
People use this phrase two different ways, and mixing them up costs money.
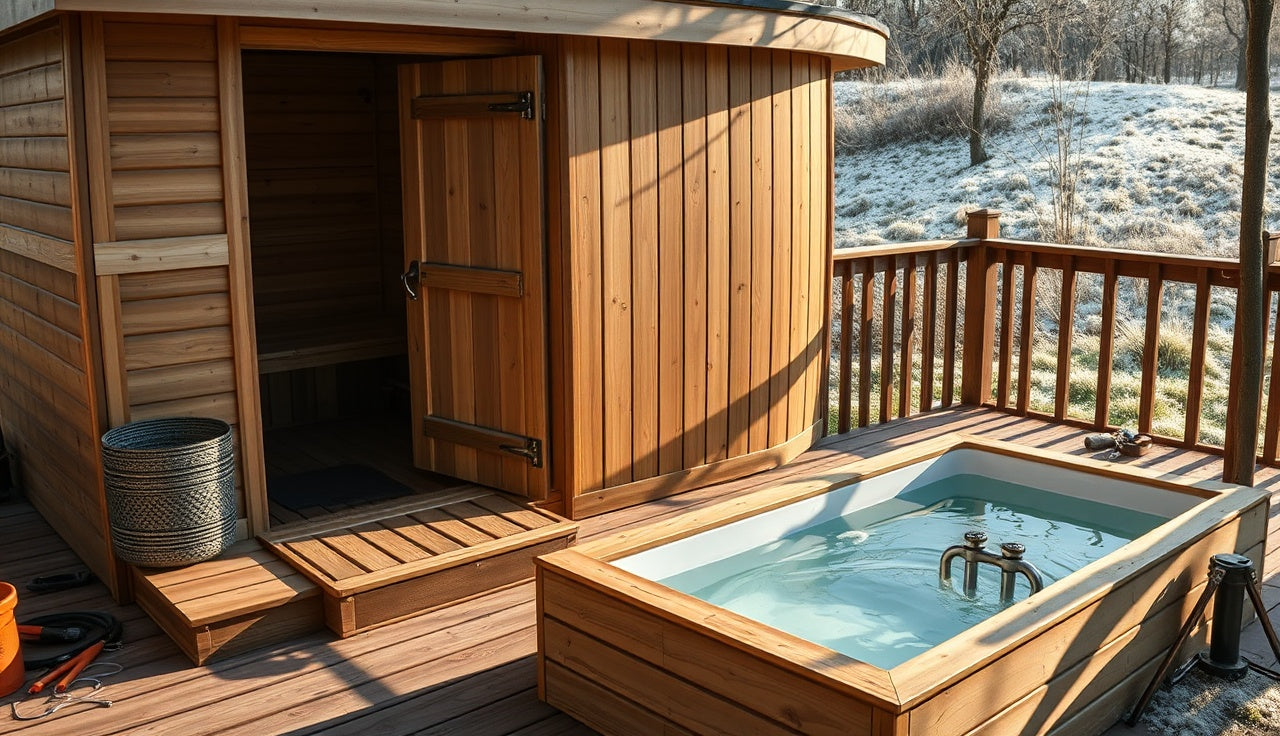
The first meaning is physical proximity: putting a cold plunge and a sauna close enough that you can move between them in seconds. That is layout and decking, not plumbing.
The second meaning is shared plumbing: running actual water lines so both units share a fill source, a drain, or a recirculating chiller loop. That is what this guide covers.
A fully connected setup has three plumbing runs. One is the cold water supply line that fills the plunge tub and feeds the chiller. The second is the drain line that empties the tub for cleaning or winterizing. The third, optional but common, is a return line if you plumb a remote chiller into a closed loop. The sauna itself needs no plumbing beyond a single hose bib for the ladle bucket, so when people say 'connecting sauna to cold plunge plumbing' they mean getting the cold plunge's supply and drain right in an outdoor spot the sauna also occupies.
Get those three runs correct and the rest is finish work.
What permits and codes apply to outdoor cold plunge and sauna plumbing?
It depends on your jurisdiction, and you should call your local building department before you dig anything. That is the honest answer.
Here is what is typical across most U.S. municipalities. A cold plunge tub holding under 150 gallons is generally treated like a hot tub or spa for permitting [1]. The International Plumbing Code (IPC) 2021 Section 305 requires that water supply piping installed outdoors be protected from freezing by burial at or below the local frost depth [2]. In northern climates (think Minnesota or Vermont) that depth can be 48 inches or more. In Atlanta it is 12 inches.
If your cold plunge holds more than 150 gallons and is permanently installed, some states classify it as a pool. That triggers pool-barrier fencing rules and an electrical inspection for the chiller pump [1].
On the sauna side, an outdoor sauna with a wood-burning heater usually needs only a building permit for the structure, not a plumbing permit, because it has no supply plumbing. Electric sauna heaters need an electrical permit in almost every jurisdiction.
The drain line is where people get surprised. Discharging tub water to a storm drain is prohibited in most municipalities under the Clean Water Act Section 402 [3]. You generally drain to the sanitary sewer, to a permitted drywell, or to a vegetated area under your local greywater rules. California, for one, classifies cold plunge and hot tub discharge as greywater under Health and Safety Code Section 17922.12 [4].
Budget $75 to $300 for permits on a typical residential install, pull them before you dig, and confirm your frost depth with a quick call to the building department.
What materials do you need for a cold plunge plumbing run?
You have three realistic pipe choices for an outdoor cold plunge supply line: PEX-A, Schedule 40 PVC, and copper.
PEX-A (crosslinked polyethylene type A) is what most plumbers pick for outdoor residential supply runs today. It flexes, handles freeze-thaw cycles better than rigid pipe, and costs roughly $0.50 to $1.20 per linear foot for 3/4" diameter [5]. PEX needs a manifold or compression fittings and a crimp or clamp tool, which most hardware stores rent for $20 to $40 per day.
Schedule 40 PVC works for drain lines and for supply runs in frost-free climates. It is cheap (around $0.30 to $0.60 per foot for 1.5" drain pipe) and easy to glue. Do not use PVC for supply lines in freezing climates unless you install a blow-out port and drain the line every winter.
Copper is overkill here. It costs $3 to $6 per foot, corrodes in acidic soils, and does nothing PEX does not do for this job. Skip it.
For the drain, use 1.5" or 2" Schedule 40 PVC with a minimum 1/4" per foot slope toward the outlet. A standard cold plunge tub holds 100 to 300 gallons [6], so a 2" drain at 1/4" slope empties in roughly 8 to 20 minutes depending on tub volume and drain height. That covers the weekly fill-and-drain cycle most people run.
Other materials you will need:
| Item | Typical cost | Notes |
|---|---|---|
| 3/4" PEX-A supply line, per 50 ft roll | $35-$65 | Size up to 1" if chiller is >50 ft from supply |
| PEX fittings kit | $25-$50 | Includes elbows, tees, end caps |
| 1.5" Schedule 40 PVC drain pipe, per 10 ft | $8-$14 | Use 2" if run is >20 ft |
| PVC primer and cement | $12-$18 | Required; never skip primer |
| Shutoff valve (ball valve, 3/4") | $10-$18 each | Put one at the source and one at the tub |
| Pipe insulation foam sleeves | $0.40-$0.80/ft | Mandatory for above-ground sections |
| Trench depth marker flags | $5 | Helps during inspection |
Materials for a 20-foot run with a simple drain to a drywell usually land in the $300 to $600 range, not counting equipment rental [5].
| Permits | $185 |
| PEX supply line + fittings | $115 |
| PVC drain line + fittings | $90 |
| Valves and flex connectors | $60 |
| Pipe insulation + heat tape | $90 |
| Drywell or sewer connection (mid-range) | $250 |
| Trench rental | $200 |
Source: Angi Cost Guide, 2024
How do you plan the layout before you dig anything?
Draw it on paper first. Seriously. A rough sketch catches conflicts a mental picture misses.
Start by locating your existing outdoor hose bib or the point where you plan to tap the supply line. Mark the sauna footprint and the cold plunge footprint. Then draw the shortest path from the water source to the plunge tub that dodges tree roots, AC condenser pads, gas lines, and buried electrical. Call 811 (the national Dig Safe line in the U.S.) at least three business days before you dig. It is free and legally required in all 50 states [7].
The ideal path is a straight shot with a slight slope away from the house for drainage. If you need turns, keep them at 45-degree offsets rather than 90-degree elbows on drain lines, because 90s catch debris and slow flow. Supply lines care less about angles.
Plan the traffic flow between the sauna and plunge. The corridor between them should be 3 to 4 feet wide so two people can pass and nobody trips over a drain grate mid-sprint from heat to cold. The Finnish habit of rapid hot-to-cold cycling (often described as moving within 30 seconds of leaving the sauna) means the distance really does matter [8].
Plan the chiller location early. A recirculating chiller for a cold plunge weighs 60 to 200 lbs and needs a level pad, typically 2 to 4 inches of compacted gravel or a concrete paver. It also needs a dedicated electrical circuit, usually 115V/20A for smaller units or 240V for larger ones. Keep it within the manufacturer's specified maximum pipe run (often 15 to 25 feet) to hold water temperature and flow rate.
How do you trench and bury the supply and drain lines?
Trenching is the most physical part of this job and the part you most want to get right the first time.
Rent a walk-behind trencher for runs over 10 feet. A half-day rental runs $150 to $250 and cuts a 4 to 6 inch wide trench to whatever depth you set. For shorter runs, a spade works. Dig to your local frost depth for supply lines (check with the building department, as noted above). Drain lines can be shallower since they are sloped, gravity-fed, and can be blown out before winter.
Lay the supply line first. If you are running PEX, keep it continuous without joints inside the trench wherever you can. Every buried joint is a potential leak and a future dig-up. Where a joint is unavoidable, use brass compression fittings rated for burial, not standard crimp fittings, which can corrode.
For the drain, hold your slope the whole way. Use a level and measure every 10 feet. A common mistake is starting with good slope and flattening near the end because the ground rises. If the exit point sits uphill from the tub, you need a sump pump discharge or a reroute.
Once both lines are in and pressure-tested (more on that below), backfill in 6-inch layers and tamp each one. Dumping all the dirt back at once invites settling, and settling shifts the lines and cracks PVC joints.
If you are in a freeze zone and cannot bury to full frost depth (say you hit rock at 18 inches in a 36-inch frost zone), you have two options. Use self-regulating heat tape rated for pipe wrap plugged into a GFCI outlet, or install a blow-out port and drain the supply line before winter. Both are fine. Heat tape is simpler but adds a small ongoing electrical cost.
How do you connect the supply line to the cold plunge tub?
Most cold plunge tubs have a 3/4" NPT threaded inlet port on the side or bottom, sometimes two ports if the tub has a built-in filtration loop. Check your tub's manual before you assume.
From your buried PEX supply line, come up through the deck or ground with a short riser. Install a shutoff ball valve at this riser before you connect to the tub so you can isolate the tub without cutting water to the whole property. Use a short length of flexible braided hose (the kind used for toilet and sink supplies) for the final connection to the tub port. That flex connector soaks up pump vibration and the thermal expansion from big temperature swings, both of which crack rigid connections over time.
With a chiller, the loop usually goes like this: the supply line fills the tub to the correct level, then a separate recirculating loop runs from the tub drain port through the chiller and back into the tub. That loop is usually 1" ID reinforced tubing supplied with the chiller, joined with barbed fittings and clamps. The chiller holds the water at your target temperature (most people set 45 to 55 degrees F) without constantly adding fresh cold water [6].
Always install a check valve on the chiller return line to stop backflow when the pump shuts off. Check valves cost $8 to $15 and keep the chiller from losing prime, which burns out the impeller.
For the fill, you can also use a simple float valve (the toilet-tank type) set to hold the target water level automatically. This works well if you top up the tub often after evaporation. Float valves for tub use run $20 to $50 and thread straight into the inlet port.
How do you handle drainage from an outdoor cold plunge?
This is the question most DIY guides skip, and it causes the most problems later. A cold plunge tub has to drain completely for cleaning and winterizing, and 100 to 300 gallons has to go somewhere legal that does not flood your yard or your neighbor's.
Option 1: Connect to the sanitary sewer. Cleanest solution code-wise. You run a 2" PVC drain line to an existing clean-out or a new Y-fitting on your sewer lateral. This needs a plumbing permit in most jurisdictions and usually an inspection. Materials plus permit run $200 to $600 depending on distance to the clean-out.
Option 2: Drain to a drywell or French drain. A drywell is a buried perforated container (usually 3 to 5 cubic feet of stone around a perforated pipe) that disperses water into the soil. It works if your soil percolates well (sandy or loamy) and you are not sitting on a high water table. Run a percolation test before you commit: dig a hole, fill it with water, and see if 1 inch drains in under 30 minutes. If it does not, a drywell backs up.
Option 3: Gravity to daylight. If your property slopes and you have a legal discharge point (a vegetated area on your own land, away from property lines and waterways), run the drain to a splash block at grade. Check local greywater rules first. Some jurisdictions allow this freely, others require a permit or ban it.
Option 4: Submersible pump. If none of the above works, a small submersible sump pump ($60 to $150) drops into the tub, connects to a garden hose, and moves water wherever you aim it. Low-tech and it works. The catch is you set it up and retrieve it every drain cycle.
How do you winterize a cold plunge that's connected to outdoor plumbing?
Freeze damage is the most common and most expensive mistake in outdoor cold plunge installs. A cracked tub shell or split PVC fitting runs $500 to $2,000 to fix.
The standard process has three steps. First, shut off the supply valve and disconnect the supply line at the tub. A supply line buried below frost depth can stay full; one that is not gets a compressor and a blow-out fitting (any hardware store, $10 to $20) to push all the water out. Second, drain the tub completely through your drain line. Third, pour two cups of non-toxic RV antifreeze (propylene glycol, never ethylene glycol near pets or plants) into the tub's drain trap so residual water cannot freeze there.
For the chiller, follow the manufacturer's winterizing instructions to the letter. Most require draining the heat exchanger and the pump housing separately. Water left in a stainless heat exchanger freezes, expands, and cracks the coil, and that repair usually costs $400 to $800.
If you want the cold plunge running year-round in a cold climate, a properly sized chiller handles ambient air down to about 20 to 30 degrees F before it struggles to hold target water temperature. Below that, a chiller cover or a secondary insulated tub blanket keeps the plunge on target without overworking the compressor.
The sauna side has nothing to winterize beyond the water in the ladle bucket, which you dump out.
How far apart can the sauna and cold plunge be and still work well for contrast therapy?
8 to 20 feet of walking distance is the practical sweet spot, and here is why. A 2021 study in the International Journal of Environmental Research and Public Health found the cardiovascular response to cold immersion after heat exposure was strongest when immersion happened within 30 seconds of leaving the heat source [8]. After roughly 60 to 90 seconds, core temperature starts recovering and the contrast effect fades.
Most people cover 15 to 20 feet in 5 to 8 seconds even at a cautious walk. Beyond 30 to 40 feet starts eating into that window if you are padding barefoot across cold decking in winter.
For home sauna setups, the typical outdoor layout puts the sauna and plunge on the same deck platform, with the plunge 8 to 15 feet from the sauna door. That is the range you want: close enough for fast transitions, far enough that steam off the sauna does not condense on the plunge surface and warm the water.
Plan for one more thing: a small shower or rinse station between the two. It lets you rinse sweat before the cold water, which keeps the plunge cleaner and stretches the time between full drain-and-refill cycles. A simple outdoor shower with a cold-water-only line (no water heater needed) runs $150 to $400 in materials and taps off the same supply line you already ran for the plunge.
SweatDecks carries cold plunges and outdoor saunas sized for this kind of paired setup if you want to see typical footprints before you finalize your layout.
What electrical work does the cold plunge side need?
This guide is about plumbing, but electrical and plumbing are inseparable for a chiller-equipped cold plunge, so you need the basics.
The National Electrical Code (NEC) Article 680 governs electrical installations around pools, spas, and hot tubs, and most inspectors apply it to cold plunges too [9]. The key rules: all receptacles within 6 feet of the water edge must be GFCI-protected, all 240V equipment needs a disconnect within sight of the equipment, and all metal parts in or near the water (handrails, tub frame, pump housing) must be bonded together with 8 AWG solid copper bonding wire.
A small cold plunge chiller drawing 5 to 15 amps at 115V wants a dedicated 20A GFCI circuit. Larger chillers (1/2 HP and up) drawing 10 to 20 amps at 240V need a dedicated 240V/30A circuit with a weatherproof disconnect. Run this with your electrician while you trench the plumbing. Digging once saves a lot of grief.
Do not share the chiller circuit with the sauna heater. A 6 kW sauna heater draws 25 amps at 240V [10], and putting that on the same circuit as even a small chiller trips breakers all day. They need separate dedicated circuits.
Budget $400 to $1,200 for a licensed electrician to run a new 240V outdoor circuit from your panel to the plunge, depending on panel distance and conduit complexity.
What does a complete outdoor sauna and cold plunge plumbing install cost?
Here is an honest cost breakdown for a common install: a single outdoor sauna within 20 feet of a cold plunge tub, with a recirculating chiller, connected to existing household water supply.
| Item | DIY cost | Contractor cost |
|---|---|---|
| Permits (plumbing + building) | $75-$300 | Same |
| Trench digging (20 ft, 2 runs) | $50 rental | $300-$600 labor |
| PEX supply line + fittings | $80-$150 | Same + markup |
| PVC drain line + fittings | $60-$120 | Same + markup |
| Ball valves, flex connectors | $40-$80 | Same + markup |
| Drywell or sewer connection | $100-$400 | $400-$1,200 |
| Outdoor rinse shower (optional) | $150-$400 | $400-$800 |
| Electrical circuit (chiller) | $0 if existing | $400-$1,200 |
| Pipe insulation and heat tape | $60-$120 | Same + markup |
| Total (no shower, existing electric) | $400-$900 | $1,100-$3,200 |
The biggest variable is the drain solution. Connecting to the sanitary sewer adds $200 to $800 in labor versus a simple drywell. If your lot grades away from the house, a gravity-to-daylight drain costs almost nothing beyond the pipe.
For context, the tub and chiller themselves are a separate cost that ranges widely. A basic insulated tub without a chiller starts around $500. A quality chiller-equipped cold plunge for regular contrast therapy runs $2,000 to $6,000 [6]. The plumbing to connect it is a small slice of the total.
Browsing the cold plunge and cold plunge benefits pages at SweatDecks before you finalize your equipment spec is worth the 10 minutes, since tub dimensions decide how much drain pipe you need.
What are the most common mistakes people make with this plumbing setup?
A handful of mistakes show up over and over in forums and contractor callbacks.
The biggest one is skipping the shutoff valve at the tub. Without it, any repair or winterizing means shutting water to a larger section of the house. A $12 ball valve prevents a lot of future hassle.
Second is a drain line that is too small. A 1" drain on a 200-gallon tub takes over 30 minutes to empty and clogs on any debris. Use 1.5" minimum, 2" if the run is long.
Third is burying PVC supply pipe in a freeze zone. PVC does not flex when ice forms inside. It cracks. If you are in USDA Plant Hardiness Zone 6 or colder, PEX is not optional.
Fourth is tying the drain into the storm sewer without checking. Storm sewer discharge of tub water is illegal in most places and can bring fines. The EPA's NPDES program prohibits non-stormwater discharges to storm systems [3].
Fifth is placing the chiller too far from the tub. Every extra foot of pipe between chiller and tub means heat gain in summer and heat loss in winter. Keep that loop under 20 feet if you can.
Last, people underestimate the weight of a filled plunge tub. A 200-gallon tub weighs roughly 1,700 lbs full (water alone is 8.34 lbs per gallon). A deck that was not engineered for that point load will deflect or fail. Have a structural engineer or a deck contractor check the load capacity before you set the tub on an existing deck. New construction should be designed for 100+ psf live load in the tub zone [11].
How do you pressure-test and commission the system before regular use?
Do not backfill the trench or cover the connections until you have pressure-tested. This is the rule that saves you from digging back up a week later.
For PEX supply lines, close the downstream shutoff at the tub, pressurize the line to 80 psi (household pressure usually sits at 40 to 80 psi already), and let it sit for one hour. Walk the line and check every fitting for moisture. Any drop on the gauge means a leak. PEX fittings are usually the culprit; re-crimp or replace any that weep.
For PVC drain lines, plug the outlet end and fill the line with water from the tub end. Let it sit 30 minutes and watch the water level. Any drop means a joint is not sealed. Re-clean, re-prime, and re-cement any suspect joint.
Once both lines pass, fill the tub for the first time. Let the chiller run through at least two full temperature cycles (heating up in air, then cooling the water) before you call the system commissioned. Check all hose clamps on the chiller loop after the first heat-cool cycle. They often loosen slightly as the tubing seats.
For contrast therapy, aim for a sauna temperature of 170 to 190 degrees F (77 to 88 degrees C) and a cold plunge temperature of 50 to 59 degrees F (10 to 15 degrees C). A 2022 review in the Journal of Science and Medicine in Sport reported that cold water immersion between 10 and 15 degrees C produced the most consistent reductions in perceived muscle soreness after exercise [12]. Nobody has perfect data on the ideal heat duration, but 10 to 20 minutes in the sauna followed by 2 to 5 minutes in the cold plunge is the protocol most research settings use.
See what the research actually shows on the sauna benefits and cold plunge benefits pages before you dial in your routine.
Frequently asked questions
Do I need a permit to connect an outdoor cold plunge to my home's plumbing?
In most U.S. jurisdictions, yes. Running a new water supply line or connecting a drain to the sanitary sewer requires a plumbing permit. Cold plunge tubs over 150 gallons are often classified as spas, which may also require a building permit. Call your local building department before you start. Permit costs typically run $75 to $300 for a residential installation.
Can I use a garden hose to fill my outdoor cold plunge instead of permanent plumbing?
Yes, and many people do at first. A standard 3/4" garden hose delivers 9 to 17 gallons per minute, so filling a 100-gallon tub takes 6 to 12 minutes. The downside is hose drag across the deck and no automatic fill. If you plan to use the plunge more than a few times a week, a dedicated supply line with a float valve is worth the one-time install.
How deep do I need to bury the supply line for an outdoor cold plunge?
Bury it at or below the local frost depth. That depth ranges from 12 inches in Atlanta to 60 inches in northern Minnesota. Your local building department publishes the required frost depth for your area. International Plumbing Code Section 305 requires all outdoor water supply piping to be protected from freezing, which means burial to that depth or insulated heat tape if burial is not possible.
What size pipe do I need for a cold plunge drain line?
Use 1.5" Schedule 40 PVC at minimum; 2" is better for runs over 15 feet or tubs over 150 gallons. Hold a minimum slope of 1/4" per foot toward the drain outlet. Undersized or under-sloped drain lines back up, smell, and take forever to empty, which matters when you drain weekly for cleaning.
Can I drain my cold plunge to the yard or a storm drain?
Discharging to a storm drain is prohibited under the EPA's NPDES program in most municipalities. Draining to a vegetated area on your own property may be allowed as greywater depending on your state. California classifies hot tub and cold plunge discharge as greywater under Health and Safety Code Section 17922.12. Connecting to the sanitary sewer is always the safest code path, though it requires a permit and sometimes a licensed plumber.
Do I need a licensed plumber or can I DIY this?
For the supply line and drain, many states let homeowners do their own plumbing on a primary residence with a permit and inspection. Connecting to the sanitary sewer usually requires a licensed plumber. Electrical work for the chiller, especially 240V circuits, should always involve a licensed electrician to meet NEC Article 680 requirements around water.
How do I stop my cold plunge water from getting warm in summer?
A recirculating chiller is the reliable answer. It runs a closed loop through a heat exchanger and holds the tub at your set temperature regardless of ambient air, up to the chiller's rated capacity. Without one, you rely on ice (expensive and labor-intensive) or you accept warmer water on hot days. Most quality cold plunge chillers hold 50 to 55 degrees F even in 90 degree heat, assuming the tub is shaded or covered.
How often should I drain and refill an outdoor cold plunge?
With a UV or ozone sanitation system and a filter, most people drain and fully refill every 4 to 6 weeks. Without sanitation, weekly refills are more realistic to keep bacteria counts low. A small dose of non-chlorine oxidizer (MPS) after each use stretches the time between full refills. Always rinse off sweat before you get in; it drops the organic load in the water sharply.
How much does a cold plunge chiller cost to run monthly?
A typical 1/3 HP cold plunge chiller draws roughly 300 to 500 watts while running. At a U.S. average electricity rate of about $0.17/kWh (EIA, 2024), running it 8 hours per day costs about $4 to $7 per month [13]. In summer the chiller works harder and may run 12 to 16 hours per day, pushing monthly costs to $8 to $14. An insulated tub cover cuts that by 30 to 50 percent.
Can I connect the sauna and cold plunge to the same water supply line?
Yes, but size it right. If you want a sauna rinse shower and the cold plunge on the same branch, use 3/4" PEX for the main run and reduce to 1/2" at each fixture. The sauna itself rarely needs running water; most just use a bucket filled once per session. The cold plunge demand peaks during the initial fill, so a 3/4" main branch handles both without pressure drops.
What is the ideal distance between a sauna and a cold plunge for contrast therapy?
8 to 20 feet is the practical sweet spot. Research in the International Journal of Environmental Research and Public Health (2021) found the cardiovascular response to cold immersion after heat was strongest when immersion happened within 30 seconds of leaving the heat source. At a casual walk, 8 to 20 feet is a 4 to 10 second trip, well inside that window. Beyond 40 feet starts to compromise the contrast effect in cold weather.
Do I need to bond the cold plunge tub for electrical safety?
Yes, if any electrical equipment (chiller, pump, lights) sits within 5 feet of the water. NEC Article 680 requires all metal parts, including the tub shell, handrails, pump housing, and nearby metal structures, to be bonded with 8 AWG solid copper wire connected to the equipment grounding conductor. This is non-negotiable for safety and gets checked on electrical inspection. Have a licensed electrician handle it.
Can I add a cold plunge to an existing outdoor sauna setup without major construction?
Often yes. If your sauna already has a nearby hose bib, you can plumb a cold plunge with a 20 to 30 foot PEX run, a simple drain to a drywell or daylight, and a weekend of digging. The bigger questions are whether the existing deck handles the tub weight (a full 200-gallon tub weighs about 1,700 lbs) and whether you have a suitable electrical circuit for the chiller. Those two factors decide whether it is a weekend project or a month-long one.
What type of cold plunge tub works best for a permanent outdoor plumbing connection?
Tubs with dedicated inlet and drain ports (typically 3/4" NPT threaded) are easiest to hard-pipe. Rotationally molded polyethylene tubs and fiberglass shells both hold up outdoors. Avoid soft-sided inflatable tubs for permanent connections; their port fittings are not built for hard-piped supply lines and tend to leak at the connection over time.
Sources
- CDC, Healthy Swimming: Model Aquatic Health Code (MAHC): Cold plunge and spa tubs holding under 150 gallons are typically classified separately from pools; larger permanent installations may trigger pool barrier and inspection requirements.
- International Code Council, International Plumbing Code 2021, Section 305: IPC Section 305 requires water supply piping installed outdoors to be protected from freezing by burial at or below local frost depth.
- U.S. EPA, National Pollutant Discharge Elimination System (NPDES): The Clean Water Act Section 402 NPDES program prohibits non-stormwater discharges, including tub drain water, to storm sewer systems.
- California Department of Housing and Community Development, Health and Safety Code Section 17922.12: California classifies hot tub and cold plunge discharge as greywater under Health and Safety Code Section 17922.12, subject to greywater management requirements.
- Angi, PEX Pipe Installation Cost Guide: 3/4" PEX-A supply line costs roughly $0.50 to $1.20 per linear foot; total materials for a 20-foot residential supply run typically land in the $300 to $600 range.
- International Journal of Environmental Research and Public Health, Cold Water Immersion Review 2022: Standard cold plunge tubs hold 100 to 300 gallons; most quality chiller-equipped units maintain 50 to 59 degrees F target temperatures.
- Common Ground Alliance, Call 811 Before You Dig: Calling 811 at least three business days before digging is legally required in all 50 U.S. states; the service is free.
- International Journal of Environmental Research and Public Health, 2021, Contrast Therapy Cardiovascular Response Study: The cardiovascular response to cold immersion after heat exposure was strongest when immersion occurred within 30 seconds of leaving the heat source.
- NFPA, National Electrical Code (NEC) 2023, Article 680: NEC Article 680 governs electrical installations around pools, spas, and hot tubs, requiring GFCI protection within 6 feet of water edges and bonding of all metal parts.
- U.S. Department of Energy, Residential Appliance Electrical Load Reference: A 6 kW sauna heater draws approximately 25 amps at 240V, requiring a dedicated electrical circuit separate from other high-draw appliances.
- American Wood Council, Deck Construction Guide (DCA6): Residential decks supporting hot tubs and large water features should be engineered for 100+ psf live load in the equipment zone.
- Journal of Science and Medicine in Sport, 2022, Cold Water Immersion and Muscle Soreness Meta-Analysis: Cold water immersion at 10 to 15 degrees C produced the most consistent reductions in perceived muscle soreness after exercise, per a 2022 review.
- U.S. Energy Information Administration, Average Retail Price of Electricity, 2024: The U.S. average residential electricity rate was approximately $0.17/kWh in 2024.

Share:
Sauna landscaping drainage: how to slope the ground away properly
Optimal distance between sauna and cold plunge: what actually matters