
Last updated 2026-07-09
TL;DR
Building a barrel sauna takes a weekend to a few weeks, depending on your skill and whether you buy a kit or go fully custom. Budget $1,500 to $3,500 for a scratch build and $2,000 to $5,000 for kit assembly, including the heater. Cedar or kiln-dried pine staves, steel hoops, a properly sized heater, and basic carpentry skills cover the core requirements.
What is a barrel sauna and why build one yourself?
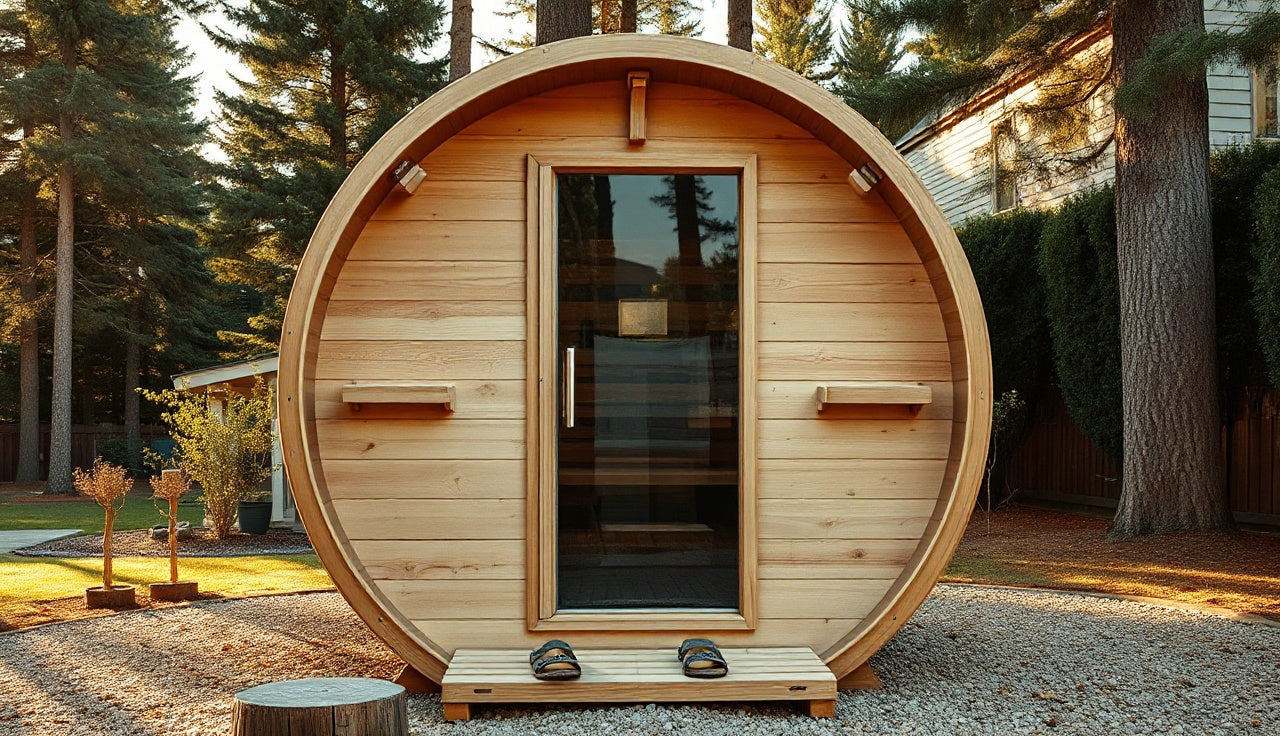
A barrel sauna is exactly what it sounds like: a cylindrical sauna made from curved wood staves held together by steel tension bands, the same principle as a wooden wine barrel. The round shape does more than look good. It cuts interior dead air volume compared to a rectangular box of the same floor area, so the heater warms the space faster and burns less energy holding temperature.
For a homeowner with moderate carpentry skills, a barrel sauna is one of the more satisfying DIY projects in the home sauna category. You get a working, good-looking outdoor structure for much less than the $8,000 to $20,000 a contractor charges for a comparable installation. Buy a prefabricated kit and assemble it yourself and you land comfortably in the $2,000 to $5,000 range for a two-to-four person unit.
The other reason people build their own is control. You pick the length, the door placement, the bench layout, and the heater size. A kit gives you a starting point. A scratch build gives you everything.
Before you swing a mallet, read up on outdoor sauna setups in general. It helps you think through siting, drainage, and electrical access before you lock in a location.
What wood species should you use for a barrel sauna?
Wood choice matters a lot. Sauna staves spend their entire life cycling between high heat (160°F to 200°F), humidity, and outdoor weather. That repeated thermal and moisture stress splits and warps species that aren't stable enough.
Western red cedar is the standard everyone measures against. It carries a high natural oil content that shrugs off moisture, stays dimensionally stable, and smells genuinely good when heated. Clear, knot-free cedar costs more, but knots crack under thermal cycling and turn into weak points in your stave wall. Expect $3 to $6 per linear foot for quality cedar 2x4 or 2x6 stock, depending on region and supplier.
Nordic spruce and Scots pine are the traditional Scandinavian choices. They're denser than cedar, so they hold heat well, but their higher resin content can bleed sap at high temperatures if the wood isn't properly kiln-dried. Look for kiln-dried (KD) lumber marked at 19% moisture content or below [10].
Thermally modified wood is worth serious thought if the budget allows. The treatment process, typically 350°F to 430°F for several hours, drives out resins and lowers the wood's equilibrium moisture content, which makes it more dimensionally stable than standard kiln-dried stock [1]. It runs roughly 30 to 50 percent more than untreated cedar and resists warping better across a decade of outdoor use.
Skip pressure-treated lumber entirely. The preservatives, mainly copper-based compounds like copper azole (CA) or alkaline copper quaternary (ACQ), aren't rated for high-heat sauna environments and can release compounds you don't want to breathe during a session [2].
| Wood Species | Cost (per linear ft) | Moisture Stability | Heat Performance | Notes |
|---|---|---|---|---|
| Western red cedar | $3, $6 | Excellent | Good | Most popular, pleasant aroma |
| Nordic spruce (KD) | $2, $4 | Good | Very good | Traditional choice, watch resin |
| Scots pine (KD) | $2, $4 | Good | Very good | Dense, durable, Scandinavian standard |
| Thermally modified | $5, $9 | Excellent | Excellent | Best longevity, highest cost |
| Pressure-treated | Avoid | N/A | N/A | Off-gases toxins at sauna temps |
How much does it cost to build a barrel sauna?
Cost comes down to three things: size (length and diameter), wood species, and heater type. Here's an honest breakdown for a mid-size barrel, roughly 7 feet long by 6 feet in diameter, which seats three to four people comfortably.
Lumber for the staves, floor, and benches runs $600 to $1,400 depending on species and whether you mill your own curves or buy pre-profiled staves. Pre-profiled staves cost more per board foot but take the hardest part of the build off your plate.
Steel tension bands (hoops) are the structural backbone. A 7-foot barrel typically uses five to six hoops. You can buy laser-cut flat bar stock and bend it yourself or buy pre-formed barrel hoops from sauna kit suppliers. Budget $150 to $350 for hardware: bands, threaded rod, nuts, and lag bolts.
The heater is where the real cost swing lives. A basic electric sauna heater sized for the right volume, typically 4 to 6 kW for a small barrel, costs $300 to $700. A wood-burning sauna stove from a quality manufacturer runs $500 to $1,500. Go electric and you also need a dedicated 240V circuit, which an electrician installs for $200 to $600 depending on how far the panel sits from your build site [9].
Door, glass, and hardware add another $200 to $500. A pre-hung cedar sauna door with tempered glass is the easiest route.
Roofing the open ends (a changing room canopy or rain cover) adds $100 to $300 in material.
Realistic DIY range: $1,500 to $3,500 for a competent scratch build. Kit assembly (buying a pre-cut kit and putting it together) lands at $2,000 to $5,000 including the heater. Hiring a contractor to build from a kit adds $1,500 to $3,000 in labor.
The most common budget mistake is underestimating the electrical run. If your panel sits 100 feet from the build site, trenching and wiring a 240V line can cost $800 to $1,500. Get that quote before you commit to a location.
| Cedar lumber (staves, benches, end caps) | $1,000 |
| Steel hoops and hardware | $250 |
| Electric sauna heater (4–6 kW) | $500 |
| 240V electrical circuit installation | $400 |
| Sauna door with tempered glass | $350 |
| Foundation materials (gravel, runners) | $200 |
| Exterior sealer and finishing | $100 |
Source: Industry supplier pricing ranges, 2024–2025
What tools and materials do you need before you start?
This isn't a project you can pull off with a basic homeowner toolkit. You need a few specific tools, and they're worth renting or buying outright if you plan any future woodworking.
Essential tools:
- A table saw or router table to cut the longitudinal bevel on each stave (the slight angle that lets flat boards form a circle when assembled)
- A band saw or jigsaw for cutting end-cap curves
- A mallet and strap clamps for pulling staves tight during assembly
- A drill with a 1/2-inch bit for hooping hardware
- A level and chalk line
- A concrete or paving base (more on that below)
The stave bevel angle is the trickiest calculation in the whole build. For a 6-foot (72-inch) diameter barrel, the circumference is about 226 inches. Use 2.5-inch-wide staves and you need roughly 90 staves. Each stave needs a bevel of 2 degrees on each long edge so the faces meet flush when assembled in a circle. The formula: bevel angle = 180 / number of staves. For 90 staves that's exactly 2 degrees. Get it wrong by even half a degree and gaps open up or the circle won't close. Do a test assembly with ten staves before you commit to cutting all of them. It saves a lot of grief.
Materials checklist:
- Kiln-dried stave lumber (calculate stave count from your target diameter and length)
- End-cap boards (typically thicker stock, 1.5 to 2 inches)
- Flat steel bar stock (1/4-inch by 2-inch is common) for hoops, or pre-formed hoops
- Threaded rod, nuts, and washers for hoop tensioning
- Lag bolts and wood screws (stainless steel, exterior grade)
- Sauna-grade silicone for end-cap seating
- Pea gravel or concrete for the foundation pad
- Sauna heater and appropriate stone load
- Sauna door with tempered glass
- Vapor-permeable roofing felt and cedar shingles or metal roofing if you plan a rain canopy
- Interior bench lumber (typically 1.5-inch thick cedar slats, smooth-sanded)
How do you prepare the foundation for a barrel sauna?
The foundation is where most DIY barrel saunas fail over time. The structure is heavy, around 1,500 to 2,500 pounds fully assembled, and it has to sit level and drain freely. Wood sitting in pooled water rots even if it's cedar.
Three practical options:
1. Compacted gravel pad. Dig out 4 to 6 inches of topsoil, fill with compacted pea gravel or crushed stone, and lay two pressure-treated 4x6 or 6x6 runners across the gravel perpendicular to the barrel's axis. The cradle supports sit on these runners. Gravel drains freely and needs zero concrete work. This is the right call for most backyards.
2. Concrete piers or pad. Pour a 4-inch reinforced concrete pad or set four concrete piers at the corner points of your cradle footprint. More permanent and more level over time, but more work and more planning. In a frost zone (most of the northern US and Canada), concrete piers have to go below the frost line to stop heaving, and that depth varies by location. Your local building department can give you the frost depth for your address.
3. Existing patio or deck. Got a solid concrete patio or a properly built deck? Set the barrel on rubber isolation pads directly on that surface. Check your deck's load capacity first. A 2,000-pound point load on a residential deck needs engineering input.
Whatever foundation you pick, the ground under and around the barrel needs positive drainage, meaning water flows away from the structure in every direction. A 1 to 2 percent slope away from the barrel is standard.
Step-by-step: how do you actually build a barrel sauna?
Here's the build sequence that makes the most sense for a scratch-built barrel. If you're using a pre-cut kit, your manufacturer's instructions will follow a similar but simpler path.
Step 1: Calculate and cut your staves. Set your target inner diameter (48 to 72 inches is typical). Calculate the stave count from your chosen stave width. Set the table saw blade to the correct bevel angle and rip every stave. Cut them all to the same length (your target barrel length, typically 6 to 8 feet). Sand the faces smooth. Barrel interiors sit against bare skin.
Step 2: Cut the end caps. End caps are round boards that close each end of the barrel. They're usually tongue-and-groove planks glued into a panel, then cut to a circle with a router jig or a compass-guided jigsaw. Each end cap needs a small relief groove around its perimeter so the staves seat against it. One end cap takes the door cutout, the other takes a vent or flue cutout.
Step 3: Build the cradle supports. Two curved wooden cradles hold the barrel off the ground, one near each end. Each cradle is typically a half-circle of 3/4-inch plywood or solid lumber cut to match the barrel's outer radius. These sit on your foundation runners.
Step 4: Assemble the staves. Stand the two end caps up with temporary bracing. Lay staves between them, working from the bottom up. Use strap clamps to pull staves tight as you go. This is a two-person job. Friction between dry staves holds the assembly while you work, but not well enough to stop slippage, so the clamps matter.
Step 5: Apply the hoops. Bend your flat bar steel into circles slightly smaller than your target outer circumference. Connect the ends with threaded rod through drilled holes. Slip the hoops over the stave assembly from one end and space them evenly. A 7-foot barrel typically takes five hoops: one about 6 inches from each end and three equally spaced between. Tighten the threaded rod nuts gradually, hoop by hoop, like torquing lug nuts on a wheel, so the tension spreads evenly.
Step 6: Install the door and vent. Cut the door rough opening with a jigsaw through the assembled staves on the outward-facing end cap. A pre-hung sauna door set in cedar jamb material beats building your own by a mile. Drill or cut the vent opening on the opposite end cap or at floor level near the heater.
Step 7: Build and install the interior benches. Barrel sauna benches follow the curve of the interior. The simplest approach: two parallel bench rails fixed to the end caps at the right height (upper bench about 18 inches below the ceiling peak, lower bench about 18 inches below that). Slats of 1.5-inch cedar run across the rails. Leave a 3/8-inch gap between slats for drainage and airflow. Sand everything to 120 grit minimum. Splinters in a sauna are unacceptable.
Step 8: Install the heater. For electric heaters, follow the manufacturer's clearance requirements to the letter. Most call for at least 4 to 6 inches between the heater body and any combustible surface, but read your model's manual because it varies [3]. For wood-burning stoves, the flue pipe runs through the end cap or roof of the barrel. Use double-wall insulated flue pipe wherever it passes through wood.
Step 9: Wire the electrical (if electric heater). This step needs a licensed electrician in most US jurisdictions. The National Electrical Code (NEC) Article 424 covers fixed electric space heating. Sauna heaters are typically treated as fixed electric heating equipment and require a dedicated circuit, proper breaker sizing, and GFCI protection in wet locations [4]. Don't skip the permit. A sauna fire from bad wiring is a homeowners insurance nightmare.
Step 10: Weatherproof the exterior. Apply an exterior wood oil or UV-resistant penetrating sealer to the outside of the barrel. Never finish the interior. Interior sauna surfaces need to breathe, and most finishes off-gas at sauna temperatures. Reapply the exterior sealer once a year.
What size should a barrel sauna be?
Barrel saunas get measured two ways: interior diameter and length. The common configurations run 4 to 7 feet in interior diameter and 6 to 8 feet in length.
For one or two people, a 4-foot diameter by 6-foot barrel is enough and it heats up fast. For three to four people who want to actually lie down, a 6-foot diameter by 7-foot barrel is the sweet spot. Go past 8 feet and it starts to feel like a tunnel and demands a bigger heater.
Heater sizing tracks cubic volume. The rough rule from most heater manufacturers is 1 kilowatt of heater power per 50 cubic feet of sauna space, though the exact numbers vary by manufacturer and insulation quality [3]. A 6-foot diameter by 7-foot barrel holds roughly 140 to 160 cubic feet inside (the curved ceiling trims usable volume), so a 4 to 6 kW heater fits.
Building a barrel big enough for a changing room anteroom at one end is a nice touch in cold climates. Add that space to your length calculation. Anterooms typically take 3 to 4 feet of the barrel's total length, partitioned off with a dividing wall.
Do you need a permit to build a barrel sauna?
Almost certainly yes, at least for the electrical work, and possibly for the structure itself. Exact requirements depend on your local jurisdiction, but the general framework holds across most of the US.
For the electrical portion, a permit is required under most state adoptions of the National Electrical Code. The work must be inspected and the heater must be listed (UL-listed or equivalent) for sauna use [4].
For the structure itself, many jurisdictions treat an outdoor sauna as an accessory structure. Rules usually hinge on finished footprint. Structures under 120 to 200 square feet often qualify for a simplified or exempted permit process in residential zones, but that threshold varies by municipality [11]. A 6-foot by 7-foot barrel has a footprint of roughly 42 square feet, which often falls under the exemption threshold, but confirm with your local building department before you start digging.
HOA restrictions are a separate matter. If you live in a community with an HOA, review your CC&Rs before you settle on a location and design.
The CPSC has published general guidance on sauna safety hazards, including temperature limits and ventilation, that shapes many local codes [5]. Knowing it helps you make the case to an inspector that your build is safe and code-conscious.
How do you ventilate a barrel sauna properly?
Ventilation isn't optional. A sauna with no fresh air exchange is uncomfortable at best and dangerous during long sessions. The goal is controlled fresh air intake low and near the heater (the hot side) and an exhaust vent high on the opposite end cap.
The standard barrel layout: a 4-inch round vent or adjustable louver set just above floor level behind or beside the heater, and another vent at or near the ceiling on the opposite end. That creates a convective loop. Fresh cool air heats the moment it enters, rises to the ceiling, and stale warm air exits the high vent.
Adjustable vents beat fixed ones because you control the exchange rate. In a well-built barrel, even a small vent opening produces noticeable air movement.
For wood-burning stoves, the flue handles exhaust. But the combustion air intake for the firebox should still pull from outside the sauna envelope if possible, drawing air from under the floor or through a dedicated exterior duct. That keeps the fire from competing with the occupants for oxygen.
The Finnish Sauna Society, whose standards much of the sauna industry defers to, recommends a minimum of 6 to 8 air changes per hour in a sauna at normal operating temperature [6]. In a small barrel at 180°F, even a 3-inch floor vent left 50% open usually hits that.
How long does it take to build a barrel sauna?
For an experienced carpenter building from scratch with all materials on hand: two to three full weekends, roughly 40 to 60 hours of actual work.
First-time builder going the scratch route? Add 30 to 50 percent. The stave beveling and initial assembly go slowly the first time. Budget three to four weekends and don't schedule your first sauna session for the weekend you plan to finish.
Pre-cut kit assembly cuts the time roughly in half. Most kit manufacturers advertise one to two days for assembly, and while that's optimistic for a homeowner working alone, a two-person team can realistically get a kit assembled in one solid weekend day plus a few hours the next morning for the heater and finishing.
The electrical rough-in and inspection is usually the longest wait, not the work itself. Scheduling an electrician and then waiting for an inspection slot can add one to three weeks. Plan for it.
Drying time counts too. After the exterior sealer goes on, give it 24 to 48 hours before the first heating cycle. On the first few uses, heat the sauna to a moderate 150°F and let it cool before running it at full temperature. This lets the wood stabilize and the staves fully seat.
How do you maintain a barrel sauna after it's built?
Barrel saunas are low-maintenance if you build them right. The ongoing work is minimal.
Exterior wood treatment: once a year, apply a fresh coat of penetrating oil or UV-resistant exterior sealer. Oil-based products soak in and don't peel. Skip film-forming finishes like paint or polyurethane on the exterior.
Hoop tension: check the hoop nuts after the first full season of use. Wood shrinks and swells with seasonal moisture, and the hoops can loosen slightly. A quarter-turn on each nut usually does it.
Interior cleaning: wipe down benches with a dilute solution of baking soda and water now and then. No soap inside the sauna. The wood absorbs moisture, and soap residue changes the scent and can affect the wood's long-term behavior. Sand the bench surfaces lightly (220 grit) every two to three years if they start to feel rough or discolored.
Heater stones: replace sauna rocks every two to three years, or sooner if they start to crumble. Broken rocks cut heat output and can interfere with the heating elements. Use only stones rated for sauna use. Granite, peridotite, and olivine are common safe choices [3].
The exterior wood darkens and grays over time. That's expected and doesn't mean rot if your drainage is good. See actual soft spots or discoloration that reads like moisture damage? Probe with an awl. Healthy wood feels firm. Rot lets the awl push in easily.
To pair your sauna sessions with cold exposure, a cold plunge or ice bath next to the barrel is the natural next move. Contrast therapy, alternating heat and cold, has reasonable support in the recovery literature, though the best protocol specifics are still under study [7].
Is a barrel sauna kit or a scratch build the better choice?
Honest answer: a pre-cut kit is better for most people, and a scratch build is better for experienced woodworkers who want full control.
The stave beveling is the hardest part of a scratch build. It takes a table saw set up precisely and a real grasp of compound angles. One mistake in the bevel setup means wasted lumber and time. Kit manufacturers have already solved this with CNC-precision pre-cut staves.
Scratch builds win when you want a non-standard size, a specific wood species the kit market doesn't offer, or a much lower total cost because you have access to cheap lumber through a mill or timber connection.
If you go the kit route, compare what's actually included. Some kits include everything down to the door and hardware. Others include only the staves and hoops and leave the heater, door, and foundation to you. Read the materials list, not the marketing copy.
SweatDecks carries a range of barrel sauna options for people who want a proven kit with quality components already chosen. Buy from us or another supplier, the assembly process in this guide still applies.
On the fence about barrel versus other formats? Reading through portable sauna and outdoor sauna comparisons can help you figure out what fits your yard, budget, and lifestyle.
The sauna benefits article is also worth reading before you commit real money to any sauna format. It calibrates your expectations against what the research actually says, which is encouraging but more limited than the wellness marketing suggests.
Frequently asked questions
Can I build a barrel sauna without power tools?
Not practically. The stave bevel cuts need a table saw or router table to hit the precision required for a tight fit. You might outsource the milling to a local lumber yard if you provide dimensions, but hand-cutting 80 to 100 staves to a precise 2-degree bevel isn't realistic. Everything else in the build, assembly, hooping, and bench installation, can be done with basic hand tools.
How hot does a barrel sauna get and how long does it take to heat up?
A properly built barrel sauna with a correctly sized heater reaches 150°F to 195°F in 30 to 45 minutes. The cylindrical shape and lower interior volume compared to a rectangular box of similar footprint mean faster heat-up times. Wood-burning stoves take slightly longer to stabilize than electric heaters. First heating cycles on a new build run longer as the wood itself absorbs heat.
What is the best diameter for a barrel sauna?
For most people, 6 feet (72 inches) of interior diameter is right. It lets two adults sit comfortably side by side on the upper bench, and a person of average height can lie down on the lower bench without bending their knees. The 4-foot diameter barrels are fine solo but feel tight with two. Go 6 feet if you have the yard space.
How many staves do I need for a barrel sauna?
It depends on your target diameter and your chosen stave width. For a 6-foot interior diameter barrel using 2.5-inch-wide staves, you need approximately 90 staves per foot of barrel length. A 7-foot barrel requires about 630 stave lengths plus extras for waste. Calculate with the formula: number of staves = circumference divided by stave width, where circumference = pi times diameter.
Can I use a wood-burning stove in a barrel sauna?
Yes, and many barrel sauna purists prefer it. A wood-burning stove gives a different quality of heat and doesn't depend on electrical infrastructure. The trade-off is that you need a proper insulated double-wall flue pipe through the end cap or a purpose-built roof penetration, plus a permit and inspection in most jurisdictions. Wood stoves also need a supply of dry, split firewood.
Does a barrel sauna need a concrete foundation?
No. A compacted gravel pad with two pressure-treated 4x6 runners is the most common and practical foundation for a barrel sauna. Concrete piers or a pad work well but take more effort. The requirements are level, stable support and free drainage away from the structure. Don't set the barrel directly on soil or on any surface that traps moisture under the wood.
How do I waterproof the outside of a barrel sauna?
Use a penetrating oil or UV-resistant exterior wood sealer, not a film-forming finish like paint or spar varnish. Oil soaks into the wood, doesn't peel, and reapplies easily every year. Teak oil, linseed oil, or products marketed as outdoor sauna sealers all work. Apply per the manufacturer's directions after the wood is clean and dry, then reapply once a year.
How long will a barrel sauna last?
A well-built cedar barrel sauna with proper foundation drainage, annual exterior sealing, and hoop maintenance lasts 20 to 30 years. Thermally modified wood can push that further. The main failure modes are rot from pooled water under the barrel and hoop corrosion from rust. Stainless steel or galvanized hoops and good drainage handle both. The interior usually outlasts the exterior because it stays dry during sessions.
Do I need a special door for a barrel sauna?
Yes. Sauna doors need tempered glass or a solid wood panel that handles heat cycling, a low threshold to hold heat, and hardware that doesn't conduct excessive heat to your hands. Pre-hung cedar sauna doors with tempered glass are widely available from sauna suppliers for $200 to $500 and beat building your own. Standard interior doors warp in sauna conditions within a season or two.
Can two people build a barrel sauna together, or do I need a bigger crew?
Two people is the ideal crew for a scratch build. One holds staves in position while the other drives hardware during assembly. The hoop tensioning is doable solo but much easier with two. Assembling a pre-cut kit, two people can finish in a weekend. Three or four people only help if the space allows it. The inside of a 6-foot barrel gets crowded fast.
What are the health benefits of using a barrel sauna?
The most studied effects are cardiovascular. A long-term Finnish study published in JAMA Internal Medicine found that sauna use 4 to 7 times per week was associated with a 50 percent lower risk of fatal cardiovascular disease compared to once-weekly use, though observational studies can't establish causation [8]. Heat exposure also temporarily raises core body temperature, which may have immune and recovery effects. Claims beyond the cardiovascular associations have less consistent evidence.
How is a barrel sauna different from a traditional rectangular sauna?
The cylindrical shape cuts dead air volume, so the space heats faster and heat distributes more evenly from floor to ceiling. Rectangular saunas give you more usable bench space for a given length and are easier to build from standard lumber. Barrel saunas look more distinctive and suit outdoor settings well. For a comparison of sauna types and steam rooms, the sauna vs steam room breakdown covers the format differences in detail.
What size heater do I need for a barrel sauna?
Most heater manufacturers recommend roughly 1 kilowatt of capacity per 50 cubic feet of sauna interior volume. A 6-foot diameter by 7-foot long barrel holds roughly 140 to 160 cubic feet, which puts the ideal heater in the 4 to 6 kW range for electric, or an equivalent BTU rating for wood-burning. Always follow the specific heater manufacturer's sizing chart, since recommendations vary.
Can I insulate a barrel sauna?
Traditional barrel saunas aren't insulated. The mass of the wood itself holds enough heat for a session, and the design relies on the heater running during use. Some builders in very cold climates (zone 6 and below) add a thin layer of foil-faced insulation between the stave wall and an interior liner, but that adds real complexity to the build. For most climates, a properly built uninsulated cedar barrel performs well.
Sources
- USDA Forest Service, Forest Products Laboratory - Wood Handbook: Wood as an Engineering Material: Thermal modification at high temperatures reduces equilibrium moisture content and improves dimensional stability in wood products
- US EPA - Chromated Copper Arsenate (CCA) and Alternatives: Preservatives used in pressure-treated lumber are not designed for high-heat enclosed environments and can release compounds when heated
- Underwriters Laboratories (UL) - UL 875 Standard for Electric Dry-Bath Sauna Heaters: UL 875 covers safety requirements for electric sauna heaters including clearances from combustibles and stone load specifications
- National Fire Protection Association - NFPA 70 National Electrical Code, Article 424: NEC Article 424 governs fixed electric space heating installations including sauna heaters, requiring dedicated circuits and proper breaker sizing
- US Consumer Product Safety Commission - Home Sauna Safety: CPSC guidance covers sauna temperature limits, ventilation requirements, and hazard scenarios including overheating risks
- Finnish Sauna Society - Sauna Building Guidelines: Recommended minimum of 6 to 8 air changes per hour in a sauna operating at normal temperatures
- PubMed / Journal of Science and Medicine in Sport - Contrast water therapy and exercise induced muscle damage (2013): Contrast therapy (alternating heat and cold exposure) shows some evidence for reducing perceived soreness but optimal protocols remain under study
- JAMA Internal Medicine - Association Between Sauna Bathing and Fatal Cardiovascular and All-Cause Mortality Events (Laukkanen et al., 2015): Frequent sauna use (4-7 times per week) was associated with 50% lower risk of fatal cardiovascular disease compared to once-weekly use in a Finnish cohort study
- US Department of Energy - Home Electrical System Information: 240V dedicated circuit requirements and GFCI protection standards for fixed heating equipment in residential construction
- USDA Forest Service Forest Products Laboratory - Drying of Lumber: Kiln-dried lumber at 19% moisture content or below recommended for applications with repeated moisture and heat cycling
- International Code Council - International Residential Code (IRC), Accessory Structure provisions: Many jurisdictions use IRC thresholds (typically 120-200 sq ft) to determine when accessory structures require a full building permit

Share:
Eddy barrel sauna: what it is, what it costs, and whether it's worth it
Eddy barrel sauna: what it is, what it costs, and whether it's worth it