
Last updated 2026-07-11
TL;DR
A barrel sauna needs a flat, well-drained base or it will rack, leak, and void most warranties. Clear the site, excavate 4 to 6 inches, compact the soil, then lay gravel, concrete, or treated timber cradles. Check level in both directions with a 6-foot level before delivery. Most people finish the groundwork in a weekend for $200 to $500.
Why does leveling matter so much for a barrel sauna?
A barrel sauna is a big cylinder of kiln-dried cedar or pine staves held together by steel bands and gravity. Beautiful design. Unforgiving base. If the ground tilts even a couple of degrees, the staves separate on one side, the door frame goes out of square, and water pools inside instead of draining toward the vent. Give that a season or two and you get rot, warped benches, and a door that no longer seals.
Most manufacturers publish a maximum allowable slope under the cradle assembly. Check your manual, but a common spec is no more than 1/4 inch of variation across the full length of the sauna. For a 7-foot unit that means the ground has to sit very close to dead flat. That tolerance is tighter than most people expect from something that looks this rustic.
Frost is the other problem. In USDA Hardiness Zones 5 and colder, frost depth routinely hits 30 to 48 inches, and unrestrained soil heaves unpredictably each winter [10]. A barrel sauna sitting on bare compacted dirt in Minnesota will walk itself into a tilt over two or three freeze-thaw cycles. Your base has to account for that movement, or you re-level every spring.
Here is the good news. You do not need a full concrete slab for a barrel sauna the way you might for a rectangular home sauna. The barrel's own cradles spread the load, so a well-prepared gravel bed or properly spaced concrete piers are often enough. Prepared is the operative word. Skipping steps here costs you real money later.
What tools and materials do you need before you start?
Get this together before the sauna ships. Waiting on a tool while a 600-pound pallet sits in your driveway is a bad afternoon.
Tools:
- 6-foot or 8-foot carpenter's level (a 4-foot level is not long enough for most barrel saunas)
- Line level and string line, or a laser level if you have one
- Tape measure, 25 feet minimum
- Spade, square-head shovel, and a hand tamper or plate compactor (rent the plate compactor for under $60 a day at most equipment rental shops)
- Wheelbarrow
- Garden rake
- Rubber mallet
- Pencil and graph paper, or a phone note app, for marking your layout
Materials (these vary by base type, see the comparison section below):
- Gravel base: class II road base or crushed granite, 4 to 6 inches deep; estimate 1 ton per 40 to 50 square feet
- Concrete pad: 3,000 psi ready-mix or bags; a 6x8-foot pad at 4 inches thick takes roughly 0.6 cubic yards
- Concrete deck blocks: 4 to 6 blocks depending on sauna length, rated for the load
- Treated lumber: 4x4 or 6x6 ground-contact rated (UC4B treatment minimum per the American Wood Protection Association) [3]
- Landscape fabric: optional under gravel, keeps weeds out without blocking drainage
- Torpedo level for fine checks on individual cradles
Plan to spend $150 to $600 on materials for a gravel or deck-block base. A poured concrete slab with contractor labor runs $800 to $2,500 depending on your region and slab size [9].
How do you pick the right spot in your yard?
Site selection and leveling are the same job. A spot that looks flat often hides a 2 to 3 percent grade, and a spot that looks sloped can sometimes be cut-and-filled more easily than you expect.
Walk your yard with a 6-foot level held flat. Find an area where the bubble stays centered across at least 8 feet in both the length and width direction of your planned footprint. Mark that rectangle with stakes and string.
Drainage is the second filter. Stand at your candidate spot after a hard rain, or run a hose on it for five minutes. Water should sheet away from the center and never pool. Barrel saunas need the base to shed water, not hold it against the wood cradles. A slight crown, raising the center of the gravel bed by 1/4 inch, helps.
Sun and privacy are personal preference, but they matter. Morning sun on the door side speeds drying. A north-facing entrance in a snowy climate means ice lingers on the steps longer. Most people face the door south or east.
Check your zoning before you dig. Many municipalities require a 5 to 10 foot setback from property lines for accessory structures, and some classify a barrel sauna as a permitted structure once it has electrical connections [6]. A five-minute call to your building department beats a stop-work order.
Leave yourself room to work. You want at least 3 feet of clearance around the sauna for assembly, maintenance, and the chimney clearance any wood-burning stove requires. If you are adding a cold plunge or a larger outdoor sauna setup nearby, plan that footprint now, not after the concrete is poured.
What are the 5 steps to level ground for a barrel sauna?
These steps cover a DIY gravel base, which is what most people build. Adjustments for concrete or deck blocks are noted along the way.
Step 1: Mark and clear the footprint. Add 12 inches to each dimension of your sauna's footprint. A 6x7-foot sauna gets an 8x9-foot cleared area. Strip all sod, roots, and organic debris. Organic matter compresses and rots unevenly, and that is exactly what causes future settling. Cut the sod with a flat spade and haul it away rather than turning it under.
Step 2: Excavate to the right depth. Dig down 4 to 6 inches for a gravel base. In cold climates (frost depth over 18 inches), go 6 inches minimum and add 2 to 3 inches of sand as a sub-base beneath the gravel to help drainage. For a concrete pad, excavate 6 to 8 inches to fit 2 inches of compacted gravel sub-base plus 4 inches of concrete [4]. Use your string lines and a line level to keep the bottom of the excavation consistent in depth. You are not trying to make the soil flat yet. You are keeping it uniformly deep.
Step 3: Compact the subsoil. Before any material goes on, run a plate compactor (or hand tamper) over the exposed subsoil. Two to three passes. If the soil is bone dry, mist it lightly first. This step is what stops long-term settling. Skipping it is the number-one reason a sauna tilts 18 months after installation.
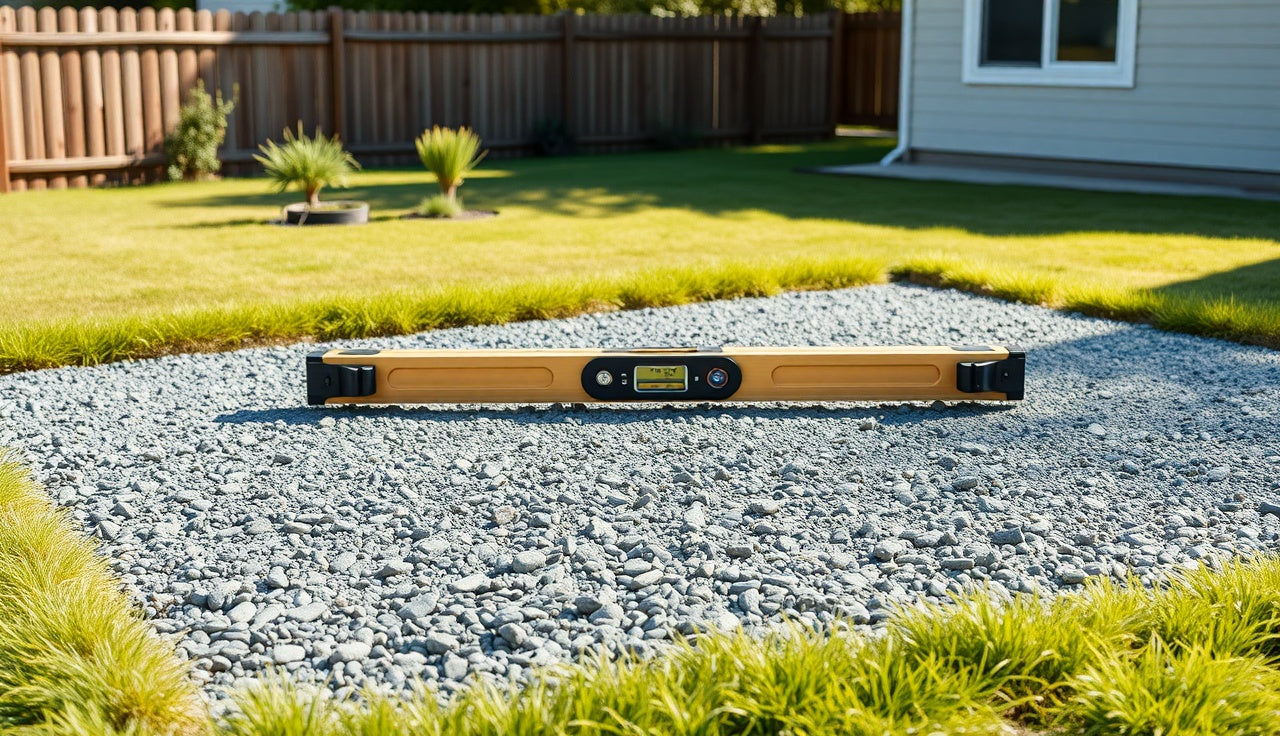
Step 4: Add and level your base material. For gravel: add 2 to 3 inches, rake roughly level, compact, then add another 2 to 3 inches and repeat. Check with your 6-foot level in four directions (two perpendicular, two diagonal). Aim for a surface within 1/4 inch of flat across the full footprint. Drag a straight 2x4 across the surface as a screed to find high and low spots. Fill the lows, scrape the highs, re-compact.
For deck blocks or piers: set them on your compacted base, check each one with a torpedo level on top, and shim or dig until all contact points sit on the same plane. String a level line between the two farthest-apart blocks to confirm.
Step 5: Final check before the sauna arrives. Lay your 6-foot level diagonally across the finished surface. The bubble should sit centered. Then check the two perpendicular axes. Take timestamped photos. If anything shifts between prep and delivery day, you have a reference. Most manufacturers want the site inspection-ready at least 24 hours before scheduled delivery so the ground settles after your final compaction pass.
Which base type is best: gravel, concrete, or deck blocks?
There is no single right answer. The best base depends on your soil, climate, budget, and how permanent you want the install. Here is the honest breakdown.
| Base Type | Avg DIY Cost | Permanence | Frost Tolerance | Best For |
|---|---|---|---|---|
| Compacted gravel | $100-$300 | Removable | Good (if deep enough) | Most climates, budget-conscious |
| Concrete pad | $400-$2,500 | Permanent | Excellent with rebar | Warm/mild climates, heavy saunas |
| Concrete deck blocks | $80-$200 | Semi-permanent | Fair (can heave) | Quick install, renters |
| Treated lumber sleepers | $150-$400 | Semi-permanent | Fair | Sloped sites, uneven yards |
| Poured concrete piers | $300-$900 | Permanent | Excellent | Deep-freeze climates |
Compacted gravel is the default most manufacturers recommend. It drains well, it is cheap, and if the sauna ever moves, you are not cutting concrete. The catch: it can shift in heavy freeze-thaw cycles without enough depth and proper edging.
Concrete pads are the most stable long-term option and overkill for most residential barrel saunas. If your ground freezes solid, a floating slab (not tied to the house foundation) with a 6-inch gravel sub-base and a thickened perimeter edge handles frost well. A 4-inch reinforced slab on 6 inches of compacted gravel is a common spec [4].
Concrete deck blocks are fast and need no formwork, but they are just contact points sitting on soil. In hard-freeze zones they heave individually at different rates, which means you shim cradles every spring. Use them only in Zone 7 or warmer.
Treated lumber sleepers (two or three 4x6 or 6x6 timbers running parallel to the cradles) are the go-to for sloped sites. Level the sleepers with shims, then set the cradles on top. It works well, but the lumber has to be ground-contact rated (UC4B or UC4C treatment) [3]. Standard green treated lumber is UC3B, rated for above-ground use only. Do not substitute.
If you are still working through the purchase itself, the SweatDecks outdoor sauna guide covers barrel sauna construction quality before you get to ground prep.
| Concrete deck blocks | $140 |
| Compacted gravel (4-6 in) | $200 |
| Treated lumber sleepers | $275 |
| Concrete piers (poured) | $600 |
| Concrete slab (contractor) | $1,650 |
Source: Angi Cost Guide, 2024; AWPA use category data
How deep should the gravel base be for a barrel sauna?
The minimum is 4 inches of compacted crushed stone. Full stop. Four inches on native soil gives you drainage and basic load distribution, and it is what most manufacturers require to keep the warranty valid.
In frost-affected areas, 6 inches is the better target. Frost heave acts on the water in soil, and a deeper, well-draining gravel bed keeps moisture from collecting under the sauna's contact points. The USDA hardiness zones map most of the northern United States into cold territory where design frost depth runs 24 to 48 inches [7]. That sounds alarming, but you do not excavate that deep. You just make sure the base material drains so saturated soil never sits right under your cradles.
Use angular crushed stone, never round pea gravel. Angular stone (class II road base, crushed granite, or 3/4-inch clean crushed stone) locks together when compacted and stays put. Round pea gravel rolls and shifts under point loads. It feels solid underfoot and then slowly redistributes under the repeated thermal expansion of a hot sauna.
On very wet sites, add a 2-inch sand layer beneath the crushed stone. Sand acts as a capillary break and makes final leveling easier, since it responds better to fine adjustment with a screed. Compact the sand before the crushed stone goes on top.
How do you level ground on a sloped yard?
A slope under 5 percent (about 6 inches of drop over 10 feet) can usually be handled with cut-and-fill grading or adjustable sleepers. Steeper than that and you are looking at retaining work or a different site.
Cut and fill: Excavate the high side down and use that material to build up the low side, then compact everything together. This works cleanly only in stable clay-rich soils. Sandy or silty fill compresses unevenly unless you compact in 2-inch lifts, which takes time but is the right way to do it.
Sleeper system on a slope: Set two parallel treated timber sleepers running across the fall line, not down it. Dig pockets for each sleeper, set the downhill sleeper at finished grade, then notch or shim the uphill sleeper until both sit level and coplanar. String a line between them to confirm. This handles moderate slopes and is far easier to fine-tune than re-grading a big area.
What not to do: Never perch the sauna on a hillside with one side of the cradle on soil and the other hanging over a retaining block. The load goes uneven in ways you cannot see until the staves start gapping. If your slope runs more than 8 to 10 percent across the footprint, hire a landscaper for site prep. That is not defeat. That is structural sense.
For reference, a 10-foot barrel sauna on a 5 percent slope has a 6-inch height difference across its length. Correctable. A 12-inch difference across the same span is not a DIY gravel-rake situation.
Do you need a building permit to level ground for a barrel sauna?
Grading itself rarely needs a permit at residential scale unless you move more than a set volume of soil, and that threshold varies by jurisdiction. Many California counties require a grading permit for any cut or fill moving more than 50 cubic yards, though a barrel sauna pad will almost never come close [5].
The permit question that actually matters is the structure. Most jurisdictions treat a barrel sauna as an accessory structure. Under the International Residential Code, Section R105.2, accessory structures under 200 square feet are commonly exempt from building permits, and the code lists "work exempt from permit" for exactly this kind of small structure [6]. But add electrical service and that electrical work almost always needs its own permit and inspection, no matter the structure size.
The safe path is one phone call. Ask your building department two things: does a freestanding outdoor sauna at my address need a building permit, and does any grading or drainage work need a grading permit. Get the answers in writing, or at least note the date, time, and name of the person you talked to.
Setbacks apply either way. Most municipalities require 5 to 10 feet from property lines for accessory structures. HOA rules can be stricter and are not overridden by local building code, so check those too.
A professional home sauna installer will pull permits for you. Doing it yourself, that job is yours.
How do you account for drainage and water runoff?
This step gets skipped more than any other, and it causes the most long-term damage. Read it twice.
The ground around the sauna has to drain away from the structure in every direction. A 2 percent grade away from the base (a 1/4-inch drop per foot of horizontal distance) is the standard slope in residential construction, and FEMA's homeowner drainage guidance uses the same figure [8]. You can usually hit it by shaping the surrounding landscape after your base is set, pulling soil slightly away from the perimeter of the gravel pad.
If your yard naturally drains toward the site, add a simple French drain: a trench filled with gravel and a perforated pipe that catches the water before it reaches your pad. A 6-inch-deep, 6-inch-wide trench on the uphill side, filled with 3/4-inch clean stone, does the job for most residential slopes.
Inside the sauna, condensation and the water people carry in on their bodies has to go somewhere. Most barrel saunas have a small floor drain or a gap at the lowest stave. Your base has to let that water percolate down instead of pooling. Gravel and deck blocks do this naturally. A solid concrete slab does not, so if you pour one, pitch it slightly toward a drain edge.
Check drainage after the first heavy rain following installation. If water sheets toward the sauna or pools under the floor, fix it before it turns into wood rot. Rot in the base staves is expensive to repair and almost always traces back to drainage nobody thought through at install.
What are the most common mistakes people make leveling a sauna base?
Read enough owner forums, installation guides, and warranty claim patterns and the same mistakes surface again and again. Here they are.
Not compacting the subsoil first. People dump gravel on a soft yard, get it level, and six months later the whole thing has settled 2 inches on one side. Compact the native soil before any base material touches it.
Using the wrong gravel. Round pea gravel looks nice and does not compact. It moves under load. Use angular crushed stone.
Checking level in only one direction. A surface can be level front-to-back and tilted side-to-side. Check both axes and both diagonals.
Undersizing the base footprint. The gravel pad should extend at least 6 to 12 inches past the sauna on all sides. That gives the cradle end boards solid material to sit on and keeps the gravel edges from eroding out from under the contact points.
Not planning for the delivery truck. Most barrel saunas arrive by freight truck. If the truck cannot reach your site, you are carrying the sections by hand. Map the access path when you pick the site, not after.
Skipping drainage. Covered above, worth repeating: poor drainage is the leading cause of early barrel sauna failure.
Treating treated lumber as maintenance-free. UC4B wood lasts a long time but still needs a ground-contact rated sealer on cut ends. Every cut exposes raw, unprotected wood. Seal it with a copper-based end-cut preservative.
Comparing a barrel sauna to other recovery setups? The SweatDecks outdoor sauna collection lists options with specific base recommendations, which can narrow down your prep before you order.
How long does the base preparation take and what does it cost?
For a solo DIYer building a gravel base on a mostly flat yard, plan on 6 to 10 hours across a weekend. Roughly: 2 to 3 hours clearing and excavating, 1 hour compacting subsoil, 2 to 3 hours adding and leveling gravel, and 1 to 2 hours on drainage shaping and final checks.
A sloped yard, clay-heavy soil, or a concrete pad adds real time. Clay is heavy and sticky, plate compaction needs more passes, and concrete work adds at least two days for prep, pour, and cure before you can load it.
Cost by base type is in the comparison table above, but a realistic budget for most homeowners is $200 to $500 in materials for a DIY gravel or deck-block base. That covers a day's plate-compactor rental, the crushed stone, and any lumber or edging. A contractor-poured concrete slab adds $800 to $2,500 depending on size and your market [9].
Hire a landscaper for the grading and base work and labor runs $50 to $100 an hour in most US markets. A straightforward job takes 4 to 8 hours of pro labor, so $200 to $800. Often worth it if your yard has drainage problems or a real slope.
The sauna is a separate line item. A quality barrel sauna for home use runs $3,000 to $10,000 depending on size, wood species, and heater type. Spending $300 on a proper base to protect a $5,000 structure is not a luxury. It is the obvious move.
How do you check if the base is level enough before installing the sauna?
The minimum verification is a four-way level check: front-to-back center, side-to-side center, and both diagonals. Use your 6-foot level and record any deviation. Less than 1/4 inch across any 6-foot span is generally acceptable for most manufacturers. Anything larger gets corrected before the sauna goes on.
For a more thorough check, stretch a string line between two stakes at opposite corners. Set the string at a consistent height with a line level. Measure from the string down to the base surface every 12 to 18 inches along the line. Any reading that differs from the others by more than 1/4 inch marks a high or low spot to fix.
A laser level makes this faster and easier. A basic rotary laser rents for $40 to $60 a day at equipment rental shops and gives you a true horizontal reference plane you can read anywhere across the site.
Once the cradles are placed, check each one with a torpedo level, then string a level line from the first cradle to the last to confirm they are all coplanar, which matters more than each being level on its own. Individual cradles can each read level and still sit at different heights, giving you a twisted plane that stresses the sauna frame.
Photograph your finished level checks. If a warranty issue comes up later, proof that the base was level at installation protects you.
Frequently asked questions
Can I put a barrel sauna directly on grass or dirt?
No. Bare grass and topsoil are organic, compress unevenly, and hold moisture. That combination leads to rot, mold under the cradles, and a sauna that tilts as the ground settles. You need at minimum 4 inches of compacted crushed stone between the native soil and the cradle assembly. Nearly every barrel sauna manufacturer voids the warranty on a unit sitting on bare ground.
How level does a barrel sauna base actually need to be?
Most manufacturers specify no more than 1/4 inch of variation across any 6-foot span. That is the threshold where staves start to gap and doors go out of square. Check your specific manufacturer's documentation, since specs vary. Verify with a 6-foot carpenter's level or a string-line method before delivery, not after.
What size pad do I need under a barrel sauna?
The pad should extend at least 6 to 12 inches beyond the sauna footprint on all sides. For a 6x7-foot barrel sauna, plan an 8x9-foot base minimum. The extra width keeps the gravel edges from washing out from under the cradle end boards and gives you room to step off the sauna without leaving the stable surface.
Do I need a concrete slab for a barrel sauna?
Usually not. Most manufacturers recommend a compacted gravel base as the standard. A concrete slab is more permanent and slightly more stable, but it costs a lot more and traps moisture without a drain or proper slope. A 4 to 6 inch compacted crushed stone bed is adequate for most residential installs in most climates.
How do you level ground for a barrel sauna on a slope?
Slopes under 5 percent can be handled with cut-and-fill grading or a treated lumber sleeper system. Excavate the high side down, build up the low side with that material, and compact in 2-inch lifts. For steeper slopes, two parallel treated 4x6 or 6x6 sleepers shimmed to level and running across the fall line give a stable, adjustable base without major excavation.
Will a barrel sauna on gravel stay level through winter?
Yes, if the gravel base is deep enough and drains well. In frost-affected climates, use 6 inches of angular crushed stone, not 4. Round pea gravel and shallow beds are the ones that heave. The goal is keeping saturated soil away from the base contact points, because it is water in the soil that freezes and expands. Good drainage is the real frost protection.
Do I need a permit to install an outdoor barrel sauna?
Possibly. Most jurisdictions treat a barrel sauna as an accessory structure, and many exempt structures under 200 square feet from building permits under IRC Section R105.2. Any electrical connection almost always requires its own permit and inspection. Setback rules (commonly 5 to 10 feet from property lines) apply regardless of permit status. Call your local building department before you break ground.
Can I use deck blocks instead of a full gravel base?
Deck blocks work in mild climates (USDA Zone 7 and warmer) where hard frost is rare. In colder zones, concrete deck blocks heave at different rates over winter and throw the sauna out of level each spring. If you use them, set them on a 2 to 4 inch compacted gravel bed and plan to check and re-shim every spring after the first freeze-thaw season.
What type of gravel is best under a barrel sauna?
Use angular crushed stone: class II road base, crushed granite, or 3/4-inch clean crushed stone. Angular particles interlock when compacted and hold their position under load. Avoid round pea gravel, which rolls and redistributes under point loads from the cradles. A 4 to 6 inch compacted layer of angular crushed stone is the standard recommendation from most manufacturers.
How do I handle drainage under and around a barrel sauna?
The ground around the sauna should slope away at about 2 percent (1/4 inch per foot) in all directions. If your yard drains toward the site, install a simple French drain: a 6-inch-deep gravel-filled trench with perforated pipe on the uphill side. Inside, use a gravel base or leave a drain gap at the lowest stave so condensation and splash water percolate down instead of pooling.
How long should I wait after base prep before installing the sauna?
For a gravel base, 24 hours is enough to let the final compaction settle. For a concrete pad, full-strength cure is 28 days, but most manufacturers allow loading after 7 days if the concrete tested at design strength. Do not install on a slab that is still visibly damp on the surface; moisture trapped under the wood cradles is a rot risk.
Can a barrel sauna base double as a base for a cold plunge nearby?
Yes, with planning. Many people pair a barrel sauna with a cold plunge for contrast therapy. If you run both, extend the gravel pad or pour a larger concrete area for both units with a walking path between them. Plan drainage for both: cold plunges need a drain connection, and the combined water load during use can overwhelm an undersized drainage setup.
What wood is best for sleepers under a barrel sauna?
Ground-contact rated treated lumber, specifically UC4B or UC4C classification per the American Wood Protection Association. Common dimensions are 4x6 or 6x6. Standard green-treated lumber at most home improvement stores is UC3B, rated for above-ground use only. Using UC3B in ground contact voids its preservation warranty and leads to early decay.
How much does it cost to have someone else prep the base?
Professional landscaper rates for base prep run $50 to $100 an hour in most US markets. A straightforward gravel pad on a flat yard takes 4 to 8 hours of pro labor, so $200 to $800 in labor plus materials. A contractor-poured concrete slab ranges from $800 to $2,500 total depending on size and region. For most homeowners, the DIY gravel option is a reasonable weekend project.
Sources
- American Wood Protection Association, Use Category System: UC4B or UC4C treatment is required for wood in ground contact; UC3B is rated above-ground use only
- Portland Cement Association, Guide to Residential Concrete Construction: A 4-inch reinforced concrete slab on 6 inches of compacted gravel sub-base is a standard residential accessory structure spec; 3,000 psi mix and 2% slope to drain
- California Department of Conservation, Grading Permit Requirements: Many California counties require a grading permit for residential work moving more than 50 cubic yards of soil
- International Code Council, International Residential Code Section R105.2 (Work Exempt from Permit): The IRC exempts many accessory structures under 200 square feet from building permits, but electrical work nearly always requires a separate permit regardless of structure size
- US Department of Agriculture, Plant Hardiness Zone Map: USDA hardiness zone classifications correspond to temperature extremes and frost patterns that affect ground preparation requirements
- Federal Emergency Management Agency (FEMA), Homeowner's Guide to Retrofitting, Drainage and Grading: A 2% grade (approximately 1/4 inch per foot) away from any structure is the standard residential drainage slope requirement
- Angi, Concrete Patio and Slab Cost Guide (2024): Contractor-poured concrete slabs for residential accessory structures average $800-$2,500 depending on region and slab size
- University of Minnesota Extension, Frost Depth and Foundation Design for Outbuildings: Frost depth in Minnesota and northern states routinely reaches 30-48 inches, requiring well-drained bases to prevent frost heave under structures

Share:
Cold plunge fencing safety codes: what every homeowner needs to know
How deep should a gravel base be for an outdoor sauna?