
Last updated 2026-07-09
TL;DR
Building a barrel sauna takes one to three weekends for a motivated DIYer. You need a level foundation, a pre-cut cedar or pine stave kit (or milled lumber), galvanized steel bands, an 8 to 12 kW wood or electric heater, and basic carpentry skills. Total material cost runs $2,500 to $7,000 depending on wood species, heater type, and size.
What is a barrel sauna and why build one instead of buying?
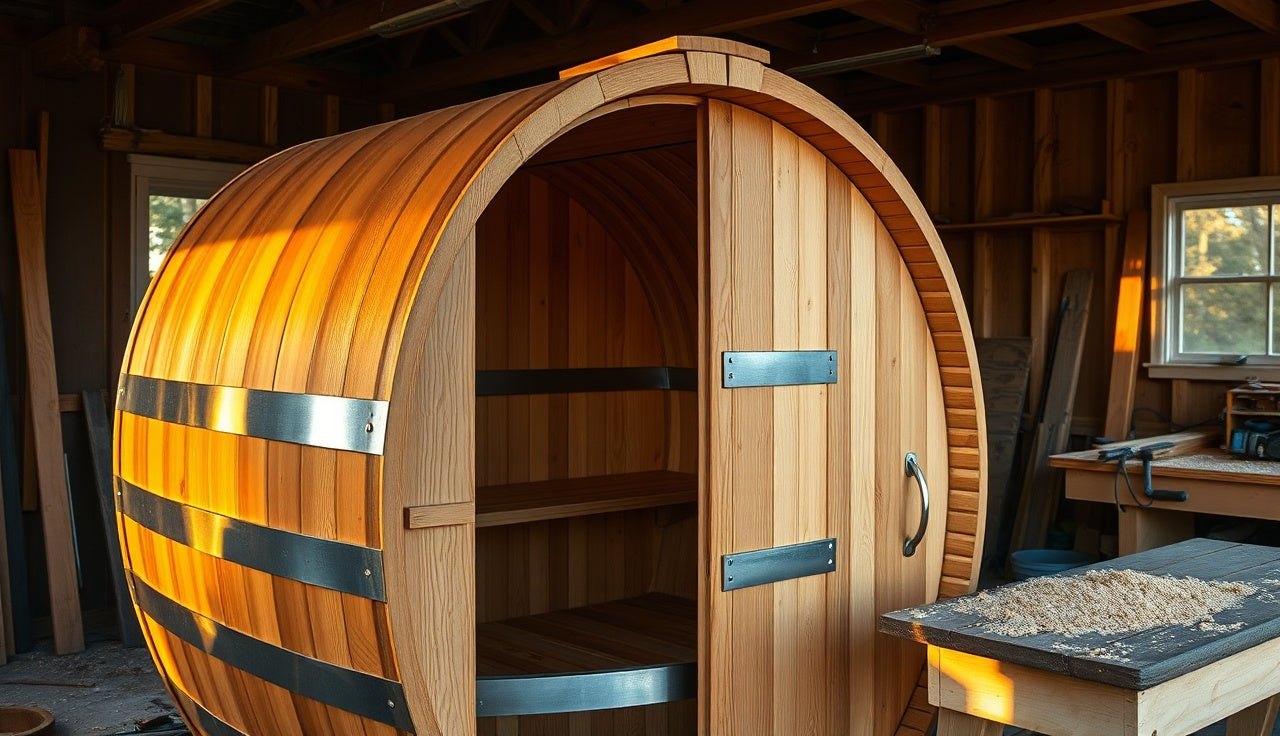
A barrel sauna is a cylinder built from long, radially arranged staves, the same logic as a wine barrel. The round shape kills off dead corners, so the heater warms a smaller air volume than a square room with the same floor footprint. Heat-up is faster because of it: typically 30 to 45 minutes to reach 170 to 190°F versus 45 to 60 minutes for a comparable rectangular cabin.
The case for building your own is mostly money. A pre-assembled 6-foot-diameter, 7-foot-long barrel sauna from a mainstream retailer runs $4,500 to $8,000 before shipping. DIY materials for the same size run $2,500 to $4,500 depending on wood and heater. You save 30 to 45 percent and you know exactly what went into it.
The case against is skill. You need to be comfortable with a circular saw, basic woodworking, and electrical rough-in (or budget for an electrician). If neither describes you, a kit-based outdoor sauna or a fully assembled home sauna is the smarter call.
One honest caveat. Barrel saunas have a curved interior floor that some people find annoying for benches that don't run along the curve. Plan your bench layout before you commit to a diameter.
What size barrel sauna should you build?
Diameter and length drive everything else: wood volume, heater kW, bench count, and cost. Pick them first.
The most common DIY diameters are 5 feet (good for two bathers sitting across from each other), 6 feet (comfortable for two, workable for three), and 7 feet (three to four bathers, but noticeably heavier and harder to assemble solo). Length runs from 6 feet (one bench row plus an entry vestibule) to 10 feet (two bench rows or a dedicated lounge section).
As a rough rule, size an electric heater at roughly 1 kW per 45 cubic feet of sauna volume, and go slightly smaller for wood-burning because radiant output is harder to throttle [1]. A 6-foot diameter, 7-foot-long barrel has an interior volume of about 175 cubic feet, so a 4 kW heater is the floor and 6 kW gives you headroom for cold days or a poorly insulated build.
| Diameter | Length | Interior volume (approx.) | Suggested electric heater | Fits (seated) |
|---|---|---|---|---|
| 5 ft | 6 ft | ~100 cu ft | 3 to 4 kW | 2 |
| 6 ft | 7 ft | ~175 cu ft | 4 to 6 kW | 2 to 3 |
| 6 ft | 9 ft | ~225 cu ft | 6 to 8 kW | 3 to 4 |
| 7 ft | 8 ft | ~280 cu ft | 8 to 10 kW | 4 to 5 |
Pairing the sauna with a cold plunge for contrast therapy? Build a changing and cooling area into your footprint. Two feet of vestibule space adds little material cost and makes the whole thing better to use.
What materials do you need to build a barrel sauna?
Here's the real material list, not the idealized one.
Wood (staves): Western red cedar is the gold standard. It resists moisture and fungal decay, has low thermal conductivity (so it won't burn skin on contact), and smells good. Expect $3.50 to $6.00 per board-foot in 2024 to 2025. Thermally modified spruce (ThermoWood) runs $4.00 to $7.00 per board-foot with better dimensional stability. Plain kiln-dried pine works and costs half as much, but it needs more careful sealing at joints and shows moisture damage sooner [2].
For a 6x7 barrel you need roughly 400 to 450 board-feet of stave material after waste. Staves are typically 1.5 inches thick, 3 to 4 inches wide, and the full interior length of the barrel.
Steel banding: Galvanized or stainless flat strap, 1.5 to 2 inches wide, with threaded rod tensioners. Use a minimum of 4 bands for a 7-foot barrel and 6 bands for anything 9 feet or longer. Budget $80 to $150 for hardware.
End caps (headboards): These are the circular disc ends. Cut them from 1.5-inch cedar planks arranged like a wagon wheel, or buy pre-cut end cap kits. A door frame goes in one or both ends.
Door and glazing: A tempered glass door is the nicest option ($250 to $450). A solid wood door is simpler to build ($50 to $100 in materials) but you lose the ability to see inside without opening it.
Heater: Covered in its own section below.
Foundation material: Gravel bed, pressure-treated 4x4 runners, or concrete piers. Covered below.
Electrical: A 240V circuit for most electric heaters over 4.5 kW. Wire, conduit, GFCI breaker.
Interior accessories: Bench boards (1.5x3.5 cedar, 6 to 8 boards per bench), backrest slats, sauna rocks (12 to 20 kg for a 6 kW heater), a thermometer/hygrometer, and a ladle and bucket for löyly.
Total material budget by size:
- 5x6 ft: $1,800 to $3,200
- 6x7 ft: $2,500 to $4,500
- 7x9 ft: $4,000 to $7,000
Those ranges assume you buy a heater (the biggest cost variable), do your own electrical rough-in, and source lumber locally. A pre-cut stave kit adds $400 to $800 to lumber cost but saves 8 to 12 hours of milling.
| 5 ft dia × 6 ft long | $2,500 |
| 6 ft dia × 7 ft long | $3,500 |
| 6 ft dia × 9 ft long | $5,000 |
| 7 ft dia × 8 ft long | $5,500 |
Source: Almost Heaven Saunas, Dundalk Leisurecraft, USDA Forest Products Lab pricing references, 2024
What foundation do you need for an outdoor barrel sauna?
Most guides skip this step and then the problems show up two years later. A barrel sauna that shifts or settles opens gaps in the stave joints, and cold air comes in while warm air leaks out.
Three options work well.
Gravel pad with pressure-treated skids. Excavate 4 to 6 inches, fill with compacted crushed stone, and lay two 4x6 or 6x6 pressure-treated runners parallel to the barrel's long axis, spaced to support the outer stave ring. This is the cheapest and most common approach. Cost: $100 to $250 in materials. It works in most climates with good drainage.
Concrete piers. Four to six tube-form piers, 12 inches in diameter, poured below your frost line. Attach post bases to the piers, then lay a pressure-treated frame. More labor, but essentially permanent and better in freeze-thaw climates. Check your local frost depth: in Minnesota it runs 42 to 60 inches, on the coastal Oregon shore it might be 12 inches [3]. Under-depth piers heave.
Existing concrete slab. Have a patio? Set the barrel directly on rubber pads to allow drainage and stop wood-to-concrete moisture wicking. Simplest of all, if you already have it.
Whatever you choose, the barrel has to drain condensate from the low point of the cylinder. Drill a 1-inch drain hole through the bottom stave and add a threaded plug or small drain fitting. This is not optional if you plan to use the sauna more than seasonally.
How do you assemble the barrel staves?
This is the part people worry about most, and it is the most technique-dependent step. It's also easier than it looks with a helper and a staging jig.
Step 1: Mill or prepare staves. Each stave needs two parallel long edges beveled so they mate flush around the curve. For a 6-foot-diameter barrel, each stave's side edges angle at roughly 3 to 5 degrees depending on stave width. If you bought a pre-cut kit, this is done. If you're milling your own, set your table saw fence for the bevel angle and test-fit five or six staves in a semicircle on the floor before cutting all of them. One off bevel ruins the whole ring.
Step 2: Build a cradle jig. Cut two semicircular cradle forms from 3/4-inch plywood at your target interior radius. Stand them parallel, 3 feet apart. They support the stave ring while you assemble it. Skip this and the barrel rolls and the staves slide. The jig takes 45 minutes to build and saves hours of cursing.
Step 3: Lay the bottom staves. Start with three or four staves in the bottom of the cradle. Run a thin bead of waterproof wood glue (Titebond III or equivalent) on each mating edge. Work up both sides at once, adding staves in pairs, alternating left and right.
Step 4: Clamp with temporary straps. Use ratchet straps or large hose clamps to hold the ring loosely in shape as you add staves. Don't fully tighten yet.
Step 5: Add the top staves and close the ring. The last stave (the keystone) is the trickiest. Cut it slightly wide and plane it to fit. When it drops in cleanly, the ring holds itself.
Step 6: Install permanent steel bands. Slide the galvanized banding over the assembled ring. Thread the tensioner rods through the band ends and tighten evenly, alternating sides. Tighten until the joints close and glue squeezes out slightly. Let it cure 24 hours before removing the cradle.
Step 7: Cut door openings and vent holes. Use a jigsaw. Mark the door opening from inside with a template. Put the intake vent low on the heater wall and the exhaust high on the opposite end. That keeps airflow moving and prevents CO buildup with wood-burning heaters.
Repeat the ring assembly for your second end, or build a flat headboard end cap if your design has one closed end and one door end. Most builds use two door/headboard ends with the door in one.
For a sauna that gets used year-round, add 1.5 inches of Rockwool or mineral wool between an inner and outer stave layer on the top arc (roughly the 9 o'clock to 3 o'clock positions). Heat rises, and ceiling insulation alone can cut heat-up time by 15 to 20 percent.
How do you wire and install an electric sauna heater?
Most home electric sauna heaters run on 240V and pull 20 to 60 amps depending on kW rating. A 6 kW heater at 240V draws 25 amps. NEC 220.10 requires a circuit sized at 125 percent of a continuous load, so you need a 30A breaker minimum and 10 AWG wire for that heater [4]. An 8 kW unit needs a 40A circuit and 8 AWG wire. Anything above 10 kW typically needs a 60A circuit.
Not comfortable with panel work? Hire an electrician for the rough-in. The heater-to-thermostat wiring inside the sauna is simpler, and plenty of people DIY that portion even after paying for the panel work.
Key wiring steps: 1. Run a dedicated 240V circuit from your panel to the sauna location (in conduit if exposed outdoors). 2. Install a GFCI breaker at the panel, or a GFCI disconnect at the sauna. NEC 680.44 doesn't specifically address saunas, but most AHJs (authorities having jurisdiction) require GFCI protection for outdoor 240V equipment [8]. Confirm with your local inspector. 3. Mount the heater on the wall opposite the door, at least 4 inches from all combustible surfaces, at the manufacturer's specified height (usually 18 to 24 inches from the floor). 4. Connect the wall-mounted thermostat/timer control per the heater's wiring diagram. Most modern heaters use a separate control box. 5. Load the heater with sauna rocks. Use only rocks made for saunas, typically peridotite or olivine, never river rocks, which can crack and explode when heated fast [5].
For wood-burning heaters, you need a properly rated flue pipe exiting through the barrel end cap or top stave. Use a double-wall insulated stovepipe and a listed thimble fitting through the wood. Clearances to combustibles per the manufacturer's manual are mandatory, not suggestions. Many jurisdictions require a permit for solid fuel appliances. Check before you build.
SweatDecks carries sauna heaters sized for DIY barrel builds if you want to compare electric options without hunting across a dozen supplier sites.
How do you build the benches inside a barrel sauna?
Benches are structurally simpler than the barrel itself, but the ergonomics decide how much you actually use the sauna.
The standard layout for a 6-foot barrel is two benches facing each other across the width, at two heights: a low bench around 18 inches from the floor and a high bench at 36 to 42 inches. The high bench is where the real heat lives. Temperatures near the ceiling of a well-running barrel sauna can be 30 to 50°F hotter than at knee height.
Bench depth matters. You want at least 18 inches to sit comfortably with your legs forward. A 24-inch-deep bench lets you lie down. For a 6-foot-diameter barrel, you have roughly 5 feet of usable interior width after the curve eats into it, so two 20-inch benches across from each other leave about 12 inches of foot space in the middle. Workable.
Materials: Use 2x4 cedar (actually 1.5x3.5 inches) for bench tops, with 1/4-inch gaps between boards for drainage and airflow. Do not use bench boards wider than 4 inches; wide boards cup and warp with repeated heat and moisture cycling. Support the bench with simple L-bracket frames made from the same 2x4 material, attached to the flat interior staves at the sides of the barrel. Do not glue anything to the interior. Every fastener should be stainless steel, not galvanized. Galvanized fasteners corrode and can create hot spots that burn skin.
Sand all interior bench surfaces to 120 grit minimum. Sharp edges at that temperature get noticed. Apply no finish inside the sauna. Oils and stains outgas when heated, and the smell is unpleasant at best and irritating to lungs at worst.
What permits do you need to build a backyard barrel sauna?
It depends on your municipality, but you almost certainly need something.
In most US jurisdictions, a structure over 200 square feet requires a building permit. A barrel sauna usually comes in well under that (a 6x7 barrel is about 28 square feet of floor area), so some homeowners slide under the permit threshold for the structure itself. The electrical work almost always requires an electrical permit, and a wood-burning appliance often triggers a mechanical or fuel-burning appliance permit.
Property setbacks matter too. Most residential zoning requires accessory structures to be set back 5 to 10 feet from property lines. Some HOA rules go further. Check before you pour any concrete.
The International Residential Code (IRC) addresses residential sauna room installation in Section R325 for interior saunas. Outdoor standalone structures fall under accessory structure provisions and local amendments [6]. Many jurisdictions exempt accessory structures under 200 square feet from a building permit, though the electrical permit still applies [10].
Bottom line: call your local building department before you start. The electrical permit typically runs $50 to $150 and buys you an inspection that confirms your wiring is safe. That inspection is not a bureaucratic hurdle. It's a second set of eyes on work that, done wrong, starts fires.
How long does it take to build a barrel sauna?
For a first-time builder, here's the honest breakdown:
- Foundation prep: 4 to 6 hours (excavation, gravel, skids)
- Stave milling (if not using a kit): 6 to 10 hours
- Stave ring assembly and banding: 8 to 12 hours
- End cap/headboard construction: 4 to 6 hours
- Door installation: 2 to 3 hours
- Bench construction: 3 to 5 hours
- Heater installation and electrical: 3 to 6 hours (DIY), or 1 to 2 hours for you plus the electrician's time
- Finish details (vents, drain, caulking, accessories): 2 to 3 hours
Total: 32 to 51 hours for the build itself, spread across two or three weekends for a solo builder. Two people cut that roughly in half on the assembly-heavy steps.
Stave milling is the most time-variable step. Buy a pre-cut stave kit and you remove 6 to 10 hours and dodge the biggest margin for error. The kits cost $400 to $800 more than raw lumber, but the time and frustration savings are real, especially on a first build.
Curing and drying come last. After assembly, let the sauna sit 48 to 72 hours before first use. Run the first session low, around 150°F for 30 minutes, to let the wood expand and the stave joints seat fully. That break-in run also burns off residual sawdust and wood volatiles.
How do you maintain a barrel sauna long-term?
A well-built cedar barrel sauna needs almost no intervention for the first several years. The wood self-regulates moisture through the seasonal use cycle.
What actually needs doing:
Exterior sealing: Apply a UV-protective exterior wood oil or sealant to the outside once a year, or every other year in mild climates. This is cosmetic and UV protection only, with no structural function. Never seal the interior.
Steel band tension: Check band tension every year. Wood shrinks slightly in dry seasons. Tighten bands evenly if you see light gaps at stave joints. Fifteen minutes.
Heater rocks: Replace sauna rocks every 3 to 5 years, or when they visibly crack. Degraded rocks hold heat poorly and can fracture explosively with steam.
Drain: Clear the floor drain before and after winter storage. A clogged drain leaves pooled water that speeds up stave rot at the bottom.
Ventilation: Leave the vent open when the sauna isn't in use. A closed, wet sauna with no airflow grows mold.
For contrast therapy, pairing regular sessions with a cold plunge or ice bath is common. The research on repeated heat-cold cycling and cardiovascular adaptation is genuinely interesting, though sauna benefits and cold exposure work through separate mechanisms that happen to complement each other. Laukkanen and colleagues, writing in Mayo Clinic Proceedings in 2018, reported that sauna use 4 to 7 times per week was associated with a roughly 50 percent lower risk of fatal cardiovascular events compared to once-weekly use in a Finnish cohort [7].
If the full build feels like too much, a portable sauna covers some of the same ground at lower cost and commitment, though the experience is noticeably different.
What are the most common barrel sauna building mistakes?
These come up in every builder forum, and every one of them is avoidable.
Wrong bevel angle on staves. If your milling angle is off by even half a degree, gaps compound around the ring. Do the math: (360 degrees / number of staves) / 2 = bevel angle per edge. For 24 staves in a 6-foot-diameter ring, that's 7.5 degrees per edge. Test with 6 staves before milling all of them.
Skipping the ventilation holes. A sealed barrel builds CO with a wood-burning stove and feels stuffy with any heater. Put the intake vent within 6 inches of the floor near the heater. Put the exhaust near the ceiling on the opposite end wall. Both need closeable dampers so you're not heating the outdoors while the sauna runs.
Undersizing the heater. The minimum kW calculation above assumes an insulated sauna in moderate weather. Building in Minnesota with single-stave uninsulated walls? Add 20 to 30 percent to your heater kW estimate.
Using galvanized fasteners inside. They corrode and stain. Use stainless steel (305 or 316 grade) for everything on the interior.
No drain. Covered above, but worth repeating: standing water in a wood barrel causes rot within one to two seasons.
Skipping the first-run break-in. Rushing to full temperature on day one can split end cap boards as the wood expands unevenly. Go slow the first two or three sessions.
Poor door fit. The door is the biggest thermal weak point. A door that doesn't seal wastes heat and drags out warm-up time. Spend extra time fitting the frame or buy a commercial sauna door. This is the one component where buying pre-made is almost always worth it.
How does a DIY barrel sauna compare to buying a pre-built kit?
Honestly, the pre-cut kit route has gotten good enough that full scratch builds are mostly for people who enjoy the craft or need a specific size.
Kit options today (2025) fall into three categories:
1. Stave-only kits: Pre-milled, beveled, cut staves plus banding hardware. You provide foundation, heater, door, benches, and labor. Cost: $800 to $2,000 for a 6x7 barrel [12]. These make the hardest part easy.
2. Full DIY kits: Everything above plus pre-cut end caps, door frame, bench lumber, and hardware. You assemble, do electrical, and provide foundation. Cost: $2,000 to $4,000. Typical timeline: two weekends.
3. Pre-assembled kits: Arrive in large panels, bolt together on site, ready to wire. Cost: $4,500 to $8,500. Minimal skills required.
A full scratch build from raw lumber sits in the same cost range as option 1 if you already own the tools, and below it if you're buying tools. The main reason to scratch-build is custom dimensions or the satisfaction of building the whole thing.
For comparison, fully assembled barrel saunas from major brands (Almost Heaven, Dundalk LeisureCraft, and others) ship for $5,500 to $12,000 with the heater included. Read more about the outdoor sauna market and what you actually get in those price ranges, and compare it against the home sauna category if you're weighing indoor versus outdoor placement.
SweatDecks has pre-assembled barrel and cabin sauna options if you want a vetted starting point rather than sourcing everything one part at a time.
The honest answer: want a sauna by next month and don't love building? Buy a kit. Want to build something specific, learn a skill, and beat the assembled price? Scratch-build, or buy a stave kit and do the rest yourself.
Frequently asked questions
How much does it cost to build a barrel sauna?
Material costs run $1,800 to $4,500 for a standard 6-foot-diameter, 7-foot-long barrel sauna if you DIY the labor. The heater is the biggest single cost at $400 to $1,200 for electric and $300 to $800 for wood-burning. Add $150 to $400 for an electrical permit and licensed electrician rough-in if needed. A full scratch build comes in 30 to 45 percent cheaper than a comparable pre-assembled unit from a retailer.
Can I build a barrel sauna by myself without help?
Yes, but the stave ring assembly is much easier with two people. The rings are awkward to hold in position while tensioning bands, and a helper cuts 2 to 3 hours off that phase alone. Foundation, bench building, heater installation, and finishing all go fine solo. Plan on 40 to 50 hours of solo labor for a 6x7 barrel versus 25 to 30 hours with a helper.
What wood is best for a DIY barrel sauna?
Western red cedar is the best all-around choice: naturally rot-resistant, low thermal conductivity, dimensionally stable with heat cycling, and naturally antimicrobial. Thermally modified spruce (ThermoWood) is a close second with better stability in very humid climates. Untreated pine works but needs more maintenance and tends to seep resin when hot, which can drip on bathers. Never use pressure-treated lumber inside the sauna.
Do I need a permit to build a backyard barrel sauna?
Almost certainly for electrical work, and possibly for the structure depending on its footprint and your municipality. The structure itself often falls under 200 square feet and may be exempt from a building permit in many jurisdictions, but electrical permits are standard and required by most AHJs. Wood-burning heaters often require a separate mechanical permit. Call your local building department before breaking ground.
How long does it take to build a barrel sauna?
Realistically, 32 to 51 hours for a solo first-time builder, spread across two to three weekends. A pre-cut stave kit removes 6 to 10 hours of milling and lowers error risk significantly. Two people working together can finish most builds in two full weekends. Allow 48 to 72 hours of cure and dry time after assembly before the first use.
What size heater do I need for a barrel sauna?
A common guideline is roughly 1 kW of electric heater capacity per 45 cubic feet of interior volume. A 6-foot-diameter, 7-foot-long barrel has about 175 cubic feet of interior volume, so a 4 kW heater is the minimum and 6 kW gives headroom for cold climates or uninsulated builds. Undersizing the heater is the most common first-time mistake.
Can you build a barrel sauna on a wood deck?
You can, but the deck has to handle the load. A fully assembled 6x7 cedar barrel sauna weighs 800 to 1,200 pounds before adding people and rocks. Many residential decks are designed for 40 pounds per square foot of live load, and spread over a 28-square-foot footprint a loaded sauna sits right at that limit. Have a structural engineer or experienced contractor check your deck before placing a sauna on it.
How do you keep a barrel sauna from leaking or splitting?
Accurate stave bevel angles, tight banding, waterproof wood glue at the joints, and break-in sessions at low heat prevent most splits. Keeping the vent open between uses prevents the moisture buildup that speeds up checking. Annual band tightening in dry seasons keeps joints seated. A floor drain prevents standing-water rot. Most splits that show up after the first year trace back to a skipped break-in or missing drainage.
What's the difference between a barrel sauna and a traditional Finnish sauna?
The difference is almost entirely structural. A barrel sauna uses cylindrical stave construction with no flat walls or ceiling. A traditional Finnish sauna is a rectangular log or timber-frame room. Both use the same dry-heat format, similar heaters and rocks, and the same löyly steam ritual. The barrel's round interior has a smaller dead air volume for the same floor footprint, which can mean faster heat-up. Inside, the experience is largely identical.
Does a barrel sauna need insulation?
Single-stave-wall barrels (1.5-inch walls) can reach temperature in most climates without added insulation, but adding mineral wool batt between inner and outer stave layers on the top arc cuts heat-up time by 15 to 20 percent and lowers operating cost for electric heaters. In climates below 0°F, double-wall insulated construction makes a real difference in comfort and energy use. The floor and end caps benefit most from added insulation.
Can a barrel sauna stay outside year-round?
Yes. Western red cedar and thermally modified wood handle repeated freeze-thaw cycles well. The main requirements are a level foundation that doesn't heave, a clear floor drain so water doesn't pool and freeze inside, and at minimum an annual exterior oil or sealant application to guard against UV graying. A well-built outdoor barrel sauna lasts 15 to 25 years with basic annual maintenance.
Is a wood-burning or electric heater better for a DIY barrel sauna?
Electric heaters are easier to control, need no chimney penetration, and qualify for simpler permits in most jurisdictions. Wood-burning heaters cost less upfront, need no electrical circuit, and many enthusiasts prefer the radiant heat quality. The tradeoff: electric is install-and-forget, wood-burning needs flue work, a combustibles clearance review, and someone to tend the fire. For most suburban DIY builds, electric is the simpler and safer choice.
What temperature does a barrel sauna reach?
A properly sized barrel sauna reaches 160 to 200°F (71 to 93°C) at bench height. The ceiling may run 20 to 40°F hotter than the floor, which is why upper benches get hotter faster. Most traditional Finnish use happens in the 170 to 190°F range at bench level. Adding water to the rocks (löyly) produces a burst of steam that raises perceived temperature without necessarily raising air temperature.
How do I pair a barrel sauna with a cold plunge for contrast therapy?
The common protocol is 10 to 20 minutes in the sauna followed by 2 to 5 minutes in cold water (50 to 60°F), repeated 2 to 3 rounds. Build a cooling-off zone or vestibule near your sauna exit so the transition is comfortable. You don't need full submersion; even a cold shower between rounds produces a meaningful response. If you want a dedicated setup, the cold plunge benefits article covers what the research actually shows.
Sources
- Harvia electric sauna heater sizing calculator and guidance: 1 kW per 45 cubic feet of sauna volume is the standard sizing guideline for electric heaters; wood-burning units run slightly smaller due to radiant output
- USDA Forest Products Laboratory, Wood Handbook: Wood as an Engineering Material: Western red cedar's low thermal conductivity and natural decay resistance make it suitable for high-moisture sauna environments; pine requires more protection against moisture damage
- NOAA National Centers for Environmental Information, frost depth data: Frost depth in Minnesota ranges 42–60 inches; frost depth on the Oregon coast can be as shallow as 12 inches; pier footings must reach below local frost line to prevent heave
- NFPA 70 National Electrical Code (NEC), Article 220.10, Branch Circuit and Feeder Calculations: NEC 220.10 requires branch circuits serving continuous loads to be sized at 125% of the continuous load; a 6 kW sauna heater drawing 25A at 240V requires a 30A minimum circuit
- U.S. Consumer Product Safety Commission (CPSC), sauna safety guidance: Only stones rated specifically for sauna use (peridotite, olivine) should be used on sauna heaters; river rocks can crack or explode when rapidly heated by steam
- International Residential Code (IRC), Section R325, Sauna Rooms: IRC Section R325 covers sauna room installation requirements; accessory structure permit thresholds and setback requirements are governed by local amendments
- Laukkanen JA et al., 'Cardiovascular and Other Health Benefits of Sauna Bathing,' Mayo Clinic Proceedings, 2018: Sauna use 4–7 times per week was associated with roughly a 50% lower risk of fatal cardiovascular disease events compared to once-weekly use in a Finnish cohort study
- NFPA 70 National Electrical Code (NEC), Article 680.44, GFCI protection: Most AHJs require GFCI protection for outdoor 240V electrical equipment including outdoor sauna heaters; a GFCI breaker or disconnect at the panel is the standard installation method
- USDA Forest Service, Western Red Cedar (Thuja plicata) species information: Western red cedar (Thuja plicata) contains naturally occurring thujaplicins that provide resistance to decay fungi, making it suitable for repeated wet-dry cycling in sauna and outdoor applications
- International Code Council (ICC), International Residential Code accessory structure permit provisions: Many US jurisdictions exempt accessory structures under 200 square feet from building permits, though electrical permits remain required regardless of structure size
- Dundalk Leisurecraft, barrel sauna kit and pre-assembled options pricing: Pre-cut stave kits from commercial barrel sauna suppliers cost $800–$2,000 for a 6x7 barrel; full DIY kits run $2,000–$4,000; pre-assembled units start around $4,500

Share:
Panoramic barrel sauna: everything you need to know before buying
Ice barrel cold plunge tub: what you actually need to know