
Last updated 2026-07-11
TL;DR
Most existing saunas need two vents: a low intake near the heater (4x8 inches minimum) and a high exhaust on the opposite wall or ceiling. Fresh air should replace the room's full volume 3 to 8 times an hour. Materials run $50 to $300 and a few hours of work, more if you cut through an exterior wall.
Why does sauna ventilation matter so much?
A sauna with no airflow is genuinely stale. Carbon dioxide builds up as you breathe, oxygen drops, and the heat stops feeling good and starts feeling oppressive. Most people blame the heater. The real problem is almost always the air.
The Finnish Sauna Society, the oldest technical authority on sauna design, says the air in a traditional sauna should be fully exchanged 3 to 8 times per hour [1]. Where you land in that range depends on how many people are in the room. Two people sweating hard need more turnover than one person relaxing. If your sauna feels thick or leaves you with a headache after 10 minutes, ventilation is the first thing to check.
There is a moisture problem too. Trapped humid air rots wood and grows mold. Good ventilation keeps you comfortable and keeps the structure sound for decades. A home sauna that looks fine on the outside can be quietly rotting at the framing if airflow was never designed in.
What are the basic principles of sauna ventilation?
Sauna ventilation runs on a convection loop. Cool fresh air enters low, gets heated, rises, then carries moisture and CO2 up and out through a high exhaust. That is the entire system. Every fix you make should feed that loop instead of fighting it.
The intake vent goes near the floor, ideally within 6 to 8 inches of it, and close to the heater so incoming cool air warms up right away instead of drafting across your feet in a cold stream. The exhaust goes on the opposite wall near the ceiling, or straight through the ceiling itself.
Put both vents on the same wall and you kill the loop. Intake and exhaust near the ceiling on the same wall gives you short-circuit ventilation: air cycles through one small zone while the rest of the room sits stagnant. It is the single most common retrofit mistake.
For a typical 4x6 foot two-person home sauna, the intake should be at least 4 by 8 inches (32 square inches of frame area). The exhaust should be 10 to 20 percent larger than the intake so slight negative pressure pulls air through [1]. A 4x10 or 6x8 exhaust works for a room that size.
What types of vents work best in a sauna?
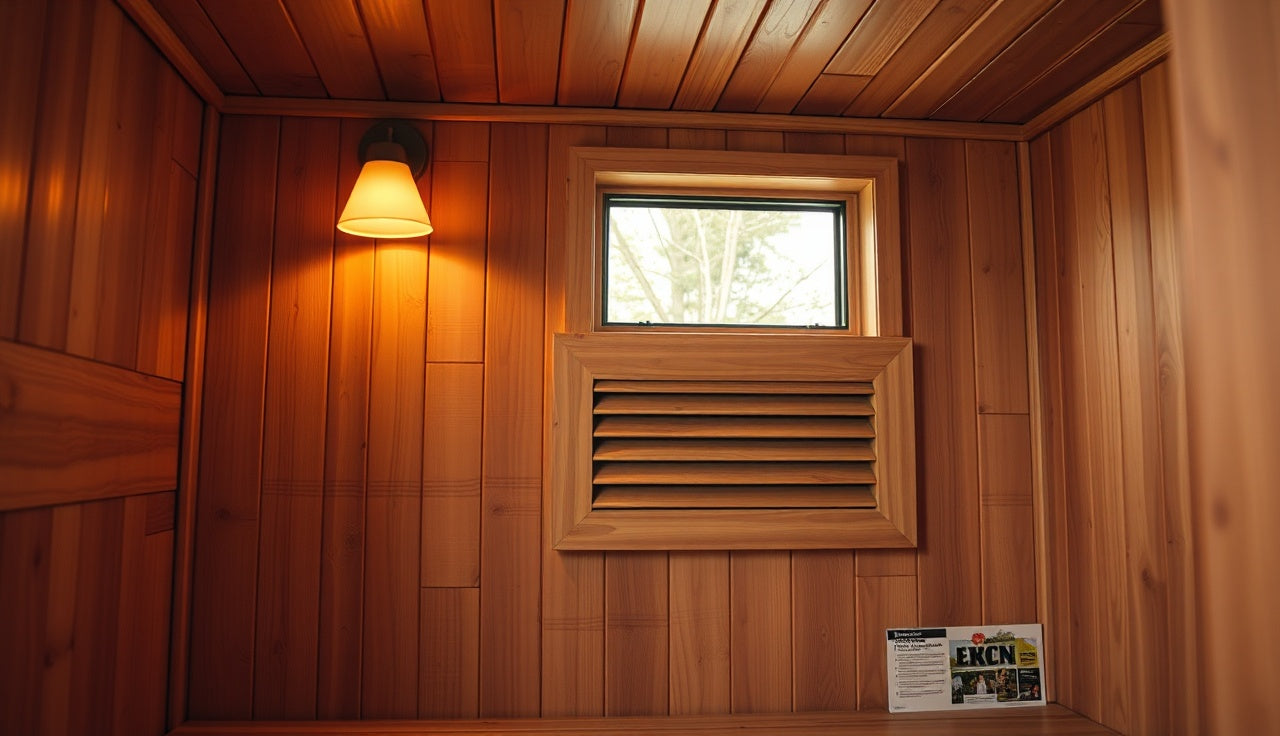
Three vent types cover almost every retrofit: adjustable louvered wood vents, adjustable metal vents, and through-wall passive vents that run all the way to the exterior. Which one you need comes down to where your sauna sits.
Adjustable louvered vents (interior to adjacent space) If your sauna is inside your home and shares a wall with a utility room, hallway, or garage, you can vent into that space instead of straight outside. This is the easiest retrofit. Cut a hole, frame it if needed, and install an adjustable wood or metal vent on the sauna side and the room side. No exterior penetration, no waterproofing headaches.
Through-wall exterior vents Saunas on exterior walls or freestanding outdoor sauna cabins get cut straight through to the outside. You need an exterior vent cap to keep rain and pests out, a short duct sleeve through the wall, and an adjustable interior cover. Keep the duct sleeve short (under 12 inches) so condensation does not collect inside it.
Ceiling exhaust with gravity cap When exterior walls are not reachable, run a ceiling exhaust through the roof or attic. This works well for pre-built barrel saunas and portable sauna structures with accessible attic space. Use a gravity-close cap on the exterior so cold air does not backdraft in when the sauna is off.
Skip powered exhaust fans in traditional Finnish-style saunas. They over-ventilate, drop the room temperature faster than the heater can recover, and add a motor that eventually dies. Passive convection vents are quieter, cheaper, and harder to break.
| Outdoor ambient air (~420 ppm) | 420 |
| ASHRAE acceptable indoor limit (1,100 ppm) | 1,100 |
| NIOSH cognitive impairment threshold (~2,000 ppm) | 2,000 |
| Poorly ventilated sauna, 2 occupants 10 min (~3,000 ppm) | 3,000 |
Source: ASHRAE Standard 62.1 and NIOSH CO2 guidance (citations 4, 10)
How do you figure out the right vent size for your sauna?
Most sauna construction guides use one rule: 1 square inch of free vent area per cubic foot of sauna volume, with the exhaust 10 to 20 percent larger than the intake [1]. Free area is the actual open space between the louvers, not the frame size. Most louvered vents open only 50 to 70 percent of their frame dimensions, so a vent labeled 4x8 might give you just 22 to 24 square inches of real free area.
Here is how the sizing works out for common sauna dimensions:
| Sauna Size | Volume (cu ft) | Min Intake Free Area | Min Exhaust Free Area |
|---|---|---|---|
| 4x4x7 ft (2-person) | 112 | ~112 sq in | ~125 sq in |
| 4x6x7 ft (2-3 person) | 168 | ~168 sq in | ~185 sq in |
| 6x8x7 ft (4-person) | 336 | ~336 sq in | ~370 sq in |
| 8x10x7 ft (6-person) | 560 | ~560 sq in | ~615 sq in |
Those numbers assume standard occupancy. Run the sauna packed full most of the time and you should size up by 20 percent.
For most home saunas in the 100 to 200 cubic foot range, two vents in the 4x8 to 4x12 inch range do the job. If one large cutout is awkward given your framing, stack two smaller vents to hit the same free area.
How do you actually cut and install a vent in an existing sauna?
This is the hands-on part. Before you cut anything, confirm what is inside the wall or ceiling. Most home sauna kits use 2x4 framing on 16-inch centers with foil-backed insulation and cedar or hemlock paneling on the inside face. Probe with a thin finish nail or use a stud finder before you mark.
Step 1: Mark your vent locations Intake: on the wall next to the heater, 6 to 8 inches above the finished floor. Center it between studs. Exhaust: on the opposite wall, within 4 to 6 inches of the ceiling, or in the ceiling itself. Center it between framing members too.
Step 2: Cut the interior paneling Use an oscillating multi-tool or a jigsaw with a fine-tooth blade. Cut just the interior cedar paneling first. Go slow at the corners to keep the opening clean.
Step 3: Cut through insulation and framing if you are going to the exterior An interior-to-adjacent-space vent only needs paneling and insulation cut. An exterior penetration means cutting the exterior sheathing and siding too. A hole saw sized to your duct sleeve handles round openings; a jigsaw handles rectangular ones.
Step 4: Install the duct sleeve (exterior vents only) Slide a pre-cut section of galvanized or stainless rectangular duct (for rectangular vents) or a short piece of PVC pipe (for round vents) through the wall. Seal the exterior penetration with exterior-grade caulk. Install the exterior cap.
Step 5: Install the interior vent cover Screw the adjustable louvered cover to the paneling. Most residential wood vents ship with screws. For a cleaner look, pre-drill with a countersink bit so the heads sit flush.
Step 6: Test the airflow Heat the sauna to operating temperature (roughly 160 to 190 F for a traditional dry sauna). Hold a small piece of tissue near the intake. It should pull gently inward. Hold it near the exhaust and it should press outward. No movement means the exhaust is probably dumping into a sealed cavity. Check it.
Where exactly should intake and exhaust vents be positioned?
Position matters as much as size. Here is the layout that works over and over.
The intake goes on the same wall as the heater, not the opposite one. Cool air enters near the heat source, warms right away, and rises across the room toward the exhaust. Put the intake on the far wall and you get a cold floor-level draft running the full length of the sauna before the air ever warms. That feels bad.
The exhaust goes on the wall opposite the heater, as high as you can get it, ideally 4 to 6 inches from the ceiling. Some builders run the exhaust straight through the ceiling. That works well for freestanding cabins vented up through the roof, but it adds complexity and more places to leak.
Corner installation, with the heater on a side wall? Put the intake on the short wall near the heater and the exhaust at the far corner or in the ceiling. The goal never changes: maximum diagonal distance between intake and exhaust, so air crosses the whole room.
One thing surprises people. Bench height matters. Air exchange happens faster at bench level than at the floor. Benches usually sit at 36 and 60 inches in a two-tier setup. Keep the intake below bench level (under 36 inches) and the exhaust above the upper bench (above 60 inches). That exchanges the air you actually breathe while seated, more than the air pooling at your feet.
Can you add ventilation without cutting through walls?
Sometimes, yes. The two main no-cut options are door-gap ventilation and floor penetrations.
Door-gap ventilation uses the space under the sauna door as the intake. Plenty of pre-built kits rely on this. The door hangs with a 1/2 to 3/4 inch gap at the bottom that works as a passive intake slot, so you only need to add an exhaust. The tradeoff is less control over airflow direction, and if someone drops a towel across the gap the whole system stops.
Floor penetrations work in saunas built over a crawl space or on a platform with reachable space below. Install a small grille in the floor near the heater that vents down into the sub-floor, which connects to the outside through the foundation. Your interior paneling stays completely intact. It is less common but it works well.
For a portable sauna or tent-style sauna, most makers build in vent flaps. If yours does not, a small zippered vent panel (or just leaving the door slightly ajar) gets you the same result with no cutting.
What does it cost to add ventilation to an existing sauna?
Materials for a basic two-vent retrofit are cheap. An adjustable louvered wood vent in cedar or basswood runs $15 to $40 apiece at lumber yards or online sauna suppliers. You need two for a full system, so figure $30 to $80 in vent covers. Add $10 to $20 for an exterior cap and duct sleeve if you are going through to the outside, plus caulk and screws.
Tool rental (jigsaw, oscillating tool) adds $30 to $50 if you do not own them. Total DIY materials: $50 to $150 for an interior-to-adjacent-space system, $100 to $250 for a through-wall exterior penetration.
Hire a contractor and a simple vent install runs $200 to $600, mostly labor. Significant framing work, patched exterior siding, or a duct run through an attic can push it to $800 to $1,200. Get two quotes.
One upgrade is worth paying for if your sauna sits in a finished room: a finish carpenter who can match the cedar trim around the vent so it looks intentional. A $50 vent inside a $100 trim package beats a $50 vent with raw cut edges every time.
How does ventilation differ for electric vs. wood-burning saunas?
The geometry is identical for both: low intake, high exhaust, convection loop. Wood-burning saunas add one thing, combustion air.
A wood stove needs fresh oxygen for the fire. If your intake is too small or too far from the stove, the fire starves, smokes badly, and can backdraft into the room. The combustion air intake should be as low as possible, ideally within 12 inches of the firebox air inlet on the stove [2].
So size the intake generously on a wood-burning sauna, at least 1.5 times the calculated minimum free area. The stove pulls combustion air from the same vent the people use, so you want enough volume for both jobs.
Electric heaters have no combustion demand, so standard sizing applies. One quirk with electric: many modern units cycle the element on and off with a temperature sensor. A well-ventilated electric sauna actually holds a more even temperature, because the heater is not fighting CO2 buildup and moisture saturation.
Steam-heavy setups (a steam room or a sauna where you throw a lot of loyly water on the rocks) need a bit more exhaust than a dry sauna, since moisture-laden air is heavier and slower to rise. Size the exhaust up 20 to 25 percent if you throw water often.
Are there building code requirements for sauna ventilation?
In the US, saunas fall under Chapter 31 of the International Residential Code (IRC) for single-family homes, and under NFPA 211 plus local mechanical codes for commercial installs [3]. The IRC does not spell out sauna vent free area in square inches at the federal level, but it does require enclosed rooms with a heat source to meet minimum ventilation standards, and most state amendments add specifics.
The code question that matters most for homeowners is not vent size. It is whether your install needed a permit at all. If a permit was pulled, the inspector should have reviewed ventilation as part of that process. If no permit was pulled (common for pre-built kits dropped into an existing room), meeting local mechanical code is on you.
Commercial saunas in gyms, spas, and hotels answer to ASHRAE Standard 62.1 for ventilation rates [4]. The standard sets minimum outdoor air rates for occupied spaces, and most health departments apply those thresholds to commercial sauna rooms. Running a commercial facility means a licensed mechanical engineer signs off on the design.
The Finnish Sauna Society's construction guidelines carry no legal weight in the US, but inspectors and contractors lean on them because no US standard is as specific about sauna ventilation [1]. If you want to see what "right" looks like, their published specs are the clearest benchmark out there.
How do you know if your current sauna ventilation is working?
Start with the tissue test from the install section. No movement at either vent during normal operating temperature means the vents are blocked, undersized, or both.
Past the tissue, here are real signs the air is not moving enough:
Headache or dizziness after 10 to 15 minutes. Often CO2, not heat. You should sit comfortably at 160 to 180 F for 15 to 20 minutes. Feel off sooner, with the temperature in normal range, and air quality is the likely culprit.
Condensation on the door glass or walls that will not clear. Some condensation is normal. If it lingers 5 to 10 minutes after you open the door post-session, moisture is not leaving fast enough.
Mold or mildew smell. Moisture has found wood it should not touch. Check the framing and insulation behind the paneling near the ceiling and floor.
A heater that cycles on constantly. A well-ventilated sauna holds temperature more efficiently because the air is drier. If the heater runs nonstop even at steady state, trapped humidity is making it work harder.
The most objective tool is a CO2 meter at bench height. Outdoor CO2 sits around 420 ppm [5]. ASHRAE puts the acceptable indoor ceiling at 1,100 ppm [4]. A poorly ventilated sauna with two people can hit 2,000 to 3,000 ppm inside 10 minutes. A $30 to $50 CO2 monitor tells you exactly where you stand.
What mistakes do people make when retrofitting sauna vents?
The most common mistake is putting intake and exhaust on the same wall at similar heights. That creates short-circuit ventilation and changes almost nothing about the air the rest of the room. Opposite walls, or opposite heights. Always.
Second most common: an unpainted metal vent that rusts in sauna humidity. Use cedar, basswood, or stainless steel covers inside. Galvanized steel rusts within a season at sauna heat and humidity.
Third: venting into a confined attic or a sealed wall cavity. If your exhaust opens into an unvented attic bay, you have just moved the moisture problem from the sauna into the attic. Wherever the exhaust exits, confirm real airflow carries the moisture away [7].
Fourth: installing a vent and never touching it again. Both vents should adjust, so you can dial airflow down while heating up (to reach temperature faster) and open them wide during the session. A vent stuck fully open makes the heater work much harder in cold weather.
Fifth: ignoring the vapor barrier. Most home saunas have a foil vapor barrier behind the paneling to protect insulation and framing. Cutting for a vent cuts that barrier. Seal around the duct sleeve with aluminum foil tape on the interior side before you install the cover [8]. Leave a gap and humid sauna air finds the insulation behind the wall and rots the framing from the inside.
Should you upgrade your sauna ventilation at the same time as other upgrades?
Yes, and the order matters. If you are already replacing the heater, adding rocks, or re-lining the interior, that is the moment to fix ventilation. The walls are partially open anyway, which makes cutting and patching vents far easier.
Buying a new sauna (you can browse what is available at SweatDecks)? Confirm the manufacturer's spec sheet includes vent placement guidance before you install. A surprising number of entry-level kits include vent covers in the box but leave placement entirely to the installer with no instructions. Do not assume a kit ships with adequate ventilation just because it came with covers.
Ventilation ties directly to the sauna benefits you are chasing. Cardiovascular stress response, heat acclimation, and the relaxation response all depend on staying in the room comfortably for 15 to 20 minutes at proper temperature. Bad air cuts sessions short and blunts the effect. Fix the air first and every other upgrade pays off more.
Frequently asked questions
Can I use a bathroom exhaust fan as a sauna vent?
Not as the primary exhaust. Standard bathroom fans are not rated for sustained temperatures above 130 to 140 F, and saunas run 160 to 195 F. The motor and plastic housing degrade fast. If you want powered exhaust, use a fan rated for sauna or high-temperature use. Passive louvered vents are simpler, cheaper, and more reliable for this.
How do I add ventilation to a sauna with no exterior wall access?
Vent into an adjacent interior space (utility room, closet, hallway) instead of straight outside. That space needs its own path to outside air so moisture can eventually escape. You can also run a ceiling exhaust into an attic, as long as the attic itself is vented. Door-gap intake is another option that requires no cutting at all.
What is the minimum vent size for a 2-person home sauna?
A 4x6 foot two-person sauna holds roughly 168 cubic feet. Using the standard rule of 1 square inch of free vent area per cubic foot, you need at least 168 square inches of free intake area and about 185 of exhaust. In practice, two 4x12 louvered vents (roughly 30 to 35 square inches free area each) near the floor and ceiling handle a standard two-person session.
Will adding vents lower my sauna temperature?
Slightly, if you leave them fully open during heat-up. Standard practice is to close or partly close both vents while the sauna heats, then open them fully once you are inside. That balances quick heat-up against air exchange during use. Once you are seated, a properly sized system should not drop the temperature more than 5 to 10 F.
Can poor sauna ventilation be dangerous?
Yes. CO2 buildup in a poorly ventilated enclosed space causes headache, dizziness, and impaired judgment, on top of the dehydration risk of prolonged heat [6]. The Finnish Sauna Society specifies 3 to 8 full air exchanges per hour precisely to prevent this. If you feel unwell faster than the heat alone should explain, check your air quality before you use the sauna again.
How do I vent a barrel sauna outdoors?
Barrel saunas have curved walls, which makes rectangular cutouts tricky. Many makers sell pre-cut vent plugs sized for their exact wall thickness. Put the intake on the end wall near the heater, low. Put the exhaust on the opposite end wall near the roof peak, or straight through the roof with a gravity cap. Seal around the vent sleeve with high-temperature exterior silicone.
Does a sauna need both intake and exhaust vents, or can one do the job?
You need both. A single vent works as intake and exhaust at the same opening, so fresh and stale air compete and net movement is tiny. The convection loop that drives ventilation needs separate entry and exit points at different heights. One vent beats none, but it is not an adequate long-term fix.
What material should sauna vent covers be made from?
Cedar and basswood are standard for interior covers. They handle sauna heat and humidity without warping and do not off-gas the way painted or coated woods can. Stainless steel is another good choice, especially for the exterior cap on a through-wall vent. Avoid galvanized steel inside (it rusts) and most plastics (they soften or warp above 160 F).
How often should I replace or clean sauna vents?
Inspect them once a year. Cedar covers need little more than brushing out dust and checking that the louvers still move freely. Check the exterior cap on a through-wall vent each spring for wasp nests and debris. If louvers warp and no longer close, replace the cover, usually a $20 to $40 part that installs in minutes.
Is sauna ventilation different for infrared saunas?
Infrared saunas run cooler (120 to 140 F versus 160 to 195 F for traditional) and make much less steam. The ventilation need is lower but still real. CO2 builds up regardless of heat type, and moisture from sweating still needs a path out to protect the wood. The same low-intake, high-exhaust geometry applies, though you can get by with slightly less free area.
Can I add a mechanical ventilation system to a sauna?
Yes, for larger commercial-style home saunas (6 or more people, daily use). Use a fan rated for high-temperature environments, wired to the sauna control so it runs whenever the room is occupied. A 50 to 80 CFM high-temperature fan on the exhaust side, paired with a passive intake, gives consistent airflow. For a typical 2 to 4 person home sauna, passive vents are enough and simpler.
Does adding ventilation affect the sauna humidity for loyly (steam)?
Yes, and it is a balance. More ventilation means steam from water thrown on the rocks dissipates faster, which some traditionalists dislike. The common fix is an adjustable intake: close it partway when you throw water to let steam build, then open it fully after the burst passes. An exhaust that is too large or too open flushes steam out before you feel it.
What is the difference between sauna ventilation and a sauna vs steam room setup?
A traditional sauna runs at low humidity (5 to 20 percent) and high temperature (160 to 195 F). A steam room runs near 100 percent humidity and lower temperature (100 to 120 F). Steam rooms need sealed, mold-resistant surfaces and a dedicated drain, more than vents. Sauna ventilation is passive and relies on convection; steam room ventilation is usually mechanical and more involved. See our sauna vs steam room comparison for detail.
Sources
- Finnish Sauna Society, Sauna Construction Guidelines: Air in a traditional sauna should be fully exchanged 3 to 8 times per hour; exhaust vent should be 10-20% larger than intake
- NFPA 211, Standard for Chimneys, Fireplaces, Vents, and Solid Fuel-Burning Appliances: Wood-burning appliances require adequate combustion air supply close to the firebox
- International Residential Code (IRC), Chapter 31, Special Construction: IRC Chapter 31 covers saunas and requires enclosed rooms with heat sources to meet minimum ventilation standards
- ASHRAE Standard 62.1, Ventilation for Acceptable Indoor Air Quality: ASHRAE recommends keeping occupied spaces below 1,100 ppm CO2 for acceptable air quality and specifies minimum outdoor air ventilation rates
- NOAA Global Monitoring Laboratory, Trends in Atmospheric CO2: Normal outdoor atmospheric CO2 concentration is approximately 420 ppm
- U.S. Consumer Product Safety Commission, Carbon Monoxide Information Center: CO2 and combustion byproduct buildup in enclosed heated spaces poses health risks including dizziness and impaired judgment
- EPA Indoor Air Quality: Inadequate air exchange in enclosed spaces leads to elevated CO2 and moisture buildup contributing to mold growth
- U.S. Department of Energy, Building Technologies Office: Vapor barriers should be sealed around any penetrations to prevent moisture migration into wall assemblies
- International Mechanical Code (IMC), Chapter 5, Exhaust Systems: Mechanical exhaust requirements for enclosed heated rooms under the International Mechanical Code
- CDC, National Institute for Occupational Safety and Health (NIOSH): NIOSH guidance on CO2 in occupied spaces; elevated levels above 2,000 ppm are associated with measurable cognitive impairment

Share:
Sauna fresh air intake CFM calculation: the complete guide
Sauna oxygen levels during a session: what actually happens