
Last updated 2026-07-11
TL;DR
A spark arrestor is a mesh cap on your sauna chimney that catches burning embers before they reach your roof or nearby brush. The IRC requires 19-gauge corrosion-resistant wire with openings between 3/8 inch and 1/2 inch. Installation means seating the cap, sealing the joint, and confirming the 2-10-3 height rule. Plan on two to four hours and $20 to $150 in parts.
What is a spark arrestor and why does a wood burning sauna stove need one?
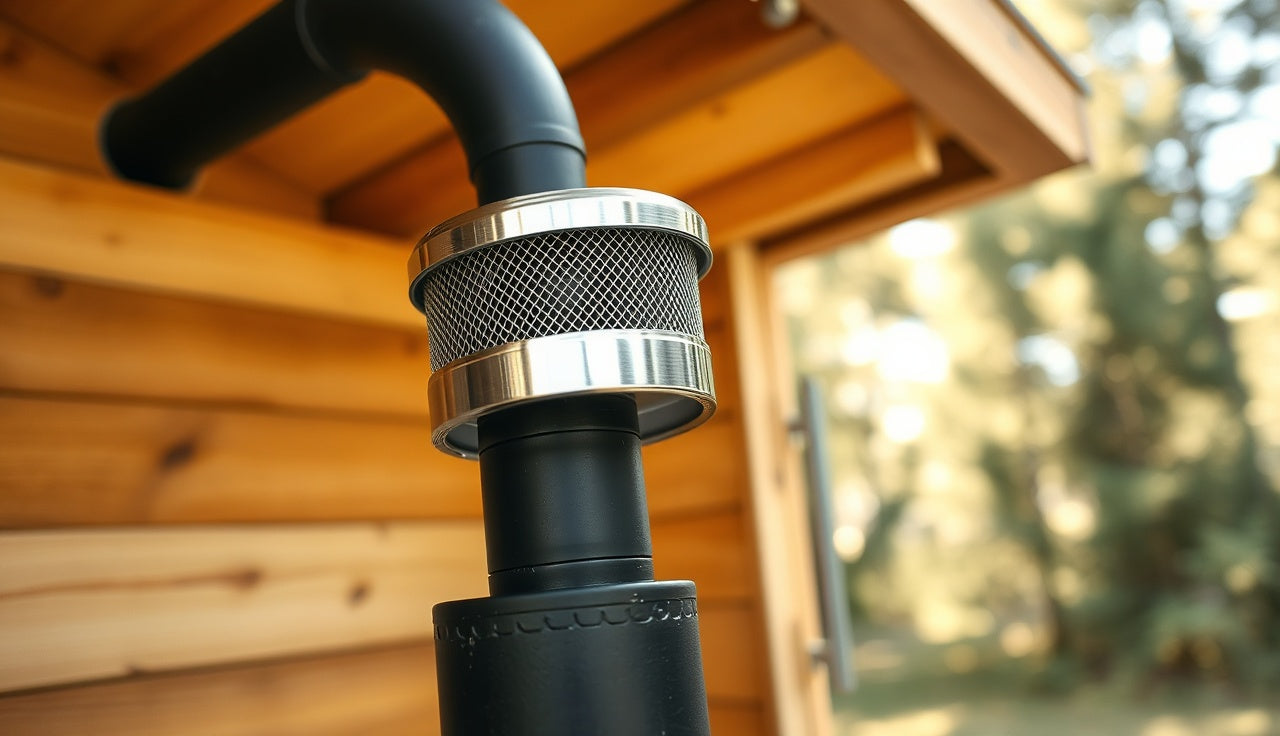
A spark arrestor is a wire-mesh cap fitted at the top of a chimney. Its job is simple. It catches glowing embers and wood fragments before they leave the flue and land somewhere they shouldn't. On a sauna stove, combustion runs hot and the fuel load changes every time you feed it another split of birch, cedar, or pine. Sparks happen more often than most people expect.
The risk is real. The U.S. Fire Administration ties a meaningful share of residential structure fires to solid-fuel heating appliances, and embers exiting an unprotected flue are a documented ignition path, especially for outdoor saunas with wood or cedar-shake roofing close by [1]. Put your sauna within 30 feet of a tree line, dry grass, or a wood deck, and an unscreened chimney becomes a genuine hazard.
Most people building or buying a home sauna fixate on the heater, the bench height, and the wood species. The chimney termination gets treated as an afterthought. That's backwards. Get the spark arrestor right before the first fire, because retrofitting after the flue is fully assembled is annoying and sometimes means pulling sections of pipe apart.
Then there's insurance. Many homeowner's policies require solid-fuel appliances to meet local fire codes, and a missing spark arrestor is exactly the detail an adjuster points to when denying a claim after a fire.
Does the law actually require a spark arrestor on a sauna chimney?
Usually yes. The requirement comes from three overlapping sources, and any one of them can bind you.
First, the model codes. The International Fire Code (IFC) Section 315 and the International Residential Code (IRC) Section R1003 cover solid-fuel appliances and chimney terminations. IRC Section R1003.9.1 requires chimneys serving solid-fuel appliances to carry a spark arrestor with mesh openings not smaller than 3/8 inch and not larger than 1/2 inch [2]. Most U.S. jurisdictions that adopted the IRC have this on the books.
Second, state forestry rules. Many state agencies have their own open-burning and spark-arrestor requirements that kick in whenever combustion equipment runs within a set distance of wildlands. California, Oregon, and Washington all require spark arrestors on chimneys inside designated fire hazard zones. California Public Resources Code Section 4442 is one of the older and more specific examples [3], and CAL FIRE enforces arrestor requirements in state responsibility areas and wildland-urban interface zones [10].
Third, your county or city may layer on local amendments. The only way to know for certain is to call your local building or fire department before you install. Permit rules for a wood sauna stove swing widely. Some jurisdictions demand a full mechanical permit and inspection. Others treat the stove like any wood stove and want only a final inspection. A few rural counties ask for nothing.
Building an outdoor sauna in a wildland-urban interface (WUI) area? Assume the rules are stricter and get the answer in writing.
What mesh size and material specs does a spark arrestor need to meet?
The IRC sets mesh openings no smaller than 3/8 inch and no larger than 1/2 inch [2]. The reasoning is practical. Anything smaller than 3/8 inch clogs with creosote and chokes your draft. Anything larger than 1/2 inch lets embers slip through.
The IRC also calls for corrosion-resistant wire no smaller than 19 gauge (roughly 0.91 mm in diameter). Stainless steel is the choice that makes sense. Galvanized mesh works at first, but the zinc coating breaks down under sustained high flue temperatures, and a sauna stove fires hot and often. Expect to replace galvanized mesh inside two to three seasons. Stainless lasts a decade or more.
Here's how the common materials stack up:
| Material | Corrosion Resistance | Heat Tolerance | Typical Life | Approx. Cost |
|---|---|---|---|---|
| 304 Stainless Steel | Excellent | Up to ~1500°F | 10-15 years | $30-$80 |
| 316 Stainless Steel | Superior (marine) | Up to ~1600°F | 15+ years | $60-$150 |
| Galvanized Steel | Moderate | Degrades >400°F | 2-4 seasons | $15-$40 |
| Aluminum | Poor (high heat) | Melts above ~1200°F | Not recommended | N/A |
For a sauna stove running two to three hours several times a week, 304 stainless is the floor I'd accept. Step up to 316 for coastal installations where salt air chews through everything.
Check your stove manufacturer's documentation too. European brands like Harvia, Narvi, and Kota often spell out chimney termination requirements, and some ship a spark arrestor cap in the accessory kit. If yours does, use it. Bolting on something non-compliant can void the warranty and your insurance coverage in one move.
| 316 Stainless Steel | 17 |
| 304 Stainless Steel | 12 |
| Galvanized Steel | 3 |
| Aluminum (not recommended) | 0 |
Source: CSIA Homeowner's Guide; IRC Section R1003.9.1 material specs
What tools and parts do you need before you start?
Stage everything at the chimney before you climb. Nothing is worse than standing on a ladder in the rain realizing you left the hose clamp on the workbench.
Parts list:
- Spark arrestor cap sized to your flue diameter (common sizes: 6-inch, 7-inch, 8-inch inner diameter; measure your flue pipe, not the outer housing)
- High-temperature stove pipe cement or silicone rated to at least 500°F (most chimney sealants run 600°F to 1000°F)
- Stainless steel hose clamps or sheet metal screws, depending on your cap style
- Chimney cap if the spark arrestor and cap are separate components (many arrestor caps combine both in one unit)
Tools:
- Tape measure
- Wire brush or chimney brush sized to your flue
- Work gloves (flue edges cut skin)
- Safety glasses
- Cordless drill with hex bit for sheet metal screws
- Caulk gun if using tube sealant
- Ladder tall enough to reach the chimney termination safely
- Roof anchor or a second person to hold the ladder
The part people undersize most often is the ladder. Most residential sauna installations put the chimney termination 6 to 14 feet above the roofline, so you need more ladder than you think.
Working on an outdoor sauna with a metal or thermally modified wood roof? Get up there when it's cool and dry. Sauna roofs run steep, and the surface is often slicker than standard asphalt shingles.
How do you actually install a spark arrestor on a sauna stove chimney, step by step?
Here's the practical walkthrough. Adjust for your specific flue system, but the sequence rarely changes.
Step 1: Confirm the flue is clean and cool. Never work on a hot chimney. Let the stove sit at least 6 hours after the last fire. Run a chimney brush through from the top if you haven't cleaned it recently. Creosote buildup is a fire hazard on its own, and a spark arrestor does nothing if the chimney itself ignites [4].
Step 2: Measure the flue collar diameter. Measure the inside diameter of the flue pipe at the termination point. That number is your ordering spec for the cap. If you already have the cap, confirm the slip fit before you climb.
Step 3: Remove any existing termination cap. Most are held by two to four sheet metal screws. Keep the stainless ones. Toss the galvanized ones and replace them.
Step 4: Clean the pipe end. Use the wire brush to strip soot, rust, or old sealant from the top 2 to 3 inches of the flue pipe. The cap needs a clean surface to seal against.
Step 5: Apply a thin bead of high-temperature sealant around the outside of the flue pipe where the cap will sit. Don't cake it on. You want a weather seal, not a structural bond.
Step 6: Slide the spark arrestor cap over the flue pipe. Most cap-style arrestors telescope over the outside of the pipe. The mesh screen should extend above the top of the pipe.
Step 7: Secure the cap. Depending on design, that's two to four sheet metal screws through pre-drilled tabs, or a hose clamp cinched around the cap's collar. Stainless screws only. Torque until snug, not so hard you distort the metal.
Step 8: Wipe away sealant squeeze-out before it cures. High-temp silicone comes off easily when wet and fights you once it sets.
Step 9: Let the sealant cure before firing. Most high-temp silicones need 24 hours at room temperature. Check the product label.
Step 10: Fire a test run. After the first fire, go back up and confirm the cap is seated correctly and the mesh isn't blocked. A little fine ash on the inside of the mesh during the first few fires is normal and burns off.
What chimney clearances and height requirements apply to a sauna stove?
The cap has to sit at the right height for the system to draft well and pass inspection. The IRC and NFPA 211 (the Standard for Chimneys, Fireplaces, Vents, and Solid Fuel-Burning Appliances) give you the rules.
NFPA 211 Section 9.4 states that a chimney shall extend at least 2 feet above any part of the structure within 10 feet measured horizontally, and at least 3 feet above the highest point where the chimney passes through the roof [5]. This is the "2-10-3 rule" you'll see quoted everywhere.
For a sauna, that usually means the flue termination lands at least 3 feet above the point where the pipe exits the roof and 2 feet above any part of the sauna structure within a 10-foot radius. A low-pitched barrel sauna roof with the chimney near the center often needs more than 3 feet of pipe above the roofline to satisfy both thresholds at once.
Sidewall clearances matter too. The chimney shouldn't terminate within 3 feet of a window, door, or mechanical air intake, and it shouldn't sit closer than 10 feet horizontally to any combustible material if the flue exits through a wall instead of the roof (side-exit setups on some portable and barrel saunas). Exit through the roof if you can. It drafts better, it's safer, and it's what most codes expect [6].
Running a portable sauna with a collapsible flue? Check whether your jurisdiction even allows temporary solid-fuel setups. Some don't, full stop.
How often does a spark arrestor need cleaning and inspection?
More often than you think. This is where a lot of sauna owners drop the ball.
The Chimney Safety Institute of America (CSIA) recommends annual inspection of all solid-fuel appliances and cleaning whenever creosote buildup exceeds 1/8 inch [4]. For a sauna stove firing two to five times a week, annual cleaning is a reasonable minimum. Fire it daily and you should check the mesh every six months. Oregon State University Extension gives the same advice for residential wood-burning systems: arrestors plus annual flue inspection [9].
The mesh gradually loads up with a mix of creosote and fine ash. Once it partly blocks, draft suffers, the stove burns less cleanly, and smoke leaks into the room. If the stove is taking longer to reach temperature or smoke backs up through the door, check the mesh before you blame the stove.
Cleaning is straightforward. Remove the cap the same way you installed it, carry it to the ground, and scrub the mesh with a stiff wire brush. Heavy creosote softens after a 30-minute soak in hot water with a chimney cleaning chemical (sodium sulfite-based products are common). Rinse, dry, reinstall.
Replace the cap outright if the mesh shows any hole larger than 1/2 inch or the metal has corroded through. A compromised mesh doesn't stop sparks.
What can go wrong if you install the spark arrestor incorrectly?
The most common mistake is the wrong mesh opening size. Larger than 1/2 inch doesn't stop embers. Smaller than 3/8 inch clogs faster than you'll ever clean it, chokes the draft, and in a bad case pushes smoke back into the sauna during firing. Neither is acceptable.
Second most common: ordering a cap sized to the outer diameter of double-wall insulated pipe rather than the inner flue diameter. A 6-inch inner-diameter flue wrapped in a double-wall section can measure 8 or 9 inches on the outside. Order for the inner diameter, or for the specific termination collar your chimney system ends with. Check the chimney manufacturer's specs.
Third mistake: skipping sealant or grabbing regular RTV silicone instead of the high-temperature kind. Standard silicone breaks down above roughly 400°F. The exterior of a sauna chimney near the termination can hit 200 to 300°F on the pipe surface, while interior flue gas temperatures during active combustion run 400 to 700°F [7]. Use sealant rated for at least 500°F.
Fourth: not checking whether the arrestor interferes with a separate chimney or rain cap. On integrated systems the spark mesh is built into the cap and there's nothing else to add. On others you're fitting a mesh collar below an existing rain cap, so make sure that cap still sheds water once the arrestor is in place. Water pooling on ash-packed mesh corrodes it fast.
Last: don't skip the local permit and inspection check. An arrestor that's the wrong spec for your jurisdiction can fail inspection, draw fines, or complicate an insurance claim even if the physical install is clean. Get the code language in writing before you buy parts. The Consumer Product Safety Commission is blunt about this: proper installation and maintenance of solid-fuel heaters, chimney systems included, cuts fire and carbon monoxide hazards [8].
Does a spark arrestor affect draft or stove performance?
A correctly specified mesh barely touches your draft. The 3/8-inch to 1/2-inch opening range in the IRC was set to balance ember capture against airflow, and a clean stainless mesh at that spec adds negligible resistance to a properly sized flue.
Trouble starts when the mesh gets dirty. Even 30 to 40 percent blockage measurably cuts draft, which makes the fire harder to light, throws off more smoke, and drives incomplete combustion. That produces more creosote, which blocks the mesh faster. It's a loop you want to stay ahead of.
If draft drops after you fit a new cap on an otherwise healthy system, check three things. First, confirm the mesh opening is actually 3/8 inch to 1/2 inch and not finer. Second, confirm the cap isn't seated so deep into the flue opening that it chokes flow from inside the pipe. Third, look at overall flue height and diameter. An undersized flue (common on imported sauna kits that ship with 4-inch pipe when 6-inch is warranted) drafts poorly no matter what cap you use.
For reference, most wood-burning sauna stoves in the 6 to 12 kW range run well on a 5-inch to 6-inch inner-diameter flue. Heaters at 14 kW and up often need a 7-inch or 8-inch flue. Your stove manual specifies the minimum flue diameter. Treat it as a firm floor, not a suggestion.
Want the bigger picture on sauna stove types and how they differ? The sauna category covers the full range of heaters.
When should you hire a professional instead of DIYing this?
DIY is fine for most arrestor installations on a straightforward single-story sauna with an existing chimney. The parts are cheap, the task is mechanical, and the odds of getting it wrong are low if you follow the steps above and use the right specs.
Hire a certified chimney professional when the sauna chimney runs two or more stories tall, or the roof pitch is steep enough that working alone up there is genuinely risky. A fall from a sauna roof lands as hard as any other fall.
Call a pro if you suspect existing creosote buildup, a damaged liner, or an improperly installed flue section below the termination. A chimney sweep can inspect with a camera and hand you a condition report before you cap a compromised system.
Get help if your jurisdiction requires an inspection for the arrestor installation itself. Some high-wildfire-risk areas want a fire department or building inspector to sign off on chimney terminations for solid-fuel appliances. In that case, pull the permit first and ask whether the inspector wants to watch the install or just see the final.
Bring in a pro if you're retrofitting an older or salvaged wood stove whose flue doesn't match modern pipe dimensions. Off-spec systems sometimes need a custom-fabricated cap, which is work for a sheet metal shop or an experienced chimney contractor.
SweatDecks carries wood-burning sauna stoves with installation guidance, and the product pages list manufacturer-specified chimney requirements that should line up with the cap you need. Cross-reference those before you order parts on your own.
The CSIA keeps a directory of certified sweeps at csia.org if you need someone local [4].
What does spark arrestor installation typically cost?
Parts alone run $20 to $150 depending on material, flue size, and whether the cap includes a rain hood. Here's the breakdown:
- Basic galvanized cap (6-inch): $20 to $35
- Stainless steel integrated cap/arrestor (6-inch): $45 to $90
- Heavy-gauge 316 stainless cap for coastal/WUI installations: $100 to $150
- High-temperature sealant tube: $10 to $20
- Sheet metal screws (stainless, 10-pack): $6 to $12
Hire a chimney professional for a combined inspection and installation and expect $150 to $400 depending on your region and what the inspection turns up. If they find significant creosote and have to sweep the full flue before capping, add $80 to $200.
One cost that catches people off guard: the ladder. A quality fiberglass extension ladder tall enough for a two-story sauna chimney runs $150 to $300 to buy or $40 to $60 a day to rent. If you'll use it once, rent.
Total out-of-pocket for a straightforward DIY install: $80 to $200 including consumables. Professional install with inspection: $250 to $600. These figures are estimates based on 2025 industry pricing and will vary by region.
Frequently asked questions
Can I use a regular chimney cap without a mesh screen on a wood burning sauna stove?
No. A plain rain cap without mesh doesn't arrest sparks and won't satisfy the IRC or most local fire codes for a solid-fuel appliance. You need a mesh screen with 3/8-inch to 1/2-inch openings. Some caps combine both functions in one unit, which is the tidiest option. If your existing cap has no mesh, replace it before the next fire.
What happens if I skip the spark arrestor on a sauna stove chimney?
Burning embers can leave the flue and ignite roofing, dry vegetation, decking, or a neighbor's structure. Beyond the fire risk, an absent arrestor likely violates your local fire code and possibly your homeowner's insurance terms. If a fire starts and investigators find a non-compliant chimney, a denied claim is a realistic outcome.
How do I measure the right spark arrestor cap size for my sauna chimney?
Measure the inside diameter of the flue pipe at the termination point, not the outer housing of double-wall insulated pipe. Common sauna stove flue sizes are 5-inch, 6-inch, 7-inch, and 8-inch inner diameter. If your flue uses a proprietary termination collar from a specific brand (Harvia, Narvi, and so on), check whether that brand sells a matching cap.
Do outdoor barrel saunas need a spark arrestor even when they're not near any structure?
Yes, in most jurisdictions. Arrestor requirements typically apply to any solid-fuel appliance regardless of proximity to other structures. Distance from vegetation matters too. Many state forestry rules require arrestors when a chimney sits within a set distance of combustible brush or trees. Check your state's fire or forestry agency rules alongside the local building code.
What temperature rating does the spark arrestor sealant need to be?
Use sealant rated for at least 500°F. Flue gas temperatures on an active wood-burning sauna stove run 400 to 700°F inside the pipe, and the exterior pipe surface near the termination can reach 200 to 300°F. Standard RTV silicone (usually rated to around 400°F) degrades and fails. Look for products labeled high-temperature or stove and chimney sealant.
How often should I clean the spark arrestor mesh on a sauna stove?
Inspect at minimum annually and clean whenever you see ash or creosote blocking the mesh. Fire the sauna two or more times a week and you should check the mesh every six months. The CSIA recommends cleaning when creosote anywhere in the flue exceeds 1/8 inch. A blocked mesh cuts draft and drives incomplete combustion, which makes the problem worse over time.
Does the 2-10-3 chimney height rule apply to sauna stoves?
Yes. The rule from NFPA 211 requires the chimney to extend at least 3 feet above the highest point where it passes through the roof, and at least 2 feet above any part of the structure within 10 feet horizontally. Sauna roofs are often low-pitched, so you may need more pipe height than you'd expect to satisfy both conditions at once.
Can I install a spark arrestor on a single-wall stovepipe or does it need to be double-wall insulated pipe?
The arrestor cap attaches to whatever pipe terminates the flue, single-wall or double-wall. The bigger question is whether single-wall pipe belongs in your installation at all. Single-wall stovepipe has much tighter clearance requirements (typically 18 inches to combustibles) and generally isn't suitable for sections passing through walls or roofs. Double-wall insulated pipe is the right choice for those penetrations regardless of arrestor type.
Will a spark arrestor prevent all chimney fires?
No. An arrestor stops burning embers from leaving the flue and igniting external materials. It does nothing about creosote fires inside the flue, which start from buildup on the interior walls. The things that prevent chimney fires are burning dry wood, keeping adequate draft, and cleaning the flue before creosote piles up. Annual sweeping is the real prevention.
Is stainless steel mesh always better than galvanized for a sauna chimney spark arrestor?
For a sauna stove fired regularly, yes. Galvanized mesh loses its zinc coating under sustained high heat and rusts through within a few seasons. Stainless steel, 304 or 316 grade, holds up for a decade or more under normal use. The price gap between galvanized and stainless caps is usually $20 to $50, trivial against the cost of replacement and the hassle of repeat roof work.
Does installing a spark arrestor require a permit?
It depends on your jurisdiction. Some areas fold arrestor installation into the original solid-fuel appliance permit and require inspection. Others have no permit requirement for adding or replacing a chimney cap. In wildfire-prone areas, arrestor compliance may fall under fire department inspection. Call your local building or fire department before starting. Getting it wrong is a headache; getting it right takes one phone call.
What's the difference between a spark arrestor and a chimney cap?
A chimney cap is a hood that keeps rain, animals, and debris out of the flue. A spark arrestor is the wire mesh that stops burning embers from exiting. Many products combine both in one unit, which is what you want for a wood-burning sauna stove. If you buy them separately, install both together, with the mesh positioned so it surrounds the entire open area of the flue termination.
Sources
- U.S. Fire Administration, Home Heating Fires report: Solid-fuel heating appliances and embers from unprotected flues are a documented ignition pathway in residential structure fires
- International Residential Code (IRC), Section R1003.9.1, International Code Council: Chimneys serving solid-fuel appliances shall be equipped with a spark arrestor with mesh openings no smaller than 3/8 inch and no larger than 1/2 inch, constructed of corrosion-resistant wire not smaller than 19 gauge
- California Public Resources Code Section 4442, California Legislative Information: California law requires spark arrestors on chimneys in designated fire hazard zones
- Chimney Safety Institute of America (CSIA), Homeowners Guide to Chimney Maintenance: CSIA recommends annual chimney inspection and cleaning whenever creosote buildup exceeds 1/8 inch; provides directory of certified chimney sweeps
- NFPA 211, Standard for Chimneys, Fireplaces, Vents, and Solid Fuel-Burning Appliances, Section 9.4, National Fire Protection Association: Chimney shall extend at least 2 feet above any part of the structure within 10 feet and at least 3 feet above the highest point where the chimney passes through the roof (2-10-3 rule)
- International Residential Code (IRC), Chapter 10 Chimneys and Fireplaces, International Code Council: Chimney terminations must maintain specified clearances from windows, doors, and mechanical air intakes
- EPA Burn Wise Program, Wood Smoke and Your Health: Wood-burning appliance flue gas temperatures during active combustion commonly reach 400 to 700°F depending on fuel moisture and burn rate
- U.S. Consumer Product Safety Commission, Solid Fuel Heaters Safety Information: Proper installation and maintenance of solid-fuel heaters, including chimney systems, reduces fire and carbon monoxide hazards
- Oregon State University Extension Service, Wood Heat Safety: Spark arrestors and annual flue inspection are recommended for all residential wood-burning systems
- California Department of Forestry and Fire Protection (CAL FIRE), Spark Arrestor Requirements: CAL FIRE enforces spark arrestor requirements for chimneys in state responsibility areas and wildland-urban interface zones

Share:
Carbon monoxide risk in wood-burning saunas: what you need to know
How to breathe during cold plunge immersion (and why it matters)