
Last updated 2026-07-11
TL;DR
A hearth pad under a wood burning sauna stove must extend at least 18 inches in front of the firebox door and 8 inches on the other three sides under NFPA 211. Many local codes and stove manuals require more. The pad has to be non-combustible and, for short-leg stoves, thick enough to add R-value. Verify your local fire code before cutting anything.
What is a hearth pad and why does a wood burning sauna stove need one?
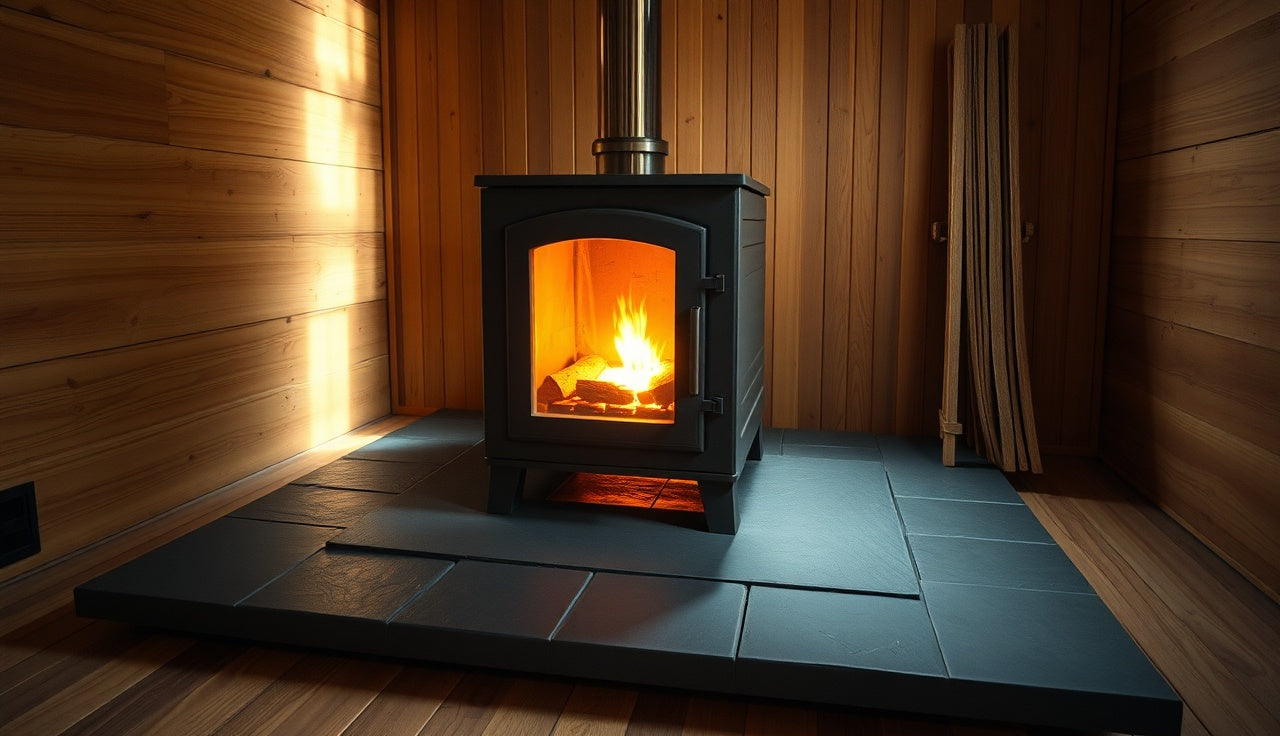
A hearth pad is a non-combustible platform on the floor beneath and around a wood burning stove. Its job is simple. Stop the floor from charring or catching fire over hundreds of heat cycles.
Wood burning sauna stoves (called kiuas in Finnish) run hotter than most indoor wood stoves. A typical stove surface reaches 500°F to 900°F [1], and the floor directly below takes continuous radiant heat during a two- to three-hour session. Timber subfloors, tongue-and-groove pine decking, and even cement board laid over wood framing can degrade or ignite without protection.
The pad does two jobs at once. It blocks radiant heat from reaching anything combustible below, and it catches embers or ash that spill when you open the firebox door. Both jobs depend on the dimensions. Too small and the exposed floor at the edges is still at risk. Too thin and heat conducts straight through to the subfloor.
On a home sauna build, the hearth pad feels like paperwork right up until the day you skip it and the pine under the stove starts to darken.
What are the minimum hearth pad dimensions required by code?
The baseline is 18 inches of non-combustible floor protection in front of the firebox door and 8 inches on the sides and rear, per NFPA 211. Your stove's installation manual can require more, and it wins whenever it does.
NFPA 211 is the Standard for Chimneys, Fireplaces, Vents, and Solid Fuel-Burning Appliances, and it is the most widely adopted reference for floor protection in the U.S [2]. The 18-inch front zone is the ember-catch area. The 8-inch side and rear zones handle radiant spread.
Those numbers assume the stove legs hold the firebox bottom more than 6 inches off the floor. If the firebox bottom sits 6 inches or less above the floor, the standard raises the thermal demand on the pad and requires the protection to run under the full stove body with documented R-value, more than around the edges.
Most jurisdictions adopt the International Residential Code, which points to the appliance manufacturer's listing as the controlling document [3]. Translation: the installation manual overrides the generic NFPA minimums whenever the listed clearances are larger. Pull the manual for your exact stove before you size a pad.
Some states stack their own rules on top. California requires an air quality district permit for most new wood burning appliances [4], and inspectors in those districts often hold the pad to NFPA 211 or larger no matter what the manufacturer lists.
| Zone | NFPA 211 minimum | Typical manufacturer listed |
|---|---|---|
| Front of firebox door | 18 in | 16 to 24 in |
| Sides of stove | 8 in | 8 to 12 in |
| Rear of stove | 8 in | 8 to 12 in |
| Under stove body (legs >6 in) | Required | Required |
| Under stove body (legs ≤6 in) | Required + R-value pad | Required + R-value pad |
How do you calculate the total hearth pad size for your specific stove?
Start with the stove footprint at floor level. Measure the length and width of the stove base, not the cabinet or stone surround above it.
Then add the clearances:
- Pad length = stove depth + front clearance + rear clearance
- Pad width = stove width + left side clearance + right side clearance
Example. A stove 20 inches deep and 18 inches wide, using NFPA 211 minimums (18 in front, 8 in on the other three sides):
- Pad length = 20 + 18 + 8 = 46 inches
- Pad width = 18 + 8 + 8 = 34 inches
That is a 46 x 34 inch pad. Round up to the next clean tile or slate dimension so your cuts are simple. For that stove, most installers go to 48 x 36 inches.
Corner placement does not change the math. The side and rear clearances still apply independent of the walls. A corner just pushes two of your clearance zones out into the room instead of toward a wall. Check the stove's listed wall clearances separately, because those govern the gap to the wall, not the floor pad.
Outdoor builds change the substrate, not the formula. Pressure-treated lumber is still combustible. The pad has to sit on or extend to the edge of any wood decking in the protection zone [5]. If you are building an outdoor sauna, run the pad to the deck edge or pour a concrete pad poured independent of the wood platform.
| Front of firebox door | 18 |
| Left side of stove | 8 |
| Right side of stove | 8 |
| Rear of stove | 8 |
Source: NFPA 211, Standard for Chimneys, Fireplaces, Vents, and Solid Fuel-Burning Appliances, 2022 edition
What materials work for a sauna hearth pad?
Non-combustible is the only category, and that word has a specific meaning. Under ASTM E136, a non-combustible material does not ignite, burn, support combustion, or release flammable vapors when heated to 1382°F (750°C) [6].
Materials that qualify and get used all the time:
- Ceramic or porcelain tile (over cement board, never over bare plywood)
- Natural stone: slate, granite, marble, soapstone
- Brick or firebrick (common in traditional Finnish builds)
- Cement board (as the base under tile, sometimes as the finished surface)
- Steel plate (fully compliant but slippery when wet, which matters in a sauna)
Materials people try and shouldn't:
- Backer board over plywood with no other non-combustible layer. Plywood burns. NFPA 211 wants the non-combustible protection to run down through the assembly, not sit on top as a veneer.
- Luxury vinyl tile or vinyl plank. Combustible, and it deforms well below sauna temperatures.
- Laminate flooring. Same failure.
Thickness drives R-value. If your stove has short legs (under 6 inches) or no legs, NFPA 211 and most manuals require a pad with enough thermal resistance to protect the floor from sustained conductive heat. A 3/4-inch cement board base plus 3/8-inch porcelain tile satisfies many listings. For very low stoves, a layer of mineral wool board (non-combustible, and not the same thing as fiberglass batt) under the tile adds real R-value [7].
Soapstone deserves a note. Finnish builders have used it for generations because it holds and releases heat slowly, so it steadies the floor temperature instead of spiking it. It costs more than tile, but the thermal mass works for you in a sauna.
Does hearth pad thickness change if the stove has short legs?
Yes, and this is the detail most DIY builders miss. When the firebox bottom sits 6 inches or less above the floor, the pad has to carry documented R-value, more than cover the area.
A low firebox loads the floor directly below with far more radiant and conductive heat. NFPA 211 answers this by requiring the floor protection to handle that increased load, which in practice means a rated R-value for the assembly [8].
Most manufacturers put a minimum R-value for short-leg configurations in the installation manual. A common target is R-1.5 to R-2.0 for the floor protection layer. A 3/4-inch cement board alone gives you roughly R-0.13. You need more insulating material to close that gap.
One tested route: pour a 2-inch concrete slab directly on the subfloor. Concrete has a low R-value but high thermal mass, and 2 inches of it over wood framing has been accepted by many inspectors for low-leg stoves because the mass soaks up and spreads the heat before it reaches the wood. Not every inspector signs off without a documented thermal calculation, though. Get the AHJ (Authority Having Jurisdiction) on record before you pour.
The other route is a proprietary hearth pad system listed for solid fuel appliances. Companies build steel-and-mineral-board sandwich pads with published listing data. They cost more than a DIY tile job and they end the R-value guessing.
What wall clearances interact with hearth pad placement?
Wall clearance and pad size are separate rules, but they push on each other. The farther the stove has to sit from the wall, the farther the whole pad pushes into the room.
Listed wall clearances for wood burning sauna stoves usually run 6 to 12 inches from a combustible wall on the sides and rear. Some models drop to 3 or 4 inches with a listed heat shield [9]. You can cut the listed clearance by installing a non-combustible wall shield with a 1-inch air gap behind it. NFPA 211 Table 8.3.1 allows up to a 66% reduction when a properly spaced shield covers the full stove height.
Here is why that touches the pad. Say your stove needs 10 inches from a combustible rear wall. You push it 10 inches out. The front of the stove now sits 10 inches deeper into the room than it would with a shield and a 4-inch clearance. That shifts the entire pad forward, and the 18-inch front ember zone lands farther from the wall. In a 6 x 6 foot sauna, that swing eats into your bench space fast.
A listed shield protects the wall. It does not shrink the floor pad. The pad dimensions stay exactly the same.
For a portable sauna or a kit sauna with pre-built walls, the installation guide pins the stove location relative to the walls, which pins your pad location. Follow that guide first, then confirm the floor clearances are met.
How do I know if my existing floor can support a hearth pad?
Run the numbers on total weight over a small area. A loaded stove plus pad concentrates 200 to 500 pounds into roughly 12 square feet, which sits right at the edge of a typical residential floor design.
A tile-over-cement-board pad weighs 4 to 8 pounds per square foot. A 48 x 36 inch pad (12 square feet) runs 48 to 96 pounds bare. A medium sauna stove with a full load of stones weighs 150 to 400 pounds [10]. Add them and a loaded stove plus pad concentrates 200 to 500 pounds in that footprint.
Most residential joists (2x8 or 2x10 at 16 inches on center) are designed for a 40 psf live load plus a 10 to 15 psf dead load under IRC Table R301.5 [11]. A 500-pound load spread over 12 square feet is about 42 psf, which is essentially the design limit.
Basement on a concrete slab? Load is not an issue. Wood-framed floor? Check the joist span. Long spans under heavy stone loads deflect, and a cracked tile a year later is the first symptom. For heavy stoves, a short post or a doubled joist under the stove location is cheap insurance.
Outdoor decks raise the same question a different way. A deck rated for 40 psf live load can carry a sauna stove, but only if the load spreads. Four stove legs punching a point load can beat local bearing capacity even when the deck passes the psf math.
Do local building codes differ from NFPA 211 for sauna stoves specifically?
They can, and in a handful of states the gap is real. Most jurisdictions adopt the IRC with local amendments, and the IRC defers to the manufacturer's listing for solid fuel appliance clearances [3]. So if your stove is listed with specific floor protection numbers, those control, and the inspector checks the install against the manual.
Some jurisdictions adopt NFPA 211 on its own or add amendments that set a floor (pun intended) on how small the pad can be regardless of listing. California, Oregon, and Washington all have jurisdictions layering air quality and fire safety rules on top of the base IRC [4]. Hawaii has extra requirements tied to wildfire interface zones.
A few rural counties adopt no local code and lean on the state code only. Even there, NFPA 211 is the professional standard of care, mandated or not.
Call your building department and ask two things. Do they require a permit for a wood burning appliance in an accessory structure, which a sauna often is? And which standard governs floor protection? Those two answers cover almost everything. Permits are sometimes waived below a certain BTU threshold or for detached buildings under a certain square footage, but that varies county to county.
Stoves imported from Finland or Scandinavia complicate the path. Many carry CE marking but no UL listing. Some inspectors accept CE-marked stoves with the manufacturer's published clearance data. Others want a third-party field evaluation. Sort that out before you buy.
What does a proper hearth pad installation look like step by step?
The sequence is not the place to freelance. Each layer has a job and they go down in order.
Step 1: Mark the stove location on the subfloor, then mark the full pad footprint with every clearance included. Check it against the installation manual twice.
Step 2: If you are adding R-value for a short-leg stove, lay the mineral wool or other listed insulation board first, fastened to the subfloor with non-combustible fasteners.
Step 3: Install cement board (1/2 inch minimum, most pros use 5/8 or 3/4 inch here) over the subfloor or insulation. Use cement board screws, not drywall screws. Tape the seams with alkali-resistant fiberglass mesh.
Step 4: Trowel thinset and set the tile or stone. Use a mortar rated for high heat (floor tile mortar, not mastic). Large-format tile (18 x 18 or 24 x 24) cuts grout lines, which cuts failure points.
Step 5: Grout with sanded or unsanded grout matched to your joint width. Sealers are optional and usually unnecessary here, since the grout under a stove is not seeing standing water.
Step 6: Let the assembly cure fully (72 hours minimum for thinset) before the stove goes on.
Step 7: Have it inspected if your jurisdiction requires it before the first fire.
SweatDecks carries wood burning sauna stoves sized for small cabin builds and larger family saunas, each with a manual that spells out the pad requirement for that model. Build the pad to your specific stove, never to a generic standard.
Can you use a pre-made hearth pad or does it have to be custom built?
Pre-made pads are a legitimate option and sometimes the smarter one. Several companies make listed hearth pad systems for solid fuel appliances: steel face plates over a mineral board core, sometimes finished with stone or tile. They carry UL 1618 data (the standard for floor protectors for free-standing space heaters) or UL 1482 data for solid fuel appliances [12].
The advantage is documented thermal performance. The inspector reads the listing instead of you calculating R-values. The downsides are cost ($150 to $400 for a standard size) and fixed dimensions. Most come in 36 x 36, 40 x 40, 42 x 48, or similar. If your stove needs a 52 x 38 pad, you buy the next size up or go custom.
For a sauna specifically, the case for custom tile or stone is strong. A sauna is a warm, steam-exposed room and the pad is a permanent visible feature. Slate or granite matched to your bench color looks intentional. A steel-edge listed pad looks like it wandered in from a utility room.
That said, if you are building a plain utility sauna in a garage and you want it done in a day, a listed pre-made pad is a sound call. Buy the next size up from your calculated minimum for margin.
What are the most common mistakes people make sizing a sauna hearth pad?
Measuring the cabinet instead of the firebox. Clearance zones measure from the firebox opening, not the outer edge of the decorative cabinet. If your stove has a wrap-around stone skirt or legs that extend past the firebox, the firebox is still your front measurement point.
Ignoring the manual in favor of generic code. NFPA 211 sets minimums. The manufacturer's listing can be more conservative. Use whichever demands the larger pad.
Tiling over plywood with no cement board. This fails the NFPA combustibility rule and basic tile practice at the same time. Plywood moves with moisture and cracks the tile within a season or two in a sauna.
Forgetting the pad has to be level. A stove with a tilted firebox door will not seal right. The pad sets the stove's reference plane. If the subfloor crowns or dips, shim the cement board before you tile.
Sizing the pad to the smallest legal dimensions, then buying a bigger stove later. Stove and pad are a matched set. Buy the stove first, build the pad to that stove's manual.
Skipping the permit because it is an outbuilding. Many jurisdictions specifically pull accessory structures and detached saunas into solid fuel appliance permitting. A fire in an unpermitted install can void homeowner's insurance coverage. That is not a risk worth carrying.
Frequently asked questions
What is the minimum hearth pad size for a wood burning sauna stove?
Under NFPA 211, the minimum is 18 inches in front of the firebox door and 8 inches on the sides and rear. Your stove's installation manual may require more, and local code can add further requirements. Always use whichever number is largest: the NFPA minimum, the manufacturer's listed requirement, or your local code.
Does a wood burning sauna stove need a hearth pad if the floor is already concrete?
If the finished floor is solid poured concrete (not cement board over wood framing), a separate hearth pad is generally not required by NFPA 211, since concrete is non-combustible. But your stove's manual may still call for a pad for ember catch. Check the manual and confirm with your local inspector before skipping it.
Can I use regular ceramic tile for a sauna stove hearth pad?
Yes. Standard ceramic or porcelain tile is non-combustible and acceptable. It has to sit over a cement board substrate, not over plywood alone. Use a high-temperature floor tile mortar, not mastic. The tile handles the heat fine. The failure point in most DIY pads is the combustible substrate hidden underneath.
How thick should a hearth pad be under a wood burning sauna stove?
For stoves with legs more than 6 inches tall, a 1/2-inch to 3/4-inch cement board base plus standard tile thickness is usually enough. For low-leg stoves (6 inches or less), you need added R-value, typically from mineral wool board or a listed pad system. Many manuals specify a minimum R-value of R-1.5 to R-2.0 for that configuration.
What is the front clearance requirement for a sauna stove hearth pad?
NFPA 211 requires 18 inches from the firebox door opening. This zone catches embers when you open the door to add wood. Some manufacturers list 16 or 24 inches depending on the firebox design. The front clearance is almost always the largest single dimension and drives the total pad length calculation.
Do I need a building permit to install a wood burning sauna stove with a hearth pad?
It depends on your jurisdiction and whether the sauna is in your main home or an accessory structure. Many counties require a solid fuel appliance permit for any wood burning stove, including those in detached saunas. Call your building department before you start. Skipping a required permit can affect homeowner's insurance coverage if something goes wrong.
Can I put a wood burning sauna stove on a wood deck with a hearth pad on top?
You can, but the pad has to cover the full floor protection zone and extend to or beyond the edge of any wood decking in that zone. The pad does not protect wood decking outside its footprint. For outdoor saunas on wood platforms, many builders pour a separate concrete pad for the stove location instead of relying on a tile pad over combustible decking.
How do I reduce the wall clearance for a sauna stove without moving it farther from the wall?
Install a listed non-combustible heat shield on the wall with a 1-inch air gap behind it. NFPA 211 Table 8.3.1 allows up to a 66% reduction in listed clearance with a properly installed spaced shield. This does not reduce the floor pad dimensions, only the distance from the stove to the wall. Confirm the shield covers the full stove height.
What is the best material for a sauna hearth pad?
Slate and soapstone are top choices for saunas. Both are non-combustible, handle repeated heat cycles without cracking, and look right in the space. Soapstone has high thermal mass, which buffers floor temperature swings during long sessions. Porcelain tile over cement board is cheaper and works well too. Use a large format to minimize grout lines.
How much does it cost to build a hearth pad for a wood burning sauna stove?
A DIY tile-over-cement-board pad in the 36 x 48 inch range typically runs $80 to $250 in materials depending on tile. Natural stone like slate or soapstone runs higher: expect $150 to $400 for materials. A listed pre-made pad system runs $150 to $400 retail. Professional installation adds $150 to $400 in labor for a straightforward job.
Does a corner sauna stove placement change the hearth pad size?
The required clearances do not change: still 18 inches front, 8 inches sides and rear per NFPA 211 minimums. In a corner, two of the clearance zones push toward the room instead of the walls. The pad calculation is the same, but the shape may shift to fit the corner. Confirm the pad covers the full zone on all sides, including the front ember-catch zone.
Can a hearth pad be smaller than the stove footprint?
No. The pad has to cover the full stove footprint plus the clearance extensions on all sides. A pad smaller than the footprint leaves floor under the stove unprotected, which violates NFPA 211 and any reasonable installation manual. No code variance allows a pad smaller than the stove base.
Do Finnish or Scandinavian imported sauna stoves follow the same hearth pad rules?
The physical clearance principles are the same, but imported stoves with CE marking and no UL listing follow a more complex compliance path. Some inspectors accept the manufacturer's published clearance data from CE-listed stoves. Others require a third-party field evaluation. Confirm with your local AHJ before buying so you know what documentation you will need.
How do I maintain a sauna stove hearth pad over time?
Tile and stone pads need almost no maintenance. Sweep ash regularly so it does not work into grout lines. If you see cracked grout or tile, regrout or replace before the next fire season. Check cement board edges at the perimeter each year for moisture, especially in humid saunas where condensation can wick under the pad edge.
Sources
- U.S. Environmental Protection Agency, Burn Wise program: Wood burning stove surfaces reach very high operating temperatures, in the 500°F to 900°F range during normal firing
- National Fire Protection Association, NFPA 211 Standard for Chimneys, Fireplaces, Vents, and Solid Fuel-Burning Appliances (2022 edition): NFPA 211 sets minimum floor protection zones of 18 inches in front of the firebox door and 8 inches on the sides and rear for freestanding solid fuel appliances
- International Code Council, International Residential Code (2021), Chapter 10, Chimneys and Fireplaces: The IRC defers to the appliance manufacturer's listing as the controlling document for solid fuel appliance clearances
- California Air Resources Board, Wood-Burning Appliances program: California requires air quality district permits for new wood burning appliances, and local districts may impose hearth pad requirements beyond NFPA 211
- U.S. Consumer Product Safety Commission, home heating safety guidance: Non-combustible floor protection must extend to the edge of any combustible flooring material within the stove clearance zone
- ASTM International, ASTM E136 Standard Test Method for Combustion Behavior of Materials in a Vertical Tube Furnace: Non-combustible materials per ASTM E136 do not ignite, burn, support combustion, or release flammable vapors when heated to 1382°F (750°C)
- U.S. Department of Energy, Energy Saver insulation guidance: Mineral wool board is non-combustible and can add R-value in floor assemblies under high-heat appliances
- National Fire Protection Association, NFPA 211 (2022 edition), floor protection provisions: For stoves with firebox bottoms 6 inches or less above the floor, documented R-value for the floor protection assembly is required; typical manufacturer specifications run R-1.5 to R-2.0
- National Fire Protection Association, NFPA 211 Table 8.3.1, Clearance Reduction Systems for Solid Fuel Appliances: Listed wall shields with a 1-inch air gap behind them allow up to a 66% reduction in listed clearance distances from combustible walls
- Finnleo Sauna, installation documentation for freestanding sauna stoves: Typical sauna stove weights with stone load range from roughly 150 to 400 pounds depending on model and stone quantity
- International Code Council, International Residential Code (2021), Table R301.5, Minimum Uniformly Distributed Live Loads: IRC Table R301.5 specifies a minimum 40 psf live load design for residential floor systems
- UL Standards & Engagement, UL 1482 Standard for Solid-Fuel-Burning Heating Appliances: UL 1482 is the listing standard for solid fuel appliances and governs thermal performance data used by listed floor protector systems

Share:
How to breathe during cold plunge immersion (and why it matters)
How to calculate BTU for a wood burning sauna stove