
Last updated 2026-07-10
TL;DR
The vapor barrier in a sauna goes on the inside face of the wall framing, directly behind the interior paneling. This stops steam from migrating into the insulation and wall cavity. Put it on the outside (cold side) and you trap moisture inside the structure, which rots framing and grows mold. The rule holds for both indoor and outdoor saunas.
Why does vapor barrier placement matter so much in a sauna?
A sauna makes a lot of steam. Traditional saunas run 160°F to 195°F with relative humidity anywhere from 10% to 60% depending on how much water hits the rocks [1]. That warm, moisture-loaded air wants to move toward cooler, drier air, which means it pushes outward through your walls. If it reaches your insulation or framing before something stops it, condensation forms inside the wall cavity where you can't see it. You won't spot it. You'll smell it a couple years later, and by then the framing is already going soft.
The vapor barrier's whole job is to catch that outward moisture drive before it enters the wall assembly. Put it in the wrong place and one of two things happens: you block the moisture too late (it's already soaked into the insulation), or you build a cold-side trap where condensation forms on the barrier itself and pools against the surrounding wood. This isn't a theoretical risk. The International Residential Code and building science both treat vapor retarder placement as a question of where condensation is most likely to form, which depends on the temperature differential and where the moisture comes from [2].
Saunas are the extreme version of the problem because the moisture source is deliberate and intense. A bathroom makes humidity. A sauna makes a sustained, high-temperature humidity event every single time you run it. The wall has to survive that over and over, for years.
Where exactly should the vapor barrier go inside a sauna wall?
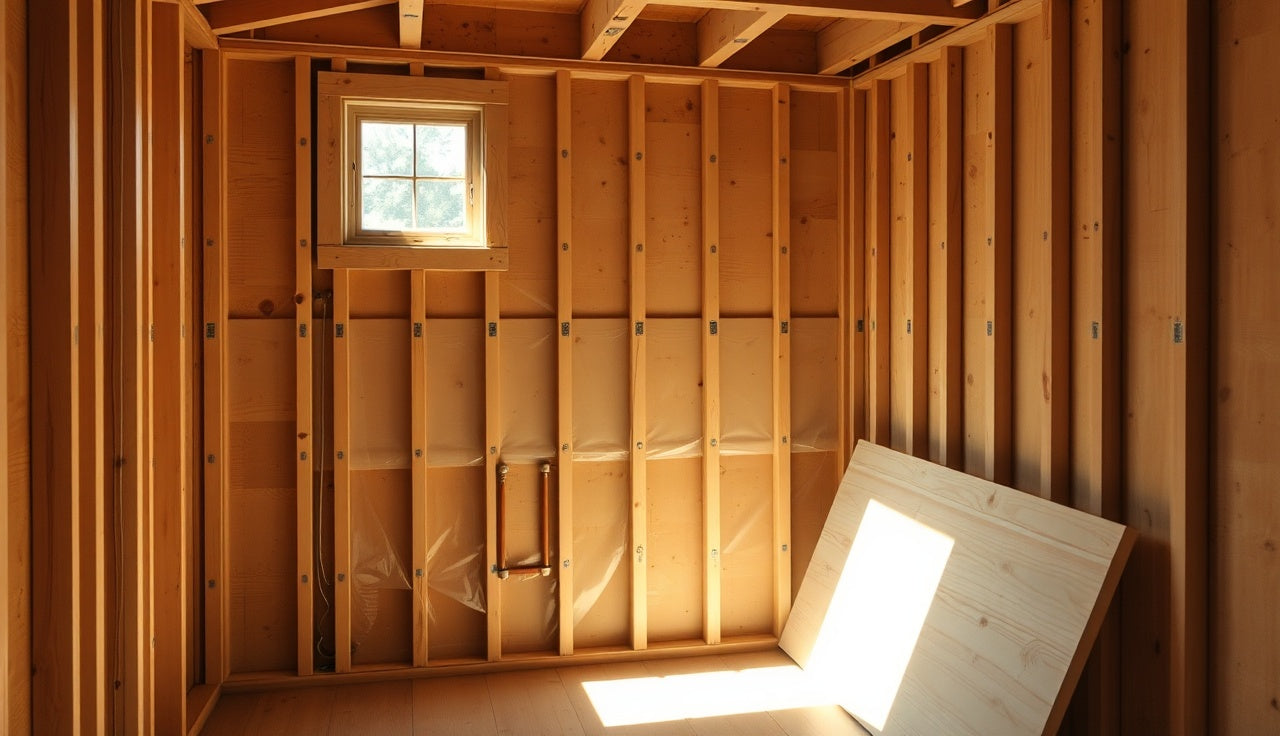
On the warm, interior side of the insulation, between the insulation and the interior paneling (usually tongue-and-groove cedar or hemlock). You insulate first, staple the vapor barrier to the face of the studs, then nail or clip your paneling over it. The barrier sits as close to the hot, humid room as possible so it stops moisture before it ever touches the insulation.
This matches the general cold-climate rule for any heated building: the vapor retarder belongs on the warm side. The 2021 International Residential Code, Section R702.7, requires interior-side vapor retarders on frame walls in Climate Zones 5 through 8 for exactly this reason [2]. A sauna applies that principle at an extreme, in every climate zone, because the temperature swing across the wall is so large.
A few details decide whether it works. The barrier runs continuously across both walls and ceiling, with seams overlapped at least 6 inches and taped. Every penetration (wire, outlet, vent) gets sealed. Gaps are where moisture sneaks in. The ceiling is usually worse than the walls because hot steam rises, so if you're going to be careful anywhere, be careful at the ceiling first.
The material is typically 6-mil polyethylene sheeting, which is cheap and effective. Some builders use foil-faced products that double as radiant barriers, reflecting heat back into the room and cutting preheat time. Either works. Location beats product choice every time.
What happens if you put the vapor barrier on the outside of the wall instead?
You slowly destroy the build. Cold-side placement (between insulation and exterior sheathing) is one of the most reliable ways to ruin a sauna. Here's the sequence. Steam passes straight through the paneling into the insulation because nothing stops it on the warm side. The insulation gets wet. The framing gets wet. The moisture reaches the cold-side barrier, has nowhere to go, condenses, and pools. The framing stays wet season after season.
Wet wood plus trapped warmth grows mold and rot. Framing lumber starts supporting decay fungi at moisture content above roughly 19%, and structural degradation speeds up past that line [3]. A sauna wall with a cold-side barrier can hit that level within months of regular use.
Outside placement does make sense in standard exterior walls in hot, humid climates, where moisture drives inward from outdoors. That's a different problem with a different answer. In a sauna the moisture source is always interior, so the barrier always faces the interior. Don't borrow exterior-wall logic for sauna walls without first checking which way the moisture is actually moving.
Does it matter whether the sauna is indoors or outdoors?
The interior barrier rule holds for both. Outdoor saunas just add a second problem: exterior weather. An outdoor sauna manages two moisture sources, interior steam driving out and exterior rain and humidity driving in, and which one dominates shifts with the season.
The standard outdoor assembly, from inside out, goes: interior paneling, vapor barrier on the interior face of the studs, insulation between studs, exterior sheathing, a weather-resistant barrier like housewrap, then exterior cladding. The weather-resistant barrier handles rain. The vapor barrier handles steam. Two products, two jobs, and they should never be collapsed into one layer.
In very cold climates, some builders worry about interstitial condensation forming in the middle of the wall even with barriers on both sides. The cleanest fix is closed-cell spray foam, which insulates and retards vapor in one step and sharply cuts the odds of moisture reaching the framing. It costs more than fiberglass batts. For an outdoor sauna in Minnesota or Montana, the repair bills it prevents pay for it.
Indoor saunas (a sauna room built inside a house or garage) need only the interior vapor barrier. The exterior environment is already conditioned. The wall outside the sauna framing is just interior building space, not exposed to weather.
What materials work best as a sauna vapor barrier?
Standard 6-mil polyethylene sheeting is the workhorse and what most sauna builders reach for. It runs well below 0.1 perm, which makes it a Class I vapor retarder under the IRC, the most restrictive category [2]. That's what a sauna wants.
Aluminum foil barriers are also common in sauna-specific builds. They have an even lower perm rating than poly and bounce radiant heat back into the room, which cuts the energy needed to reach temperature. The tradeoff: foil is fragile during install and tears at staple points. Use a foil product made for saunas, not generic HVAC foil.
Here are the common options side by side.
| Material | Perm Rating | Approx. Cost (per 100 sq ft) | Notes |
|---|---|---|---|
| 6-mil polyethylene | < 0.1 | $5 to $12 | Most common; easy to work with |
| Foil-faced barrier | < 0.02 | $15 to $30 | Adds radiant reflection; fragile |
| Closed-cell spray foam (2") | ~0.8 at 2" | $1 to $2 per sq ft installed | Insulates and retards vapor in one step |
| Kraft-faced batts | 0.5 to 1.0 | Included with insulation | Insufficient alone for saunas |
Kraft-faced batts don't cut it on their own in a sauna. They're a Class II retarder, and a sauna's moisture load runs past what kraft facing is built for. If you're using batt insulation, always add a dedicated vapor barrier layer.
Cost figures above are general retail ranges; real prices swing by region and supplier.
| Aluminum foil barrier (sauna-rated) | 0.02 |
| 6-mil polyethylene sheeting | 0.06 |
| Closed-cell spray foam 3" | 0.08 |
| Closed-cell spray foam 2" | 0.8 |
| Kraft-faced insulation batt | 0.7 |
| Open-cell spray foam | 7.0 |
| Housewrap (Tyvek-type) | 15.0 |
Source: Building Science Corporation; ICC 2021 IRC R702.7
How does this differ for a steam room compared to a traditional sauna?
A steam room sits at 100% relative humidity nonstop. A traditional sauna runs at lower humidity with bursts of steam off the rocks. That gap changes the whole vapor strategy.
In a steam room the vapor pressure is so extreme that many builders skip standard framing and use cement board or waterproof panel systems, with a full continuous waterproof membrane instead of a vapor barrier. The goal shifts from "slow the moisture down" to "stop it completely and drain whatever gets through." The Tile Council of North America's installation handbook calls for a continuous waterproof membrane behind steam room tile, more than a vapor retarder [4].
A sauna vs steam room comparison shows these are genuinely different environments. For a traditional sauna, a vapor barrier lapped and taped correctly is standard and enough. For a steam room, that same approach eventually fails because the moisture volume is higher and never lets up.
Building a hybrid or a sauna with a steam generator? Treat it like a steam room for moisture management. Err toward the more demanding standard.
What about the floor and ceiling: do they need vapor barriers too?
The ceiling does, and it's arguably more important than the walls. The floor does not.
Steam rises. The ceiling is the first place condensation forms and it takes continuous moisture every session. Run the vapor barrier across the entire ceiling plane. Lap the ceiling barrier over the wall barrier by at least 6 inches and tape the seam. Skip that and you leave a gap right at the ceiling-wall junction, which is exactly where moisture finds its way in.
The floor is a different animal. Sauna floors should not be sealed with a vapor barrier, because you need drainage. Water from rinsing off, spills, and condensation has to go somewhere. A sealed floor traps that water under the planking. Sauna floors are usually built with gaps between the boards, a sloped subfloor or concrete base, and either a drain or deliberate slope toward the door. Waterproof the subfloor if it's wood, but don't lay poly sheeting under a sauna floor.
For a home sauna built on a concrete slab, a vapor barrier under any wood sleepers or flooring on top of the slab does make sense, since it stops ground moisture from wicking up. That's a different job than the wall and ceiling barrier.
Can you use spray foam insulation instead of a vapor barrier in a sauna?
You can, and it works, but know what you're buying. Closed-cell spray foam at 2 inches runs around 0.8 perm, which is a Class II vapor retarder, not Class I [5]. Go to 3 inches or more and it usually drops below 0.1 perm into Class I. The exact number depends on the product and thickness, so read the manufacturer's data sheet for whatever you're spraying.
The practical win with closed-cell foam is that it fills every gap and penetration on its own, killing the sealing work poly sheeting demands. It doesn't sag or settle either. The cost is the catch: figure $1.50 to $3.00 per square foot installed depending on your market and thickness, against a few cents per square foot for poly.
Open-cell spray foam is wrong for a sauna. Its perm rating sits between 4 and 10, so it passes moisture freely. In a sauna it would hold water like a sponge.
Some builders run closed-cell foam on the ceiling (the highest moisture risk) and polyethylene on the walls. That's a sensible hybrid when budget is tight.
What are the most common vapor barrier mistakes in sauna builds?
The biggest one is skipping the barrier entirely or treating it as an afterthought. People building their first home sauna sometimes handle it like a normal room, use kraft-faced batts with nothing else, and then wonder why the framing smells three years in.
Second: not taping seams and sealing penetrations. A barrier with unsealed overlaps and open gaps around electrical boxes barely works compared to one sealed carefully. Every gap is a path for moist air. Electrical in saunas should be minimal for safety anyway, but seal whatever penetrations you do have.
Third: getting the orientation of a foil-faced product wrong. Some foil barriers are double-sided, but single-sided ones need the shiny face toward the interior to give you the radiant benefit.
Fourth, and this one trips up people who've read a little: mixing up vapor barriers and air barriers. Related, not the same. An air barrier stops bulk air movement. A vapor barrier retards moisture diffusion. Poly sheeting does both fairly well if it's sealed. Housewrap is an air barrier that's vapor-permeable on purpose, so it's flatly the wrong choice for the interior sauna wall.
Fifth: forgetting to run the barrier behind bench supports. Small detail, real consequences. Wherever you attach a bench bracket or backing, keep the barrier behind it and reseal it if you penetrate it. Benches sit right where the hottest, steamiest air pools.
Does vapor barrier placement affect sauna heat-up time or efficiency?
A little, yes. A properly placed interior barrier, especially a foil-faced one, reflects some radiant heat back into the room instead of letting it conduct into the wall. The heater fights less thermal mass, so the room reaches temperature faster.
The effect is real but modest for most home saunas. Efficiency comes mostly from insulation R-value, heater sizing, and airtightness, more than from the barrier alone. Still, a foil barrier plus good insulation (R-13 or better in walls, R-19 or better in the ceiling for most climates) preheats noticeably faster than an uninsulated or poorly insulated box.
The Department of Energy doesn't publish sauna-specific guidance, but its building envelope research shows interior radiant barriers in hot attics reduce heat gain by 5% to 10% [6]. The same physics runs in reverse inside a sauna. A real gain, not a dramatic one.
Shopping for a pre-built sauna instead of framing your own? Check whether the unit has a barrier and what type. Many barrel saunas and prefab kits skip a traditional vapor barrier and rely on tight interlocking wood construction and the wood's own moisture behavior. That works for plenty of designs, but understand it before you buy. SweatDecks lists wall construction specs on its pre-built saunas so you can compare directly.
What do building codes say about sauna vapor barriers?
The 2021 International Residential Code covers vapor retarders in Section R702.7 and requires Class I or Class II retarders on the interior side of frame walls in Climate Zones 5, 6, 7, 8, and Marine 4C [2]. Most states and municipalities have adopted the IRC or a version of it, though some run older editions. Check your local jurisdiction.
The IRC has no dedicated sauna section for vapor barriers. The general wall assembly rules apply, and most inspectors look for a continuous interior-side barrier consistent with R702.7. Because a sauna is a higher-moisture space than a normal room, erring toward the more conservative Class I (0.1 perm or less) is the right call no matter what the base code technically demands.
Section R702.7.1 of the 2021 IRC states: "In Climate Zones 5, 6, 7 and 8 and Marine 4, a Class I or II vapor retarder shall be installed on the warm-in-winter side of the thermal insulation." [2] That sentence is the governing principle. Follow it, and follow it on the ceiling too.
Some jurisdictions carry specific sauna rules for commercial installs. Building a sauna in a gym, spa, or commercial space? Check with your local building department. Residential sauna rules are generally simpler.
For permits, a sauna added to an existing home often needs an electrical permit (for the heater) and sometimes a building permit depending on scope. The vapor barrier becomes part of any wall assembly inspection.
How do you install a sauna vapor barrier correctly, step by step?
Here's the sequence that works. It's not hard, but the order matters.
First, frame your walls and ceiling. Run all electrical wiring before the barrier goes up, so you have the fewest possible penetrations through it later.
Second, install insulation between the studs. Fiberglass batts or mineral wool both work. Closed-cell spray foam is an alternative that simplifies the next steps.
Third, start at the ceiling. Unroll your 6-mil poly or foil across the ceiling plane, staple it to the joists with a staple gun, keep it taut, and lap successive pieces by at least 6 inches.
Fourth, move to the walls. Run the barrier floor to ceiling, lapping it up and over the ceiling barrier at the top by at least 6 inches. Staple to studs every 12 to 16 inches.
Fifth, tape every seam with a compatible vapor barrier tape. Ordinary duct tape fails over time in heat and humidity. Use acoustical sealant tape or a polyethylene-specific tape rated for temperature.
Sixth, seal every penetration. Seal electrical boxes with acoustical sealant (the putty-like product, not spray foam) around the perimeter.
Seventh, install your interior paneling directly over the barrier. The paneling clips, nails, or staples through the barrier into the studs. Each fastener hole is small enough that it doesn't meaningfully compromise the barrier.
For a portable sauna or a prefab kit, the factory handles all of this. If you're adding insulation or modifying a kit, follow the same order relative to whatever structure you're working with.
Once the sauna is built and running, you'll know the barrier is working if there's no condensation on any exterior wall surface or in any accessible attic or crawl space next to the sauna. See moisture migrating outward? That's a gap somewhere in the barrier.
Frequently asked questions
Should the vapor barrier go on the inside or outside of sauna insulation?
On the inside, between the insulation and the interior paneling. The barrier needs to sit on the warm side so it intercepts moisture before it enters the insulation. Put it on the outside and moisture-laden air has already soaked through your insulation before it hits the barrier, which rots and molds the framing over time.
Can I use regular house wrap as a sauna vapor barrier?
No. Housewrap like Tyvek is a vapor-permeable air barrier, meaning it lets moisture pass through on purpose. That's right for an exterior wall, where you want drying potential. In a sauna you need a vapor retarder at 0.1 perm or less (Class I), like 6-mil polyethylene or a foil-faced barrier. Housewrap gives you no protection against steam migration.
What perm rating does a sauna vapor barrier need?
Aim for a Class I vapor retarder, which is 0.1 perm or less. Standard 6-mil polyethylene sits well below 0.1 perm. Foil-faced sauna barriers go lower still. Class II materials (0.1 to 1.0 perm), like kraft-faced insulation, aren't adequate for a sauna's moisture load on their own. The International Residential Code defines these classes in Section R702.7.
Does a barrel sauna need a vapor barrier?
Most traditional barrel saunas don't use a conventional vapor barrier, because thick interlocking wood manages moisture through the wood itself and through ventilation gaps. If you're insulating a barrel sauna or adding a liner, follow the same rule: barrier on the interior side. Check the manufacturer's documentation for your specific unit before you modify the wall assembly.
How do I seal the vapor barrier around a sauna heater?
The heater mounts to the floor or wall with a manufacturer-specified clearance from combustibles. Run the vapor barrier up to but not behind the heater location, then seal the perimeter with acoustical sealant. Don't run poly sheeting behind or against a hot heater. Keep the barrier at the edge of the clearance zone the manufacturer specifies.
Does the vapor barrier go on the floor of a sauna too?
No, not on the walking surface. Sauna floors need drainage. Sealing the floor with a barrier traps water from splashing, rinsing off, and condensation under the floorboards. Sauna floors should have gaps or drainage. You might put a barrier under wood sleepers on a concrete slab to stop ground moisture wicking up, but that's subfloor moisture management, not the same job the walls need.
What type of tape should I use to seal sauna vapor barrier seams?
Use a polyethylene-compatible vapor barrier tape or acoustical sealant tape rated for high heat and high humidity. Standard duct tape adhesive breaks down under heat and humidity over time, and packing tape isn't durable enough. Some builders also run acoustical sealant (the putty or caulk product) at seams and penetrations. The tape's temperature rating should exceed your sauna's operating temperature.
How much does adding a vapor barrier to a sauna cost?
Material for a 6-mil polyethylene barrier runs roughly $5 to $12 per 100 square feet at retail. A foil-faced barrier runs $15 to $30 per 100 square feet. For a typical 6-by-8-foot sauna room (about 200 to 300 square feet of wall and ceiling surface), material usually lands between $15 and $90 depending on product. Tape and sealant add another $10 to $30. Labor is minimal if you do it yourself.
Can I retrofit a vapor barrier into an existing sauna that doesn't have one?
Only if you're willing to pull the interior paneling. There's no effective way to add a barrier behind existing wall boards without taking them off. If your sauna is older and you notice musty smells or soft spots in the paneling, the right fix is to remove the paneling, check the framing, add or replace insulation, install a proper barrier, and re-panel. It's a big project, but far cheaper than structural replacement later.
Does vapor barrier placement differ for an infrared sauna compared to a traditional sauna?
An infrared sauna runs cooler (120°F to 150°F typically) and makes much less steam than a traditional sauna. The vapor load is lower, but the principle holds: if you're framing and insulating an infrared room, put the barrier on the interior side. Many prefab infrared cabinets don't need a site-built barrier because they're sealed wood panel units. Building a site-built infrared room? Treat it like a traditional sauna for moisture.
How does climate zone affect sauna vapor barrier requirements?
In every climate zone the interior barrier rule holds for saunas, because the moisture source is always interior. Climate zone drives how hard you also manage the exterior side of the wall for weather. Warmer climates see lower exterior moisture drive. Very cold climates have a more extreme temperature differential, which raises interstitial condensation risk and makes a high-quality interior barrier matter even more. The IRC's Climate Zone map (Figure R301.1) guides exterior wall requirements.
Will the sauna vapor barrier affect ventilation?
It shouldn't, because sauna ventilation penetrations go through the whole wall assembly, not through the barrier alone. Vent openings need proper framing and the barrier sealed around the vent collar, like an electrical penetration. Sauna ventilation (a low intake near the heater and a high exhaust on the opposite wall) matters for air quality and heater performance, but it's a separate design question from the barrier. Don't skip ventilation thinking the barrier handles air quality.
Is there a difference between a vapor barrier and a vapor retarder, and does it matter for saunas?
Yes. "Vapor barrier" is informal and often means any material that slows moisture. The IRC uses "vapor retarder" and sorts them by perm rating: Class I (0.1 perm or less), Class II (0.1 to 1.0 perm), Class III (1.0 to 10 perm). For a sauna you want Class I. When a product label or contractor quote says "vapor barrier," ask for the perm rating to confirm it's actually Class I rather than a lesser retarder sold under the same name.
Sources
- Finnish Sauna Society, Sauna Climate and Health: Traditional saunas operate at 160°F to 195°F with relative humidity varying from approximately 10% to 60% depending on water use on the rocks
- International Code Council, 2021 International Residential Code Section R702.7: Class I or II vapor retarders required on the interior (warm-in-winter) side of frame walls in Climate Zones 5, 6, 7, 8, and Marine 4C; perm class definitions used throughout article
- USDA Forest Service, Wood Handbook Chapter 14: Biodeterioration of Wood: Wood decay fungi require moisture content above approximately 19% to become active; structural degradation from rot accelerates above this threshold
- Tile Council of North America, TCNA Handbook for Ceramic, Glass, and Stone Tile Installation: Steam room construction requires a continuous waterproof membrane behind tile, not merely a vapor retarder, due to 100% relative humidity conditions
- Building Science Corporation, Understanding Vapor Barriers: Closed-cell spray foam at 2 inches has a perm rating of approximately 0.8 (Class II); at 3+ inches it typically drops below 0.1 (Class I); open-cell foam has perm ratings of 4 to 10
- U.S. Department of Energy, Energy Saver: Radiant Barriers: Interior radiant barriers in hot attic applications reduce heat gain by 5% to 10% based on DOE building envelope research
- U.S. Department of Energy, Building Technologies Office: Moisture Control in Buildings: Vapor retarders must be placed on the warm side of insulation; cold-side placement causes condensation within the wall assembly
- Environmental Protection Agency, Moisture Control Guidance for Building Design: Moisture content of building materials must be controlled to prevent mold growth; sustained elevated moisture in wall assemblies is a primary driver of indoor mold
- Oak Ridge National Laboratory, Thermal Envelopes Research: Vapor Retarder Performance: Building envelope research confirms vapor retarder class and placement location are the primary determinants of moisture accumulation risk in wall assemblies
- International Code Council, IRC Climate Zone Map Figure R301.1: Climate zones 5 through 8 require interior-side vapor retarders per IRC; map used to determine applicable zone by jurisdiction

Share:
Sauna temperature chart: what every type runs and why it matters
Hyperice X knee contrast therapy device: honest review and guide