
Last updated 2026-07-11
TL;DR
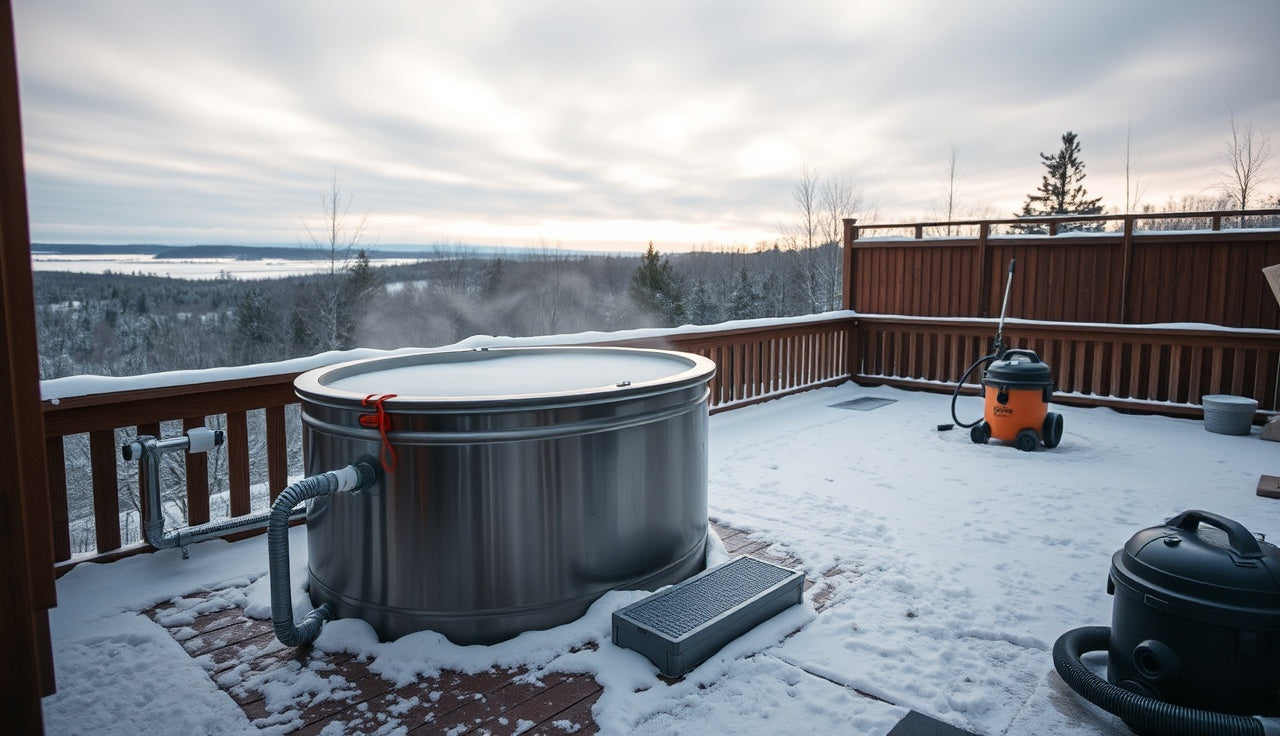
Winterizing an outdoor cold plunge means draining and drying every water line plus the tub, protecting or removing the chiller and pump, covering exposed surfaces, and deciding whether to run the unit at a maintenance temperature or shut it down. Most residential chillers are at risk below 35°F if they are not running. The whole job takes two to four hours.
What actually happens to a cold plunge if you skip winterizing?
Water expands roughly 9 percent by volume when it freezes [1]. That sounds harmless until you picture the expansion happening inside a stainless steel pipe, a pump housing, or a chiller's heat exchanger. The pipe splits. The housing cracks. The refrigerant circuit fails. Acrylic shells fracture along stress lines. None of that damage is cosmetic, and none of it is cheap.
A cracked chiller heat exchanger runs $400 to $1,200 to repair or replace, depending on the unit [2]. A split pump housing on a recirculating system runs $150 to $500. Replacing an acrylic or fiberglass shell can cost more than you paid for the whole plunge. Two hours of prep beats all of that.
Here is the part people miss. Even where the temperature never hits a hard freeze, repeated swings between 35°F nights and 50°F days work the fittings and seals loose. Gaskets shrink. O-rings harden. You wind up chasing slow leaks in spring that take three weekends to find.
At what temperature does a cold plunge freeze and get damaged?
Pure water freezes at 32°F (0°C). Damage to plumbing can start before that, because water sitting still inside pipes and pump housings loses heat faster than the main tub volume [1].
Most chiller manufacturers rate their equipment for ambient operating temperatures between 41°F and 104°F (5°C to 40°C). Once the air drops below 41°F, the refrigerant circuit fights conditions it was never designed for, and internal condensation can freeze in valves. Below 35°F ambient, treat most residential cold plunge chillers as at risk unless they are running continuously [2].
PVC fittings and flexible hose connections fail first. PVC turns brittle below 40°F and can crack from impact or internal ice pressure even before the water inside fully solidifies [3]. Copper fittings and stainless steel pipe hold up better, but threaded joints and union connections stay vulnerable.
So here is the threshold to remember. If nighttime lows in your area regularly drop below 40°F, you need a plan. If they hit 32°F even occasionally, you need a firm one.
Should you drain your cold plunge for winter or keep it running?
This is the real decision, and it turns on three things: your local winter lows, whether your chiller has a freeze-protection mode, and how much you actually plan to plunge in the cold.
Keeping it running makes sense if you live somewhere that rarely drops below 32°F (coastal Pacific Northwest, much of the South, parts of the Southwest), if your chiller has a built-in freeze cycle, and if you will use the plunge a few times a week all winter. Running the pump nonstop keeps water moving, which prevents freezing down into the low 20s when it is paired with good insulation.
Draining is the right call if you get sustained freezing temperatures (Mountain West, upper Midwest, New England), if your unit is a simple non-chilled tub or barrel, or if you would rather not pay to run a chiller through a season you will not touch. Electricity for a residential chiller runs roughly $30 to $80 per month depending on ambient temperature and efficiency [2], so three idle months add up.
There is a middle path. Some owners in moderate climates drain the lines and pump but leave a few inches of water in the tub with a floating de-icer, the kind sold for horse troughs or koi ponds, which keeps the shell from cracking under dry thermal cycling. The de-icer costs about $25 to $50 and draws 100 to 150 watts continuously [4].
Still deciding whether an outdoor plunge fits your life year-round? The cold plunge guide walks through every unit type, from barrel-style ice baths to full chiller systems.
| DIY winterization (supplies only) | $80 |
| Professional winterization service | $250 |
| Split pump housing repair | $325 |
| Cracked chiller heat exchanger repair | $800 |
| Acrylic/fiberglass shell replacement | $1,500 |
Source: PHTA Residential Water Feature Standards, 2023
What supplies do you need to winterize a cold plunge?
You do not need much. Here is what actually earns its place on the list:
| Supply | Purpose | Approximate cost |
|---|---|---|
| Wet/dry shop vac | Blow out or vacuum residual water from lines | Own one, or $40-$80 to buy |
| Compressed air or blower | Force water from narrow fittings and pipe runs | $0 if you have a compressor; $20-$40 for a hand pump |
| Non-toxic RV/plumbing antifreeze (propylene glycol) | Fill any traps or low points that cannot be blown dry | $8-$15 per gallon |
| Pipe insulation foam sleeves | Protect exposed supply and return lines | $5-$15 for a 6-ft run |
| Waterproof tub cover or fitted cover | Keep snow and debris out of a drained shell | Usually included with unit; replacement $50-$200 |
| Reflective insulation wrap | Wrap chiller housing if storing outdoors | $15-$30 |
| Silicone lubricant | Condition O-rings and gaskets before storage | $8-$12 |
| Plug or winterizing cap | Cap off drain ports and open fittings | $2-$8 |
Use non-toxic propylene glycol antifreeze (the pink RV kind, not the green automotive kind). It is safe for the tub shell and lines. Never put ethylene glycol automotive antifreeze in a cold plunge. Propylene glycol is FDA-recognized as safe for incidental food contact [5], which matters, because you will be climbing back into this tub.
How do you winterize an outdoor cold plunge step by step?
Work through this in order. Rushing the drain is the mistake that costs people money.
Step 1: Turn off the power and chiller. Kill the chiller at the breaker, more than the control panel. If it has a capacitor-based compressor, wait 10 minutes before touching electrical connections. Unplug the pump and any UV or ozone sanitation components.
Step 2: Drain the tub completely. Open the drain valve or pull the drain plug. If your tub drains slowly, a submersible pump speeds it up. Let it run until nothing more comes out, usually 15 to 45 minutes depending on volume (most residential cold plunges hold 100 to 250 gallons [2]).
Step 3: Blow out the lines. Connect compressed air or a shop vac in blower mode to each fitting and port. Blow from the tub toward the pump, then from the pump toward the tub, to clear both directions. Keep going until no water vapor comes out. This is where most DIYers quit early. Do it twice.
Step 4: Remove and store the pump and filter (if possible). Many chiller-based plunges use a pump housing that disconnects at union fittings. Pull it, drain it fully, and store it indoors. This is the single most effective freeze-protection step you can take. Everything else can freeze and your pump still survives.
Step 5: Add propylene glycol to any low points or traps. If there is a low spot you cannot fully blow dry (a U-shaped trap under the tub, say), pour in a little non-toxic RV antifreeze so any leftover water freezes at a lower temperature. A cup or two per trap is plenty.
Step 6: Clean and dry the shell. Wipe the interior with a dilute sanitizer solution (a 10:1 water to white vinegar mix works, or a product approved for your shell material). Let it air dry completely before covering. Moisture trapped under a sealed cover breeds mold or algae you will fight in spring.
Step 7: Lubricate O-rings and gaskets, then cap all ports. Apply a thin coat of silicone lubricant to every O-ring and rubber gasket. Cap or plug all open ports and fittings. Install your cover. Storing the unit outdoors? Wrap the chiller housing in reflective insulation and secure it against wind.
The whole thing takes two to four hours the first time, less once you know your unit's quirks.
How do you winterize a cold plunge chiller specifically?
The chiller is the most expensive component and the most sensitive to cold. Treat it separately from the tub.
Start by disconnecting all water connections to the chiller. Even after you drain the tub, there is almost always water trapped in the chiller's internal heat exchanger. Tilt the unit gently to one side to help gravity pull the pooled water out, then blow compressed air through the water inlet and outlet ports until no moisture comes out.
Check your chiller's manual for its minimum storage temperature. Most residential units specify a minimum around 14°F to 32°F (-10°C to 0°C) for the refrigerant circuit when the unit is off [2]. That means the refrigerant itself survives storage in that range, but the water circuit will crack anyway if any water is left inside it.
Storing the chiller outdoors through winter? Wrap it in a breathable weatherproof cover, not a sealed plastic tarp, which traps condensation. Set it on a pallet or deck blocks so it is not sitting in snow melt. Bring it indoors if temperatures will stay below 0°F for extended stretches.
The cold plunge benefits that depend on tight temperature control come back faster in spring from a chiller stored dry than from one that sat through freeze-thaw cycles unprotected.
Can you leave water in a cold plunge during winter if you keep it running?
Yes, with conditions.
If your chiller has a freeze-protection mode (many newer units do), it cycles the pump and heating element to keep water above freezing when the air drops. Check your manual for the exact threshold that triggers it, since it varies by brand.
No freeze protection? You can run the pump continuously instead. Moving water freezes at a lower temperature than standing water, and many owners in USDA Plant Hardiness Zone 6 and above (average winter lows of -10°F to 0°F) have carried units through mild winters on pump-only protection [6]. The catch is that the pump has to keep running. That means watching it, keeping electrical connections dry, and accepting that a power outage during a hard freeze could hand you a burst pipe by morning.
A stock tank de-icer (rated 100 to 1,500 watts depending on tub size and climate) is cheap backup insurance. It will not hold your plunge temperature. It just stops a hard freeze.
In a cold climate, draining beats running. Set the electricity cost aside. The real problem is that a pump failure during a cold snap is a when, not an if.
How do you protect cold plunge pipes and plumbing from freezing?
Pipes fail before the tub in almost every case. This is where your attention pays off.
Any pipe run above ground and exposed to the air is at risk. Wrap those runs in foam pipe insulation sleeves from any hardware store. For runs longer than two feet, add self-regulating heat tape underneath the foam. Self-regulating tape adjusts its output to the ambient temperature, drawing less power when it is warmer and more when it is colder [7]. A 10-foot run typically pulls 3 to 8 watts per foot, or 30 to 80 watts total, and costs $25 to $60 for the tape.
Foam insulation alone (no heat tape) is rated to protect down to about 20°F in most product specs, but only if the water inside is moving. For standing water, insulation delays freezing. It does not prevent it.
Threaded connections and union joints are the most common failure points. Wrap them with self-fusing silicone tape before the foam goes on. That adds a watertight backup if the fitting ever weeps.
If your plumbing runs through a cabinet or equipment box bolted to the tub, add a small thermostatically controlled heat cable inside the cabinet and set it to switch on at 35°F. This is standard practice in hot tub winterization and carries over to cold plunges cleanly [8].
The ice bath format has no plumbing at all, which sidesteps every problem in this section. Worth keeping in mind if you are still deciding what kind of cold water setup to build.
What is the best way to store a portable or barrel-style cold plunge for winter?
Barrel plunges and simple non-chilled tubs are easier to winterize, because there is no refrigeration to protect.
A wooden barrel plunge (cedar is the most common) runs opposite to your instinct. Bone-dry wood shrinks, and the staves gap. Most barrel makers recommend leaving 2 to 4 inches of water in the bottom to keep the wood swelled and sealed, or running a de-icer to stop that small volume from freezing [9]. Drain it completely and resoaking in spring takes 24 to 72 hours while the wood re-swells.
For acrylic or fiberglass portable tubs, drain fully, clean the interior, and store with the cover on. Get it into a garage or shed if you can. Acrylic is more UV-sensitive than freeze-sensitive, and low winter sun can degrade the surface as much as temperature swings do.
Inflatable cold plunge tubs (a growing category) get drained, deflated, and stored indoors. Never leave one inflated outside through a freeze. The vinyl or PVC turns brittle below 40°F and can split under the weight of snow or ice [3].
On any portable unit, the valve seats and drain fittings are the weak spots. Spray them with silicone lubricant before storage and check them first thing in spring, before you refill.
How do you prepare a cold plunge for spring after winter storage?
Spring startup is winterizing in reverse, with a few extra checks.
Inspect the shell, fittings, and pipe runs before you add any water. Hunt for hairline cracks in the shell, separated joints, and any fitting that shifted position, which is a sign of freeze expansion. Run your hand along every pipe run to feel for deformation.
Reinstall the pump and reconnect the water lines. Swap out any O-ring or gasket that looks compressed or cracked, and silicone-lube them before they go back in.
Fill slowly. On the first fill after winter, stop at about 25 percent capacity and check every connection for leaks before you continue. A slow fill buys you time to catch a drip before it becomes a flood.
Sanitize the tub before your first plunge of the season. Even a covered, drained tub collects mold spores or algae over several months. Do a clean fill with a startup dose of your sanitizer (bromine, chlorine, or UV/ozone depending on the system) and run circulation for 24 hours before anyone gets in [10].
Run the chiller through a full cool-down and confirm it hits your target temperature before you plunge. If it runs longer than usual to get there, check refrigerant levels and look for ice on the evaporator coils, which can point to a refrigerant leak.
For outdoor installs, SweatDecks carries cold plunge units built for year-round outdoor use with integrated freeze protection, if you would rather skip this yearly ritual.
How much does winterizing an outdoor cold plunge cost?
Own a shop vac and basic tools already? Your out-of-pocket cost is close to nothing.
| Task | DIY cost | Pro cost |
|---|---|---|
| Drain and blow out lines | $0 (own tools) / $20-$40 (shop vac rental) | $75-$150 |
| Propylene glycol antifreeze | $8-$15 | Included in service |
| Pipe insulation and heat tape | $20-$60 | $50-$120 (materials + labor) |
| Cover and weatherproofing | $50-$200 | Same |
| De-icer (if keeping water in) | $25-$50 | Same |
| Professional winterization service | N/A | $150-$350 total |
Dedicated cold plunge winterization services are less common than hot tub services, but any hot tub company can do the job. The process is the same. Expect $150 to $350 for a service call [8].
Now the comparison that settles it. A cracked pump housing from freeze damage costs $150 to $500 to repair, and a cracked chiller heat exchanger runs $400 to $1,200 [2]. Spending $30 on antifreeze and two hours of your time is not a hard call.
Got an outdoor sauna sitting next to your plunge? Many winterization tasks overlap (covering, insulating exposed utilities, checking electrical connections), so knock them out in one session.
Are there cold plunges designed to handle winter without any winterization?
Some, yes. The marketing sometimes runs ahead of the reality.
Several manufacturers now build integrated freeze protection: a thermostat that fires the pump and/or a low-wattage heater element when ambient temp drops below 35°F, keeping water moving and above freezing. This works reliably in climates that dip into the low 20s but do not sit below 15°F for long stretches.
Where winters run below zero for days at a time (Minnesota, Montana, Wisconsin), even a "winter-ready" unit needs backup: insulated equipment covers, heat tape on exposed fittings, and a plan for power outages.
Stainless steel shells handle freeze-thaw cycles better than acrylic or fiberglass. Buying for a real winter climate? A stainless shell with fully jacketed plumbing and a freeze-protection chiller is the combination worth paying extra for.
Here is the honest limit. No one has published independent, peer-reviewed comparisons of freeze-protection performance across brands. The best available information is manufacturer specs and owner forums. Read the manual for your unit and call the manufacturer with your actual winter low temperatures before you skip any step.
For what to look for in a cold plunge built for year-round outdoor use, the material and insulation specs matter more than most buyers realize.
Frequently asked questions
Can I just leave my cold plunge outside all winter without doing anything?
Only if it has factory freeze protection, your winter lows stay above 35°F, and you keep the power on. In most of the northern US, leaving an unprotected cold plunge outside through winter means cracked pipes, a damaged pump, or a fractured shell by spring. The repair costs consistently beat the cost of a two-hour winterization. Do not skip it.
How long does it take to winterize a cold plunge?
Two to four hours the first time you do it on a given unit, once you learn where all the drain points and fittings are. Later years take 60 to 90 minutes. Professional service usually runs 45 to 90 minutes on site. Drying the lines thoroughly is the step people rush, and the one that costs them later.
What antifreeze is safe to use in a cold plunge?
Non-toxic propylene glycol antifreeze, the kind sold for RV plumbing and marine systems (usually pink). Never use ethylene glycol automotive antifreeze. Propylene glycol is FDA-recognized as safe for incidental food contact, which matters for a tub you will re-enter. One to two gallons is typically enough for a residential cold plunge plumbing system.
Should I remove my cold plunge pump for winter?
Yes, if your pump disconnects at union fittings, pull it and store it indoors. The pump housing is the most freeze-vulnerable component after the chiller heat exchanger, and storing it inside erases that risk entirely. Most cold plunge pumps reconnect in 10 to 15 minutes in spring.
Do I need to winterize a cold plunge if I live in a mild climate?
If your winter lows reliably stay above 40°F, the risk is low but not zero. You still want to check O-rings and gaskets once a year, keep a cover on the unit, and make sure the pump and filter are clean. A brief annual inspection takes 30 minutes and catches slow degradation before it turns into a repair bill.
How do I winterize a cold plunge with a chiller?
Shut off power, drain the tub, then disconnect water lines from the chiller and blow out or drain its internal heat exchanger. This is the step that matters most: residual water in the heat exchanger is what cracks the refrigerant circuit. Store the chiller somewhere temps stay above 14°F, or bring it indoors if your winters run colder than that.
Can I use a stock tank heater or de-icer in a cold plunge over winter?
Yes. A non-toxic stock tank de-icer (designed for horse troughs or koi ponds, 100 to 1,500 watts depending on size) stops a hard freeze in the shell without holding plunge temperature. It costs $25 to $50 and draws relatively little power. It works best as a backup in mild climates or to keep a wooden barrel plunge's wood from drying out.
What happens to a cedar barrel cold plunge if you drain it completely for winter?
The wood staves shrink as they dry. When you refill in spring, the barrel leaks until the wood re-swells, which takes 24 to 72 hours. Most cedar barrel makers recommend leaving two to four inches of water in the bottom over winter, or running a de-icer to keep that water from freezing, to hold the wood seal.
How do I blow out cold plunge lines without a compressor?
A shop vac with a blower attachment works. Connect the blower port to each fitting in turn and run it 60 to 90 seconds per port. A hand-operated blower pump (sold for winterizing sprinkler lines) also handles shorter pipe runs. Expect to repeat the process two or three times per fitting to clear standing water from low spots.
Will my cold plunge cover protect it through winter by itself?
A cover alone protects the shell from debris and UV but does nothing for the plumbing, pump, or chiller. Covers are one part of winterizing, not a substitute for it. That said, a well-fitted insulated cover does slow heat loss if you are keeping water in the tub and running a de-icer or freeze-protection mode.
How do I restart my cold plunge after winter storage?
Inspect the shell and all fittings for cracks before adding water. Reinstall the pump, reconnect water lines, and replace any compressed or cracked O-rings. Fill to 25 percent and check for leaks. Then fill completely, add startup sanitizer, run the chiller through a full cool-down cycle, and confirm it reaches your target temperature before you plunge.
Does cold weather affect cold plunge water chemistry?
Yes. Cold water holds sanitizer differently than warm water, and algae growth slows sharply below 50°F. If you keep water in the tub over winter with a de-icer, test chemistry monthly rather than weekly. Chlorine and bromine both degrade more slowly in cold water, so you may need less, but letting levels drop to zero still allows biofilm to form.
How do I insulate cold plunge pipes for winter?
Use foam pipe insulation sleeves on all exposed above-ground pipe runs. For runs longer than two feet in climates below 20°F, add self-regulating heat tape under the foam before you seal it. Self-regulating tape costs $25 to $60 for a 10-foot run and draws 3 to 8 watts per foot. Wrap threaded connections with self-fusing silicone tape before the foam goes on.
Sources
- USGS Water Science School: Water Density: Water expands approximately 9 percent by volume when it freezes, which is why pipes and housings crack under freeze pressure.
- Association of Pool & Spa Professionals (APSP) / PHTA: Residential Water Feature Standards: Chiller heat exchanger repair costs, pump housing repair costs, residential cold plunge volume ranges (100-250 gallons), and monthly electricity cost estimates for residential chiller units.
- Plastics Pipe Institute: PVC Pipe Design and Installation: PVC becomes brittle below 40°F and can crack from impact or internal pressure at low temperatures.
- Penn State Extension: Stock Tank Heaters and De-icers: Stock tank de-icers draw approximately 100 to 1,500 watts depending on size and are designed to prevent hard freezing in water containers.
- U.S. Food and Drug Administration: CFR Title 21, Generally Recognized as Safe (GRAS) Substances: Propylene glycol is FDA-recognized as generally safe for incidental food contact, making it the appropriate antifreeze choice for cold plunge plumbing.
- USDA Agricultural Research Service: USDA Plant Hardiness Zone Map: USDA Hardiness Zone 6 corresponds to average winter minimum temperatures of -10°F to 0°F, used as a climate reference for cold-plunge winterization thresholds.
- U.S. Department of Energy: Energy Saver, Pipe Insulation and Freeze Protection: Self-regulating heat tape adjusts its heat output based on ambient temperature and draws 3 to 8 watts per foot for typical residential pipe applications.
- Association of Pool & Spa Professionals (PHTA): Hot Tub Winterization Guidelines: Professional winterization service for spa and hot tub units costs $150 to $350 and typically takes 45 to 90 minutes on site.
- University of Minnesota Extension: Wood Properties and Moisture: Cedar and other softwoods shrink as moisture content decreases; maintaining minimum moisture prevents stave gapping in barrel construction.
- CDC: Healthy Swimming, Pool and Hot Tub Disinfection: Proper sanitizer levels and circulation are required before using any water immersion vessel after a period of inactivity to prevent waterborne pathogen exposure.

Share:
Pergola over sauna and cold plunge area: everything you need to know
Cold plunge freeze protection: do you need a heating element?