
Last updated 2026-07-11
TL;DR
Two people can disassemble most prefab saunas in 4 to 8 hours with basic hand tools. Pull the heater and electrical first, then benches, then interior trim and panels, then the frame. Reassembly takes about the same time. Budget $200 to $800 for a licensed electrician if wiring is involved, and expect 1 to 2 panels to need replacing from hidden fastener damage.
Is a prefab sauna actually designed to be moved?
Yes, with a caveat. Prefab saunas, the kind that ship as numbered tongue-and-groove panels and bolt together in a spare bedroom or garage, were built to come apart. That's the point of the prefab format. A custom sauna with site-framed walls and spray insulation is a different animal. But a standard prefab panel kit from any mainstream brand can almost always come apart and go back together at a new address.
The first caveat is condition. A sauna that's sat in place for five years or more has panels that expanded and contracted hundreds of times from heat cycling. Some tongue-and-groove joints get genuinely tight. Some fastener heads strip. Some wiring runs through wall cavities in ways the original installer never planned to undo. None of this kills the project. It just means the move takes longer than the original install did.
The second caveat is your specific model. A few budget kits use proprietary clip systems or adhesive backing on certain panels. If you still have the original assembly manual, pull it out now. If you don't, search the manufacturer's website for the model number plus "assembly instructions." Most brands post these as PDFs. That document tells you whether you have a reversible system or one that's going to fight you.
Still shopping for a home sauna and want relocation flexibility later? Buy a kit with numbered tongue-and-groove interlocking panels and visible screws, not adhesive or hidden clips. Those move the easiest.
What tools do you need before you start disassembly?
Nothing exotic. Here's what actually gets used:
- Cordless drill or driver with a #2 Phillips and a square-drive bit (most prefab saunas use one or the other)
- Flathead screwdriver and a wood chisel or putty knife for popping trim without gouging panels
- Rubber mallet
- Voltage tester (non-contact style, about $20 at any hardware store)
- Needle-nose pliers
- Phone or camera to document wiring and panel order before anything comes apart
- Painter's tape and a permanent marker for numbering panels
- Moving blankets or cardboard sheets to stack panels without scratching them
- A second person
The last one isn't optional. Panels are awkward more than heavy, but you will drop one solo and possibly crack it. Cedar and hemlock don't forgive corner impacts.
One tool people forget: a headlamp. The interior goes dark fast once you start pulling panels, and you need to see inside the wall cavities, especially around the heater wiring.
For a bigger unit, say 6x8 feet or larger, rent a panel carrier or drywall lift from a local equipment shop. It runs $40 to $60. It saves your back and it saves the panels.
What is the right order to disassemble a prefab sauna?
Order matters a lot. Work backward from finish to structure and you dodge the two most common mistakes: pulling a structural panel before the heater is out, and wrecking trim pieces because you didn't remove them first.
Here's the sequence that works for almost every prefab panel sauna.
Phase 1: Electrical (first, no exceptions) Turn off the breaker feeding the sauna. Use a non-contact voltage tester to confirm power is dead at the heater terminals before you touch anything. Disconnect the heater wiring from the unit, capping or taping conductors as you go. Photograph the wiring before you disconnect it. Then lift the heater off its mounting bracket. Most freestanding heaters just lift off. Wall-mounted units have two to four screws.
If the sauna runs on 240V, and almost all full-size units do, hire a licensed electrician for the disconnect unless you're genuinely comfortable with it [1]. The National Electrical Code treats circuits over 150V to ground as higher hazard [2].
Phase 2: Accessories and benches Empty the sauna rocks from the heater basket and set them aside. Pull the thermometer, hygrometer, and any lights. Then remove benches. Most prefab benches rest on brackets screwed into the wall panels. Back out those screws, lift the bench boards off, then remove the brackets. Label everything.
Phase 3: Interior trim and door Ceiling trim, corner trim, and floor trim usually come off with a flathead screwdriver or putty knife. Take these off before any panels move. Then remove the door, which usually means two to four hinge screws and a lift. Set it somewhere it won't fall.
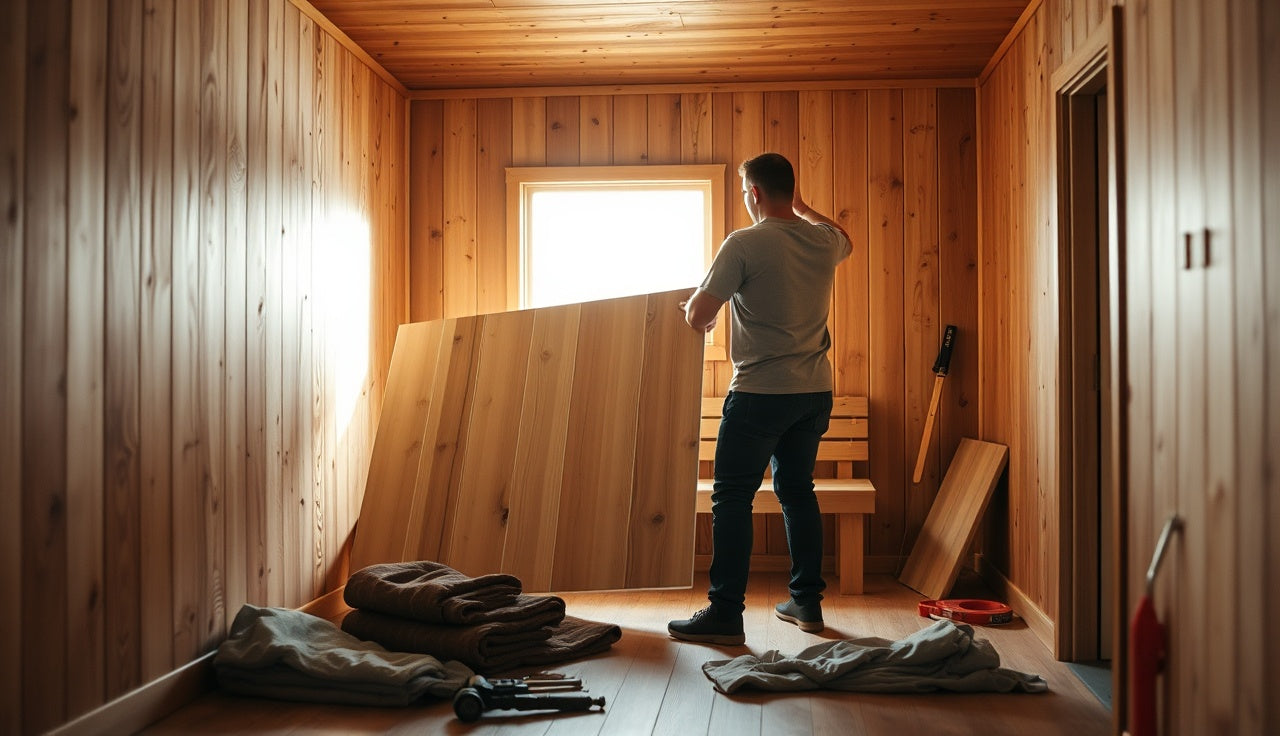
Phase 4: Panels, ceiling first Number every panel with painter's tape before it leaves the wall. Ceiling panels generally come down first since they rest on the walls. Then work the walls in reverse of how they went up (your assembly manual shows the original sequence). Most panels unlock from the tongue-and-groove joint with a rubber mallet and a wood block, tapping gently to avoid dents.
Phase 5: Floor panels and base frame Floor panels come up last. The base frame, if your model has one, is usually the final piece and often the heaviest single component.
Elapsed time for a 4x6 sauna: roughly 4 to 5 hours for two people who read the manual. A 6x8 or larger unit runs 6 to 9 hours.
| Electrical permit | $275 |
| Licensed electrician (disconnect + reconnect) | $600 |
| Moving truck rental | $187 |
| Packing materials | $55 |
| Replacement panels (if needed) | $125 |
| Professional movers (optional labor) | $400 |
Source: Angi/HomeAdvisor Cost Guide, BLS Electricians Data, FMCSA (2024)
How do you handle the electrical disconnect safely?
This is where the stakes run highest, so it gets its own section. Most residential prefab saunas run on a dedicated 240V, 30A to 60A circuit [3]. That's enough current to stop a heart. The breaker has to be off and tested before you open any junction box or touch any wire.
Here's the safe sequence: 1. Turn off the breaker labeled for the sauna at your main panel. 2. Use a non-contact voltage tester at the heater's terminal block to confirm the circuit is dead. Test twice. 3. If there's a disconnect switch or junction box near the sauna, test there too. 4. Cap or tape every conductor you disconnect with wire nuts. 5. Photograph the wiring before and after.
When you reinstall at the new location, the circuit almost certainly needs a fresh permit and inspection. Every U.S. jurisdiction requires permits for new electrical circuits, and moving a sauna to a new address counts as new work [4]. Budget $150 to $400 for the permit depending on your municipality, plus $200 to $600 for the electrician's labor to wire the new circuit [5].
Renting either location? Tell your landlord before you touch any electrical. Disconnecting a 240V circuit without authorization can cost you the security deposit and, worse, your renter's insurance coverage for any resulting damage.
One more thing. If your sauna uses a GFCI-protected 120V circuit, and some smaller units do, the reconnect at the new location is far simpler. A 120V, 15A or 20A sauna sits inside the DIY comfort zone for most homeowners who understand basic outlet wiring. Confirm with a tester before you touch it anyway.
How do you protect sauna panels during the move?
Cedar and hemlock panels are softer than most dimensional lumber. They dent, scratch, and split at the corners if you're careless. Protecting them is cheap and easy.
Wrap each panel in moving blankets or bubble wrap before stacking. Stack flat, never on edge unless secured. In a pickup or open trailer, lay panels horizontally with padding between every layer and strap them down, but not so tight the straps dent the wood.
For panels with tongue-and-groove edges, wrap the edges specifically. That's where damage happens, and a mangled tongue means a panel that won't seat at reassembly.
Hiring movers? Tell them, in plain words, that the panels are solid wood and fragile at the edges. Most crews take no special precautions unless you spell it out. Get it in writing on the contract if you can. Standard released valuation coverage from interstate movers is $0.60 per pound per article under federal rules [6], which means a 20-pound panel earns you $12 in coverage. That's the case for adding declared value coverage on a high-end kit.
For short moves across town, a cargo van or box truck works fine. For long hauls, check whether the original shipping boxes are still in storage. Plenty of people keep them for exactly this reason.
Label every stack with the panel numbers and orientation arrows. You'll thank yourself at reassembly.
How long does reassembly take at the new location?
Reassembly runs about the same as disassembly or a touch faster, because you've done it once and you have numbered panels with photos. For a 4x6 sauna, two people who did the teardown can usually rebuild in 3 to 5 hours. Larger units run 5 to 8 hours.
The bottleneck is almost always the electrical hookup, not the panels. You might finish the panel work in an afternoon and still wait days for the electrician's schedule and the permit inspection. Plan for that. Don't promise anyone the sauna is "ready this weekend" until the electrical is signed off.
A few reassembly moves that save real time:
- Lay all panels out in numbered order on the floor before you insert any. The 10 minutes it takes saves 30 minutes of hunting.
- Re-seat tongue-and-groove joints by hand first, then tap with a rubber mallet. Never swing a metal hammer at the wood.
- Check the floor is level before you commit panels to it. A prefab sauna on an unlevel floor opens gaps at the top corners. A 1/4-inch shim under the base frame is easy to add now and hard to fix once the walls are up.
- Reconnect the heater wiring last, after the inspector signs off on the circuit.
Damaged panels reveal themselves here. Keep the manufacturer's customer service number handy. Most major brands sell replacement panels individually, but lead times run 1 week to 6 weeks depending on the brand and your location.
What does it cost to move a prefab sauna?
Cost swings on one choice: DIY the physical move and hire out only the electrical, or pay a full-service crew for the whole thing.
| Cost component | DIY-friendly? | Typical range |
|---|---|---|
| Permit for new electrical circuit | Required in most jurisdictions | $150 to $400 [4] |
| Licensed electrician (disconnect + reconnect) | Recommended for 240V | $300 to $900 [5] |
| Moving truck or van rental | Yes | $75 to $300 |
| Moving blankets and packing materials | Yes | $30 to $80 |
| Replacement panels (if any are damaged) | Yes, from manufacturer | $50 to $200 per panel |
| Professional movers (labor only, if hired) | Optional | $200 to $600 |
| Total DIY (electrical pro + truck rental) | $600 to $1,700 | |
| Total fully outsourced | $1,000 to $2,500 |
These ranges assume a standard residential prefab sauna, 4x4 to 6x8 feet, on a local move under 50 miles. Long-distance moves add freight.
For context, a new entry-level prefab sauna costs roughly $1,500 to $4,000, and a mid-range unit runs $4,000 to $8,000 [7]. If your sauna is more than five years old and you're staring down a long-distance move with full freight, price out a new unit before you commit. Replacement sometimes makes more financial sense than relocation, especially once the panels carry heavy heat-cycling wear.
Moving into a new home and open to options? A fresh outdoor sauna or a portable sauna that erases the relocation problem entirely might beat hauling the old one.
Do you need a permit to reinstall a prefab sauna?
In most U.S. jurisdictions, yes, for the electrical work. The sauna structure itself usually doesn't need a separate building permit if it's a freestanding indoor unit, though some municipalities require one even for prefab outdoor structures [8].
The electrical side is clearer. Any new circuit, including a new 240V feed to your sauna at the new location, requires a permit and inspection in virtually every U.S. jurisdiction under local adoptions of the National Electrical Code [2]. This is not optional and not something to skip. An uninspected circuit that later starts a fire can void your homeowner's insurance.
For outdoor installs at the new location, check local zoning for setbacks. Most residential zones require accessory structures to sit at least 5 feet from property lines, but this varies by municipality [9]. A prefab sauna on a concrete pad counts as an accessory structure in most zoning codes.
Moving to a new state? Some have adopted the 2020 or 2023 NEC edition while others still run 2017 [2]. The differences rarely touch a standard sauna install, but an electrician licensed in the new state knows what's current there.
Pull the permit. The inspection also puts a second set of eyes on your reinstallation, which is genuinely useful.
What can go wrong during a prefab sauna move, and how do you prevent it?
A few things go wrong with real regularity. Know them going in and the move stays a chore instead of turning into a project.
Stripped fasteners. Heat cycling works screws loose and retightens them in slightly shifted positions over the years. Back them out and the heads strip. Prevention: use a screw extractor bit, not a bigger screwdriver. Keep a dozen replacement screws in the same size on hand.
Cracked panel edges. Tongue-and-groove panels seated for years sometimes crack along the groove when you separate them. Tapping with a rubber mallet and wood block instead of prying with a screwdriver prevents most of it. Slow and patient beats fast and forceful.
Lost or mislabeled panels. Two days after the move you can't remember which wall panel goes where, and the manual shows generic diagrams. Prevention: number every panel before it comes off, photograph it in place, keep a written list. Thirty minutes of documentation saves hours of puzzle-solving.
Heater damage from rough handling. Sauna heaters, especially stone-filled ones, are heavy. Drop a 40-pound heater on a concrete floor and you damage the housing and maybe the elements. Remove the stones first, every time, and carry the heater with two people.
Wiring that won't reach. The original electrician may have left just enough slack for that room's layout. At the new location the panel might sit differently relative to the entry point. Have your electrician assess the new space before the move if you can, so materials are on hand.
Mold or moisture surprise. Pull floor panels that have been down for years and you sometimes find moisture damage underneath. It's more likely if the original install lacked a proper vapor barrier or sat on an exterior wall. Find it, fix it before reassembly, not after. Running a dehumidifier and letting the subfloor dry for 48 to 72 hours handles most minor cases.
Should you move the sauna yourself or hire a specialty crew?
Honest answer: if you installed the sauna, you can take it apart and put it back together. The physical transport of panels sits squarely in DIY territory. The electrical is the one piece I'd consistently hire out, unless you're a licensed electrician or truly experienced with 240V.
A specialty sauna installation crew, where you can find one, charges roughly $500 to $1,500 for full disassembly and reassembly, not counting the electrician [7]. They bring speed and familiarity with prefab systems, but they're rare in most mid-size markets. More likely you'll pair a general handyman for the lifting with a local electrician for the wiring.
The case for doing it yourself: you know your sauna. You know where the quirks hide. You can take your time without a crew billing by the hour.
The case for hiring out: if the sauna is large (6x8 or bigger), if your back is a problem, or if it's a long-distance move with freight, the logistics multiply fast. No shame in paying someone to carry heavy things.
SweatDecks keeps a library of buying and setup guides for the moment you decide the move isn't worth it. A home sauna delivered to the new address in its original packaging is sometimes the cleaner path.
For most people moving a mid-size prefab unit across town, a DIY move with a hired electrician lands between $600 and $1,200. That's a fair spend to keep a sauna you already like.
How do you prepare the new space before the sauna arrives?
People skip this step and then regret it. The new space should be ready before you disassemble the old sauna, not after.
Measure the new room and compare it to the sauna's footprint. Add at least 6 inches on every side for ventilation clearance. Most manufacturers spec 2 to 4 inches from walls, but 6 gives you better heat dissipation and room to work during reassembly [10].
Check the floor. Prefab saunas need a level, solid floor that can carry the weight. A typical 4x6 sauna with benches, heater, and stones weighs 400 to 700 pounds spread across the floor. Standard residential floors rated for 40 pounds per square foot of live load handle this easily, but look for soft spots or existing damage [11].
Going outdoors at the new spot? Pour a concrete pad or build a deck frame before the panels arrive. A 4-inch reinforced concrete pad is standard for outdoor prefab saunas. Concrete reaches full strength after 28 days of curing [12], so schedule this well ahead of your move date.
For electrical: have your electrician check the new panel capacity before the move. A 240V, 40A sauna circuit needs two open slots in the breaker panel. If the panel is full, you're looking at a sub-panel or load management, which adds cost and time.
Think about the drain too. Saunas don't need floor drains, but plenty of people want one for cleaning. If you're planning a drain, rough in the plumbing before the sauna goes in. Adding it later is a real headache.
A sauna pays you back most in a space set up thoughtfully for it. The sauna benefits you're after, cardiovascular and recovery both, hold whether the unit is new or relocated. A good environment is what gets you actually using it.
Frequently asked questions
Can I move a prefab sauna by myself, or do I always need two people?
Two people is the floor. Even the smaller 4x4 prefab saunas have wall panels 6 to 8 feet tall that are awkward to move through doorways alone. You can do the documentation and fastener removal solo, but every panel lift needs a second set of hands to keep from dropping and cracking the wood. For saunas larger than 5x6, three people makes the reassembly noticeably faster.
How do I find the assembly manual for my sauna if I lost it?
Check the manufacturer's website first. Search the model number plus "assembly manual" or "installation guide." Most major prefab sauna brands host PDFs in their support or downloads section. If the brand is discontinued, try the model number on sauna enthusiast forums, or contact the retailer you bought it from. Some older manuals also turn up on third-party appliance manual sites.
Will moving my prefab sauna void the warranty?
Possibly. Many prefab sauna warranties tie to the original installation address or to professional installation. Read your warranty document for language about relocation or reinstallation. Some manufacturers void the structural warranty if a unit moves without their certified installer. The heater warranty is often separate from the cabinet warranty with its own terms. Contact your manufacturer before the move if the unit is still covered.
How do I keep track of which panels go where during disassembly?
Tape a piece of painter's tape to the interior face of every panel before it comes off, and write the wall name and sequence number in permanent marker, for example "Left Wall Panel 1." Photograph each panel in place from a step back so the shot shows context. Keep a written list. It sounds like overkill but takes about 20 minutes and prevents hours of trial-and-error at reassembly. Number the benches and brackets the same way.
What is the best way to transport sauna panels without damaging them?
Stack panels flat with moving blankets between each layer. Never stack on edge without securing them. The tongue-and-groove edges are the most fragile part, so wrap those specifically. In a truck or trailer, strap the stack down firmly but not so tight the straps dig into the wood. If panels are wet or hold any moisture, let them dry fully before wrapping. Moisture trapped in blankets breeds mold.
Can I disassemble an outdoor prefab sauna the same way as an indoor one?
The panel-by-panel sequence is the same. The differences are practical: outdoor saunas often have roofing like cedar shingles or metal panels that come off first, before the walls. Outdoor units also carry UV and weather exposure that tightens joints and corrodes fasteners. Keep penetrating oil like PB Blaster on hand for stubborn screws, and budget extra time for the roof. Confirm the electrical disconnect is weatherproof before you open it.
Do I need an electrician to disconnect my sauna before moving it?
For a 240V sauna, which covers almost every full-size prefab unit, hiring a licensed electrician for the disconnect is strongly recommended. The National Electrical Code treats 240V circuits as higher hazard than standard 120V household circuits. An unlicensed disconnect that causes damage may also void your homeowner's insurance. For a 120V portable or barrel sauna, a competent homeowner can unplug it like any other appliance.
How do I know if my sauna panels are damaged and need replacing before I move?
Look for cracks running along the grain, especially near fastener holes, and soft or discolored wood, which points to moisture. Check the tongue-and-groove edges for chips or splits. Minor surface scratches are cosmetic and don't affect function. Structural cracks near panel corners or running the full length of a panel should be replaced before reassembly, since they worsen with continued heat cycling. Contact the manufacturer with the model number to order replacements.
How much clearance does a prefab sauna need from walls at the new location?
Most manufacturers spec a minimum of 2 to 4 inches between the sauna exterior and surrounding walls for heat dissipation and ventilation. In practice 6 inches is more comfortable and gives you room to work if you ever need to reach the back panels again. For outdoor placement, check local zoning for accessory structure setbacks, typically 5 feet from property lines but variable by municipality.
What permits do I need to reinstall a prefab sauna in a new home?
You'll almost certainly need an electrical permit for the new circuit. Most U.S. jurisdictions also require inspection of new 240V circuit installations under their local adoption of the National Electrical Code. The sauna cabinet itself usually doesn't need a separate building permit for indoor installs, but outdoor freestanding saunas may, depending on your municipality. Call your local building department with the sauna's footprint and wattage before you start.
Is it worth moving a prefab sauna or should I just buy a new one?
Run the numbers. A full-service move including electrician, permits, and truck rental runs roughly $1,000 to $2,500. A new entry-level prefab sauna starts around $1,500 to $2,000. If your sauna is high quality, less than five years old, and moving locally, relocation almost always wins on cost. If it's an older budget unit, heavily worn, or moving long-distance with freight, replacement can be the smarter call. Judge the condition honestly.
How do I level a prefab sauna at the new installation site?
Use a 4-foot level on the floor before you set the first base panel or frame piece. If the floor runs slightly uneven, put composite shims under the base frame corners to bring it level. Cedar or composite shims hold up better than wood shims in sauna heat and humidity. A level base matters more than it looks: an unlevel sauna opens corner gaps at the ceiling over time as panels settle, and the door may not close right.
Can I store sauna panels in a garage or storage unit during a move?
Yes, as long as the space is dry. Cedar and hemlock absorb moisture readily, and panels stored in a damp garage or unclimatized unit can warp or grow mold within weeks. Stack them flat with spacers between panels for air circulation, not directly on a concrete floor. If you're storing longer than two weeks in a humid climate, lay a plastic vapor barrier under the stack.
Sources
- Occupational Safety and Health Administration (OSHA) - Electrical Safety: 240V circuits carry sufficient current to cause cardiac fibrillation and require appropriate precautions before any work is performed
- National Fire Protection Association - NFPA 70 (National Electrical Code): The National Electrical Code treats circuits over 150V to ground as higher hazard and governs permit and inspection requirements for new circuit installations
- U.S. Consumer Product Safety Commission: Most residential prefab saunas operate on dedicated 240V, 30A to 60A circuits
- International Code Council - Building Permit Requirements: Electrical permits are required for new circuit installations in virtually all U.S. jurisdictions adopting the International Residential Code
- U.S. Bureau of Labor Statistics - Electricians Occupational Outlook: Licensed electrician labor costs for residential circuit work typically range from $50 to $100 per hour, putting a disconnect-plus-reconnect job at $300 to $900 for most sauna installations
- Federal Motor Carrier Safety Administration - Protect Your Move: Standard released valuation coverage from interstate moving companies is $0.60 per pound per article under federal regulations
- HomeAdvisor (Angi) - Sauna Installation Cost Guide: Entry-level prefab saunas cost $1,500 to $4,000; mid-range units run $4,000 to $8,000; professional installation labor for disassembly and reassembly runs $500 to $1,500
- International Code Council - Accessory Structure Permit Requirements: Outdoor prefab sauna installations may require building permits as accessory structures depending on the local jurisdiction's adopted code
- American Planning Association - Zoning for Accessory Structures: Most residential zoning codes require accessory structures to maintain at least 5-foot setbacks from property lines, though requirements vary by municipality
- Finlandia Sauna - Installation Instructions (representative manufacturer guidance): Most prefab sauna manufacturers specify 2 to 4 inches of clearance from surrounding walls for heat dissipation and ventilation
- American Wood Council - Residential Structural Design Guide: Standard residential floor systems are rated for 40 pounds per square foot of live load, sufficient for most prefab sauna installations of 400 to 700 pounds
- Portland Cement Association - Concrete Curing: Concrete reaches full compressive strength after 28 days of curing, which is the minimum recommended wait before placing structures on a newly poured pad

Share:
How to move a sauna without wrecking it: the full guide
How to seal sauna tongue and groove joints the right way