
Last updated 2026-07-10
TL;DR
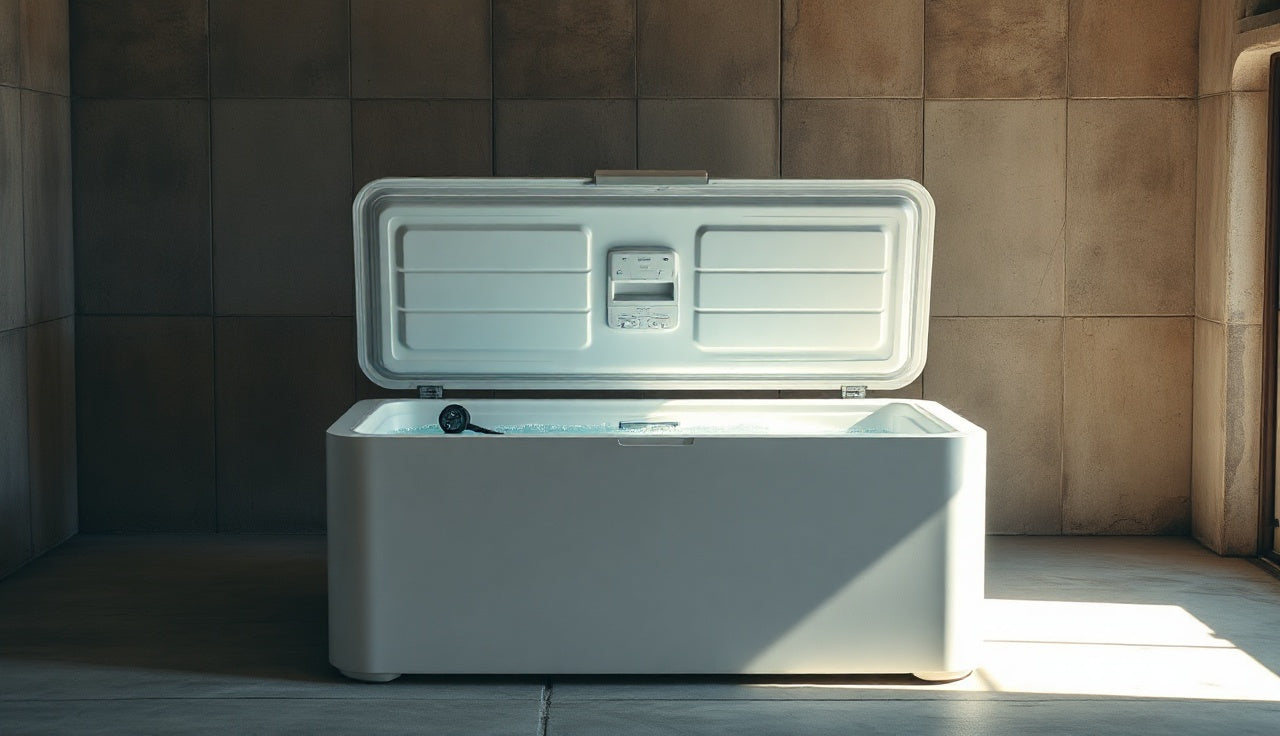
A chest freezer cold plunge costs $150 to $400 in parts and takes one weekend to build. You need a 7 to 15 cubic foot chest freezer, a waterproof liner or sealed interior, a way to sanitize the water, and a reliable thermometer. The result holds 38 to 55°F water indefinitely, matching dedicated cold plunges that run $3,000 to $6,000.
Is a chest freezer cold plunge actually worth building?
Yes, if you're willing to spend a Saturday on it. A purpose-built cold plunge like a Plunge, Ice Barrel, or ColdTub runs $3,000 to $6,000 at retail [1]. A chest freezer conversion gets you the same core experience, meaning sustained cold water at a controlled temperature, for somewhere between $150 and $400 depending on what you already own and how fancy you get with filtration.
The honest trade-offs: you'll spend time on maintenance that commercial units partly automate, the thing looks like exactly what it is, and older freezers can have insulation issues or exposed metal that needs sealing. None of those are deal-breakers for most people. The physics of cold immersion don't care what the exterior looks like.
Who should skip this build? Anyone who wants plug-and-play simplicity. Anyone without a safe outdoor or garage space for a freezer pulling 100 to 500 watts. Anyone who can't comfortably manage a DIY project that mixes water and electricity in the same box. For everyone else, read on.
For context on what you're buying into physiologically, the cold plunge benefits article covers the research on cold water immersion in detail.
What size chest freezer do you need for a cold plunge?
The minimum usable size for shoulders-to-feet immersion while seated is about 7 cubic feet. That gets you a tub roughly 42 inches long and 24 inches deep. Comfortable is 10 to 15 cubic feet, which gives you room to extend your legs instead of sitting with your knees at your chin.
Here's a practical sizing table:
| Cubic feet | Approx. interior (L x W x D) | Best for |
|---|---|---|
| 7 cu ft | 42" x 24" x 24" | Compact/seated immersion |
| 10 cu ft | 47" x 27" x 28" | Most adults, good leg room |
| 13 cu ft | 55" x 28" x 32" | Taller users, full stretch |
| 15 cu ft | 60" x 30" x 32" | Maximum comfort, two people |
Brand doesn't matter much. The compressor does. Look for units with a minimum 1/4 HP compressor. Garage-ready freezers (rated to run in ambient temps from 0°F to 110°F) are worth the small price premium if your plunge lives in a garage or outdoors, because standard freezers can struggle or fail when the surrounding air is very warm or very cold [2].
Used freezers from Facebook Marketplace or Craigslist are fine as long as they hold temperature. Bring a thermometer, set the freezer to max cold, wait 30 minutes, and confirm it actually gets below 32°F before you pay. A freezer that can't hit its rated temp is the number-one failure point in this build.
What materials do you need for the conversion?
Here's the full parts list. Prices are approximate as of mid-2025 and will vary by region.
| Item | Estimated cost | Notes |
|---|---|---|
| Chest freezer (7 to 15 cu ft) | $80, $250 used, $200, $450 new | Garage-ready if outdoors |
| Liner (vinyl, HDPE, or spray) | $30, $120 | See liner section below |
| Submersible pump/filter | $25, $60 | Pond pump with UV is ideal |
| Thermometer (digital probe) | $10, $20 | Accuracy matters |
| Pool sanitizer (bromine tabs) | $15, $25 | Safer than chlorine in cold |
| Foam pipe insulation | $10, $15 | For any exposed metal edges |
| GFCI outlet or adapter | $15, $30 | Non-negotiable safety item |
| PVC or vinyl drain plug | $8, $15 | For easy water changes |
| Pool test strips | $8, $12 | Weekly chemistry checks |
| Total | $201, $547 |
You can go lower if you already own a freezer and skip the UV pump. You can go higher if you want a pre-molded HDPE liner, a dedicated chiller controller, or cedar trim. None of the premium additions are necessary. They're comfort and longevity upgrades.
One thing people overlook: a sturdy step stool or small platform to get in and out safely. That matters most on taller freezers where the lip sits at hip height.
| DIY chest freezer (basic) | $225 |
| DIY chest freezer (upgraded) | $425 |
| Entry-level electric cold plunge | $1,150 |
| Mid-range cold plunge (e.g. Plunge) | $3,990 |
| Premium cold plunge | $7,500 |
Source: Consumer Reports, CNET product reviews, 2024–2025
Do you need to line the inside of the chest freezer?
Almost always yes. The standard chest freezer interior is zinc-coated or painted steel, and extended contact with water causes rust within weeks. You also want a smooth, sealed surface that's easy to sanitize and won't leach anything into the water you're sitting in.
Three liner approaches work well:
1. Vinyl or PVC liner (cheapest, easiest) A heavy-duty pond liner (20 to 30 mil PVC or EPDM) cut to fit and draped inside the freezer is the most common DIY approach. Fold the corners like you're wrapping a gift, use food-safe waterproof tape or a staple gun through the top lip to hold it, and you're done in under an hour. Cost: $30 to $60 for enough material [3].
2. Rigid HDPE insert (nicest, most expensive) High-density polyethylene is the same food-safe plastic used in commercial food processing equipment. Some sellers on Etsy or Amazon cut custom HDPE inserts to order. Drop it in, seal edges with waterproof silicone, and you have something that looks close to a finished product. Cost: $80 to $150 depending on size.
3. Spray-on rubber or Flex Seal coating (controversial) People do this. A few coats of food-safe rubberized sealant over the bare metal can work, but coverage is inconsistent and it's hard to verify no metal is exposed. If you go this route, let it cure fully (manufacturers usually say 24 to 48 hours), then do a 24-hour water soak and drain to test for leaks before your first plunge.
Whatever liner you choose, foam pipe insulation along the top metal edges stops scratches on the way in and out and adds a little temperature insulation.
How do you keep the water clean without draining it every time?
This is where most DIY builds succeed or fail over the long haul. Stagnant cold water grows bacteria. You have two tools: circulation and chemistry.
Circulation via a submersible pump A small pond pump (150 to 400 GPH) circulating water through a basic filter pad removes debris and keeps water from stagnating. Put the pump in one corner and the outflow at the opposite end. Cost: $25 to $60.
If you can find a pump with a built-in UV sterilizer, that add-on is worth the extra $10 to $20. UV sterilizers destroy bacteria and algae at the DNA level without adding chemicals [4]. The UV bulb needs replacement roughly every 6 to 12 months depending on the manufacturer's spec.
Chemical sanitization Bromine beats chlorine for cold plunge use. It stays effective at lower temperatures and across a wider pH range, produces less off-gassing, and is gentler on skin during longer soaks [5]. Run bromine tablets in a floating dispenser and hold levels at 3 to 5 ppm. Check with test strips twice a week.
If you strongly prefer non-chemical options, hydrogen peroxide (35% food-grade, diluted) at 30 to 50 ppm is used by some DIY builders. Nobody has well-controlled data comparing it to bromine in low-volume cold plunge settings, but it lands in a similar ballpark to what commercial pools use for chemical-free systems.
Do a full water change every 4 to 8 weeks regardless of your maintenance approach. Cold water slows microbial growth relative to a hot tub. It doesn't stop it.
Step-by-step: how to build the chest freezer cold plunge
Here's the full build sequence. Plan for a full day if this is your first time.
Step 1: Source and test the freezer Buy new or used. Test the compressor: plug it in, set it to max, wait 30 to 45 minutes, and confirm the interior drops to at least 15 to 20°F. If it can't get there empty, it definitely won't hold 38 to 45°F with 60-plus gallons of water fighting it.
Step 2: Clean the interior Wipe down every surface with a diluted bleach solution (1 tablespoon unscented bleach per gallon of water) or white vinegar. Let it dry fully. Treat any rust spots with a rust converter product before lining.
Step 3: Install the drain Drill a 1" hole near the bottom corner of the freezer. Fit a bulkhead fitting and attach a ball valve on the outside. This turns water changes into a two-minute job instead of a bucket-bailing nightmare. Seal around the fitting with waterproof silicone on both sides.
Step 4: Install the liner Drop in your vinyl liner or HDPE insert. For vinyl, press it into the corners, fold the excess over the lip, and secure it. Run a bead of silicone around the drain fitting from the inside through the liner hole.
Step 5: Install the pump and filter Set the submersible pump in one corner. Run the power cord over the lip (keep it from pinching when the lid closes) or drill a small grommet hole near the top edge. The cord must reach a GFCI outlet.
Step 6: GFCI protection (non-negotiable) Any electrical device near water must be on a GFCI-protected circuit. If your garage or outdoor outlet isn't already GFCI, buy a GFCI plug adapter ($15 to $25). The National Electrical Code (NEC) Article 680 requires GFCI protection for receptacles near pools, spas, and similar water features [6]. Follow it.
Step 7: Fill and treat the water Fill with a garden hose. Add bromine to bring it to 3 to 5 ppm before your first use. Let the pump run for 2 to 4 hours to circulate.
Step 8: Set temperature and wait Set the freezer thermostat to its coldest setting first, then dial back once the water is close to your target. Most builds land between 38°F and 50°F. A digital probe thermometer tells you exactly where you are. Depending on ambient temperature and compressor power, reaching target temp from room-temperature water can take 12 to 36 hours.
Step 9: Test, adjust, get in Verify temperature. Check bromine levels. Confirm your drain valve is closed. Have someone nearby for your first few sessions, especially if you're new to cold immersion. Start with 30 to 60 seconds and build up. Most published protocols that show a physiological response use sessions of 1 to 5 minutes at 50 to 59°F [7].
What temperature should you run a DIY cold plunge?
The research on cold water immersion clusters around 50 to 59°F (10 to 15°C) for most of the reported physiological effects, including norepinephrine release and reduced delayed onset muscle soreness [7][8]. That's a manageable target for most home chest freezer builds.
Colder than 50°F is possible, and some experienced users prefer it. But the risk of cold shock response (involuntary gasping, hyperventilation, potential cardiac stress) climbs below 50°F, especially in the first few seconds of entry [9]. Sudden cold water immersion can trigger cardiac events in people with undiagnosed heart conditions [9].
For practical purposes:
- 50 to 59°F: Most research protocols, good for beginners
- 45 to 50°F: Intermediate, requires acclimation
- 38 to 44°F: Advanced, short durations only, not recommended for new users
Your freezer thermostat may not have numbered settings, just a dial from 1 to 9 or Min to Max. Buy a separate digital probe thermometer and use the freezer dial to calibrate. Once you find the setting that holds your target temp, mark it with tape.
How do you control the temperature precisely?
The factory thermostat on a chest freezer is built for food storage, not precise water temperature. Most dials cover a range of roughly 0°F to 40°F with no numbered markings.
The cleanest upgrade is a plug-in temperature controller (Inkbird and Ranco are popular brand names). You plug the freezer into the controller, plug the controller into the wall, and set your exact target. The controller cuts power to the freezer when the water hits your target and restores power when it drifts up. These run $25 to $45 on Amazon and make the build far easier to manage [2].
Without a controller, you'll adjust the thermostat dial by hand and check the thermometer daily until you find the right setting. That works fine. It just takes a few days of calibration.
One thing worth knowing: the compressor on most chest freezers isn't built to cycle on and off rapidly. A temperature controller with a minimum off-time setting of 3 to 5 minutes protects the compressor from short-cycling. Most purpose-built controllers have this built in.
Is it safe to use a chest freezer as a cold plunge?
Yes, with the right precautions. The risks are real but manageable.
Electrical safety: The biggest risk in any DIY build. Use GFCI protection. Keep all electrical connections and cords away from standing water. Never use extension cords that aren't rated for outdoor or wet locations. Inspect connections monthly.
Cold shock: The involuntary gasp reflex triggered by sudden cold water can cause aspiration of water or, in rare cases, cardiac arrhythmia. The risk is higher in people with cardiovascular disease. The UK's Royal National Lifeboat Institution, which publishes guidance on cold water shock, notes the response is most severe in the first 30 to 90 seconds [9]. Controlled entry (slow and deliberate) blunts the response. Don't jump in.
Entrapment: A chest freezer lid is heavy. If it falls closed while you're inside and you can't push it open, that's a serious problem. Remove the lid entirely (set it aside or lean it against the wall), or permanently remove the lid hinges. Many builders swap the lid for a simple insulated cover made from rigid foam board.
Hypothermia: With controlled water temperatures and reasonable session times (1 to 10 minutes for most users), hypothermia risk is low. It rises with longer sessions, colder temps, and solo use where nobody knows you're out there. Don't plunge alone until you know your personal limits.
Water quality: Poorly sanitized water can cause skin infections or worse. Follow the maintenance schedule.
How much does a chest freezer cold plunge cost compared to buying one?
Here's an honest comparison [1][10]:
| Option | Upfront cost | Ongoing cost/yr | Notes |
|---|---|---|---|
| DIY chest freezer (basic) | $150, $300 | $50, $100 (electricity, chemicals) | Used freezer + vinyl liner + pump |
| DIY chest freezer (upgraded) | $300, $550 | $60, $110 | New freezer + HDPE liner + UV pump + controller |
| Ice barrel (ice-filled) | $200, $400 | $600, $1,800 (ice costs) | No electricity, but ice is expensive |
| Entry-level electric cold plunge | $800, $1,500 | $120, $200 | Simpler maintenance, smaller tanks |
| Mid-range cold plunge (e.g., Plunge) | $2,990, $4,990 | $150, $250 | Built-in filtration, warranty, polished |
| Premium cold plunge | $5,000, $10,000+ | $200, $400 | Commercial quality, chiller, UV |
The chest freezer build pays for itself in under a year against buying bags of ice, and in two to three years against a mid-range commercial unit, assuming similar electricity costs.
A chest freezer cold plunge pulls 100 to 500 watts while cooling, but the compressor cycles rather than running flat out. Real-world energy consumption is roughly 1 to 3 kWh per day depending on ambient temperature, insulation quality, and target temperature. At the US average residential rate of about $0.16 per kWh as of 2024, that's $5 to $15 per month [11].
To browse what purpose-built cold plunges cost and compare features, SweatDecks' cold plunge collection has current pricing on the units we carry.
How do you maintain a chest freezer cold plunge long-term?
The routine is lighter than a hot tub but heavier than just filling a tub. Here's a realistic schedule.
Daily Check the thermometer. Glance at water clarity. Takes 30 seconds.
Twice weekly Test bromine and pH with test strips. Adjust as needed. Bromine should be 3 to 5 ppm; pH should be 7.2 to 7.6. If pH drifts high, a small amount of dry acid (sodium bisulfate) brings it down. If pH drifts low, baking soda brings it up [5].
Weekly Rinse the filter pad in the pump. Check that the drain valve moves freely.
Monthly Inspect the power cord and GFCI. Check the liner for tears or separation at the edges. Wipe down the interior above the waterline.
Every 4 to 8 weeks Full water change. Open the drain valve, empty completely, wipe down the interior, refill, re-treat. If you spot biofilm (a slimy coating on surfaces), a diluted bleach wipe-down before refilling clears it.
Every 6 to 12 months If you're running a UV sterilizer, replace the bulb per the manufacturer's schedule. Check the compressor's condenser coils (usually on the back) and brush off dust buildup.
People who skip the chemistry end up with greenish water in a few weeks. People who stay on the schedule run the same water for 6 to 8 weeks with no issues.
Can you use contrast therapy with a DIY chest freezer cold plunge?
Absolutely, and this is where the DIY build gets genuinely interesting if you also own a sauna. Contrast therapy, alternating heat and cold, is one of the more studied recovery protocols, with research showing effects on perceived fatigue and muscle soreness recovery [7][8].
The typical protocol runs 2 to 3 rounds of heat (10 to 20 minutes in a sauna or home sauna) alternated with cold immersion (1 to 5 minutes in the plunge), ending on cold. Session lengths and temperatures vary across studies, and the research isn't fully settled on optimal timing, but the general pattern is consistent.
For home use, keeping both a sauna and a chest freezer cold plunge in the same space, usually a garage, is doable for well under $3,000 total. That's less than most standalone commercial cold plunges cost by themselves. A portable sauna paired with this build makes the combo even more accessible.
For anyone digging into the evidence behind contrast therapy and cold immersion, the cold plunge benefits page goes deeper into the studies. If you also want to read about ice bath protocols specifically, that's a good companion piece.
What are the most common mistakes in chest freezer cold plunge builds?
After watching hundreds of builds documented online, the same mistakes come up over and over.
Skipping the liner is the most expensive one. Rust develops fast in standing water. A $40 vinyl liner prevents a situation where you're draining and scrubbing corroded metal after six weeks.
Not using GFCI protection is the most dangerous one. This is not optional.
Keeping the lid on and attached creates an entrapment risk. Remove the lid or at minimum pull the hinge pins so it can't latch.
Buying a freezer that's too small is the most common frustration. Seven cubic feet sounds like enough until you're in it and can't straighten your legs. Spend the extra $30 to $50 for 10 cubic feet.
Skipping the temperature controller buys you weeks of dial-adjustment frustration. A $35 Inkbird controller is one of the best money-to-convenience swaps in this build.
Ignoring water chemistry turns a recovery tool into a petri dish. Set a recurring phone reminder for chemistry checks.
Not testing the freezer before building means some people build a whole liner setup only to learn the compressor can't hold temperature. Always test the freezer cold before any modifications.
Setting the target too cold too soon makes early sessions miserable and potentially risky. Start at 55 to 60°F for your first week and work down.
Frequently asked questions
How long does it take to cool the water in a chest freezer cold plunge?
Starting from room-temperature water (around 70°F), most chest freezer builds take 12 to 36 hours to reach 50°F, depending on compressor size, ambient temperature, and how much water you're cooling. A 10 cubic foot freezer holding 60 to 70 gallons in a 70°F garage typically reaches target overnight. Colder ambient temps help; hot summer garages slow the process.
How many gallons of water does a chest freezer cold plunge hold?
A 7 cubic foot freezer holds roughly 45 to 50 gallons once a liner is installed. A 10 cubic foot freezer holds 60 to 70 gallons. A 15 cubic foot freezer can hold 90 to 100 gallons. The liner reduces volume slightly, and you'll want to leave a few inches at the top so water doesn't overflow when you get in.
Do you need a pump and filter in a chest freezer cold plunge?
Technically no, but practically yes. Without circulation, water stagnates and bacteria accumulate faster. A basic submersible pond pump ($25 to $60) circulating water through a filter pad stretches the time between full water changes and keeps the water cleaner. A UV sterilizer adds meaningful bacterial control. You can skip the pump and just do weekly full water changes if you prefer the minimal approach.
Can I use a chest freezer cold plunge outdoors?
Yes, with the right freezer. Look for a 'garage-ready' or 'outdoor-rated' chest freezer, built to run in ambient temperatures from around 0°F to 110°F. Standard chest freezers are designed for climate-controlled spaces and can malfunction in extreme heat or cold. All outdoor electrical connections must be rated for wet or outdoor use and protected by a GFCI breaker or outlet.
What's the cheapest way to build a chest freezer cold plunge?
The lowest-cost build: a used chest freezer ($80 to $120 from Facebook Marketplace), a vinyl pond liner ($30 to $40), a basic submersible pump ($25), bromine tabs ($15), and a digital thermometer ($12). Skip the temperature controller and HDPE liner. Total: around $160 to $210. You'll spend more time on temperature calibration and water changes, but the core function is identical.
Is it safe to submerge yourself in a chest freezer used as a cold plunge?
Yes, with precautions. Remove or unlatch the lid to prevent entrapment. Use GFCI protection for all electrical components. Start with shorter, warmer sessions and build cold tolerance gradually. People with cardiovascular conditions should talk to a doctor before starting cold water immersion. Sudden cold water triggers an involuntary gasp and heart rate changes that can stress an unhealthy cardiovascular system.
How often do you need to change the water in a DIY cold plunge?
With a pump, filter, and proper bromine maintenance, most builders change water every 4 to 8 weeks. Without a pump or chemistry, you'd change it weekly or sooner. Full water changes take about 15 to 20 minutes via a drain valve: open the drain, let it empty, wipe down surfaces, close drain, refill, re-treat. Skipping changes leads to biofilm and off-putting water color.
Can you use a chest freezer cold plunge for contrast therapy with a sauna?
Yes, and it's one of the most popular uses. A typical contrast protocol runs 10 to 20 minutes in the sauna followed by 1 to 3 minutes in the cold plunge, repeated 2 to 3 times. End the session on cold for perceived recovery benefit. Research on contrast therapy shows reductions in perceived muscle soreness and fatigue, though optimal protocols aren't fully established. A sauna and plunge together in a garage is a practical setup many people build.
What chemicals should I use to keep a chest freezer cold plunge sanitary?
Bromine is the most recommended option for cold plunge water. It stays effective across a wide pH range and works well at lower temperatures, unlike chlorine which loses effectiveness below 65°F. Hold bromine at 3 to 5 ppm and pH at 7.2 to 7.6. Test twice weekly. Some users prefer hydrogen peroxide (food-grade 35%, diluted to 30 to 50 ppm) as a chemical-free alternative, though comparative data for cold plunge volumes is limited.
Does a chest freezer cold plunge use a lot of electricity?
Real-world consumption runs about 1 to 3 kWh per day, since the compressor cycles on and off rather than running continuously. At the US average residential rate of roughly $0.16 per kWh in 2024, that's $5 to $15 per month. Older or poorly insulated freezers run higher. Keeping the plunge in a shaded, temperate space reduces the compressor's workload and lowers your bill.
What's the best temperature for a chest freezer cold plunge?
Most cold water immersion research uses 50 to 59°F (10 to 15°C). That range produces measurable physiological responses including norepinephrine release and is tolerable for most healthy adults with practice. Below 50°F raises cold shock risk and is best reserved for experienced users. Above 60°F is gentler for beginners. Start warmer and lower the temperature gradually over your first few weeks.
Can two people use a chest freezer cold plunge at the same time?
Possible but tight in most sizes. A 15 cubic foot freezer is the minimum for two adults side by side, and comfort depends on body size. Most DIY builds are single-person setups. Two-person use also increases the bioload on the water, so you'd test chemistry more often and probably shorten the interval between water changes.
Do I need to insulate the outside of the chest freezer?
The factory insulation in a chest freezer is designed to keep the interior cold, so you don't need to add exterior insulation for the plunge to work. If the freezer sits outdoors in direct sun or extreme heat, an insulated cover for the top reduces heat gain and compressor workload. A simple rigid foam lid (cut to fit) costs about $10 to $20 and makes a real difference in hot climates.
How long should you stay in a cold plunge?
Published protocols vary, but 1 to 5 minutes at 50 to 59°F covers most of the studied benefits. Beginners should start at 30 to 60 seconds and build up. There's no strong evidence that sessions longer than 10 to 15 minutes add meaningful benefit, and hypothermia risk climbs with time and colder temperatures. End the session when you start shivering intensely or feel numbness in the extremities.
Sources
- Consumer Reports, Cold Plunge Tub Buying Guide: Purpose-built electric cold plunges retail from roughly $3,000 to $6,000 and above for premium models.
- Energy Star (EPA), Refrigerators and Freezers Product Information: Garage-ready freezers are rated to operate in ambient temperatures from 0°F to 110°F, unlike standard models designed for climate-controlled spaces.
- US EPA, Water Research: PVC and EPDM pond liners at 20–30 mil thickness are standard for water containment applications and are available in cut-to-size sheets.
- US EPA, Water Research (Ultraviolet Disinfection Guidance Manual): UV sterilizers inactivate bacteria and pathogens by damaging their DNA, reducing viable microorganism counts without adding chemicals to the water.
- CDC, Healthy Swimming: Bromine remains effective across a wider pH range and at lower temperatures than chlorine, making it preferable for cold-water applications.
- National Fire Protection Association, NFPA 70 National Electrical Code (Article 680): NEC Article 680 requires GFCI protection for receptacles serving pools, spas, and similar water features.
- Bleakley et al., 'Cold-Water Immersion (Cryotherapy) for Preventing and Treating Muscle Soreness After Exercise,' Cochrane Database of Systematic Reviews, 2012: Cold water immersion studies commonly use water temperatures of 10–15°C (50–59°F) and immersion durations of 1–15 minutes in protocols examining muscle soreness and recovery.
- Tipton et al., 'Cold water immersion: kill or cure?' Experimental Physiology, 2017: Contrast therapy alternating heat and cold immersion is associated with reductions in perceived fatigue and delayed onset muscle soreness in exercise recovery research.
- Royal National Lifeboat Institution (RNLI), Cold Water Shock: Cold water shock, including involuntary gasping and hyperventilation, is most pronounced in the first 30–90 seconds of immersion and can trigger cardiac events in susceptible individuals.
- CNET, Cold Plunge Tub Reviews and Price Comparisons: Entry-level electric cold plunges start around $800–$1,500; mid-range units such as the Plunge retail at $2,990–$4,990.
- US Energy Information Administration, Electric Power Monthly: Average Retail Price of Electricity: The US average residential electricity rate was approximately $0.16 per kWh in 2024, based on EIA monthly data.

Share:
Above ground vs in-ground cold plunge: which is right for you?
Above ground vs in-ground cold plunge: which is right for you?