
Last updated 2026-07-11
TL;DR
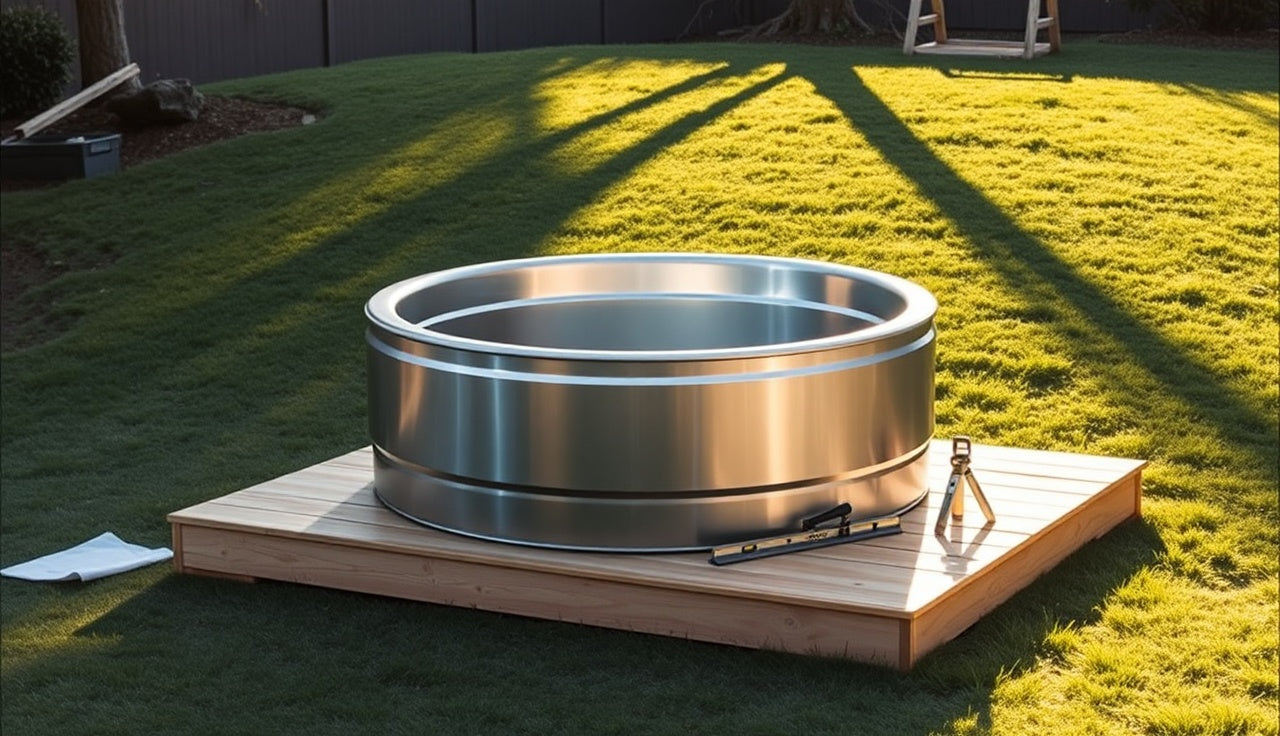
A cold plunge tub needs a stable, level base before you add a drop of water. Your options are adjustable leveling feet, composite or rubber pads, a built lumber platform, or a poured concrete pad. Most residential slopes under 6 inches of drop across 6 feet come down to pads or a simple wood frame. Steeper than that means a platform or concrete.
Why does leveling a cold plunge tub actually matter?
Water is honest. Fill a 400-pound cold plunge on a 3-degree slope and the water line sits perfectly horizontal while the tub shell and every stress point on the frame sit at an angle. Over weeks and months, that uneven load stress-cracks acrylic shells, fatigues welds on steel tubs, and makes pump fittings leak from constant side-loading.
There is a safety cost people underestimate. A filled cold plunge weighs anywhere from 800 to over 2,000 pounds depending on size and water volume [1]. That mass on an uneven surface has real lateral force pushing it downhill. Put it on decking or pavers that are themselves slightly sloped and the whole thing can shift during use. You climb in, the water sloshes, and now you have a moving load on an unstable base.
Most manufacturers void the warranty the moment a tub shows evidence of uneven support. Most local building departments require a level, structurally adequate base for a permanent plunge. Worth knowing before you shim it and fill it.
How much slope is too much to fix with simple leveling feet or pads?
If the low side of your tub location sits less than 2 inches below the high side across the full footprint, adjustable feet or rubber pad stacks handle it. From 2 to 4 inches of drop, composite shim pads or a shallow lumber frame is the right call. Past 4 to 6 inches, you are in platform or concrete territory.
The actual math depends on your footprint. A compact 4-foot round tub on a 1-in-12 slope (the standard residential grade near foundations) sees about 4 inches of drop across its diameter. That is more than it sounds when you are stacking rubber under one edge.
Here is a quick reference:
| Slope drop across tub footprint | Recommended approach |
|---|---|
| Less than 1 inch | Rubber leveling pads or adjustable feet |
| 1 to 2 inches | Composite shim pads or thick rubber mounts |
| 2 to 4 inches | Sistered lumber frame or steel frame base |
| 4 to 6 inches | Full raised platform (lumber or steel) |
| More than 6 inches | Poured concrete pad or retaining wall required |
These ranges assume a solid substrate: concrete, compacted gravel, or an existing deck. On soft soil or turf, add one tier of complexity to whatever the slope tells you.
What tools and materials do you need before you start?
Gather these before you move anything. A 4-foot level (longer is better; a torpedo level is far too short to read a tub base). A tape measure. A long straight board or box beam to bridge across the surface so you read level at the tub's actual corners, not across the uneven ground. A pencil and notepad for the corner measurements.
For most pad-based installs you also need rubber leveling pads or composite shims (HDPE or polypropylene pads made for this; real wood shims compress and rot), a torque wrench if your tub has adjustable feet with lock nuts, and a helper. Maneuvering an empty fiberglass or acrylic shell on a slope is a two-person job at minimum.
Platform builds add pressure-treated lumber rated for its exposure (UC4B for soil contact, UC3B for above grade) [2], structural screws rated for ACQ-treated lumber, joist hangers, and post bases if you are setting posts.
One thing most guides skip. Bring a smartphone with a digital level app as a second check, but never as your primary tool. Phone sensors drift, and the phone has to rest on a reference surface that may not be flat. The 4-foot spirit level is your ground truth.
| Rubber/HDPE pads | $75 |
| Adjustable leveling feet | $120 |
| Lumber platform (DIY materials) | $400 |
| Lumber platform (contractor) | $1,650 |
| Poured concrete pad | $1,250 |
| Helical piers (per pier, installed) | $400 |
Source: BLS Regional Electrician Rates and lumber yard estimates, 2024
Step-by-step: how to level a cold plunge on a mild slope (under 2 inches of drop)
Step 1: Clear and prep the surface. Remove debris, check for soft spots, confirm any concrete or paver base is sound. Press a finger into any gaps between pavers. If they move, reset them with compacted sand before you do anything else.
Step 2: Measure the drop. Lay your straight board across the full width of the tub location, set the level on it, and note how far you need to raise the low end to read level. Do this both ways, front-to-back and side-to-side.
Step 3: Position the tub empty. Slide it roughly into place so you can see where the feet or frame contact the ground.
Step 4: Raise the low side first. Slide rubber or composite pads under the low-side feet or frame rails. Most adjustable feet give about 1 inch of range; past that, you stack pads. HDPE composite pads beat wood here because they never compress and they shrug off the moisture that always drips off a cold plunge in use.
Step 5: Check and refine. Lay the level across the tub rim (if the rim is a known flat reference, which most quality tubs have), check both axes, and adjust until you read within 1/8 inch across the full length.
Step 6: Lock it down. Tighten any foot lock nuts. If the tub has no locking mechanism, bond the bottom pads to the substrate with outdoor-rated silicone construction adhesive. Do not fill yet.
Step 7: Fill slowly and recheck. Add about 6 inches of water, then re-level. That first weight compresses any remaining soft spots. Adjust, then fill the rest of the way.
How do you build a lumber platform for a bigger slope?
Once the drop across your site clears 2 or 3 inches, a platform is the answer. It spreads weight evenly, lets you dial in a truly level deck surface, and gives you a place to run plumbing and electrical if you need it.
Start with post layout. For a typical 4x6-foot cold plunge, four corner posts plus two mid-span posts on the long sides work. If the tub tops 1,500 pounds filled, go to six posts plus intermediate support.
Use 4x4 or 6x6 posts in UC4B pressure-treated lumber for anything touching soil or set in concrete [2]. Set them in tube forms with post-base hardware rather than burying them directly in concrete where you can, because hardware lets you swap a post without demolition.
Frame the deck with doubled 2x8 or 2x10 joists depending on span. The International Residential Code requires residential decks to carry 40 psf live load plus 10 psf dead load [3]. A fully loaded cold plunge concentrates on a small footprint and can blow past a typical distributed-load assumption, so spread the load with a thick platform top: two layers of 3/4-inch pressure-treated plywood glued together, or concrete backer board.
For the top surface, composite decking or a rubber mat over your plywood gives grip and drains well under constant water. Bare pressure-treated plywood turns into a slip hazard fast.
Level the platform by cutting the posts to height on the low side. Measure up from a level string line to each post, then cut. That beats shimming the top for accuracy.
If your jurisdiction requires a deck permit (most do at 30 inches above grade, or when the structure attaches to the house) [3], pull it. An uninspected structure under a 1,500-pound water vessel is not a gamble worth taking.
What about using sand or gravel to level the ground underneath?
This is the shortcut that looks easy and bites you later. Loose sand or gravel compresses unevenly under point loads, and cold plunge loads get heavy, then drain, then get heavy again. A tub that sits level in June ends up tilted by October after rain cycles move the bed around.
Compacted gravel is a legitimate base if you do it right: 4 to 6 inches of compacted crushed stone (not pea gravel, which never compacts) over geotextile fabric, with a level check after compaction [4]. The word doing the work is compacted, meaning you ran a plate compactor over it, not raked it smooth. No rented plate compactor, no real compaction.
Sand works as a thin final leveling layer under pavers or a rubber base pad, but only a half inch or less. Any deeper and you get the settlement problem above.
For a permanent outdoor setup, a 4-inch reinforced concrete pad is the most stable base you can put under a plunge. ACI 332 recommends a minimum slab thickness of 4 inches for light residential loads on stable soil [5]. A cold plunge on a concrete pad on a slope just means the pad is poured level (using forms and a laser or water level during the pour) while the surrounding grade stays sloped. That is how the pros handle it.
Do you need a permit to install a cold plunge on a sloped surface?
Probably not for a portable or freestanding tub on pads at grade. Once you build a platform or pour a pad, the answer flips.
Most jurisdictions follow the International Residential Code, which generally requires a permit for any deck, platform, or structural work attached to the house, elevated 30 inches or more above grade, or over a set square footage [3]. A ground-level platform under a plunge at grade often falls under an accessory-structure exemption, but that varies city to city and county to county.
Electrical is the bigger trigger. Cold plunges with chillers, pumps, or heaters usually need a dedicated 120V or 240V circuit. In most states that circuit must be GFCI-protected and installed by a licensed electrician under permit [6]. NEC Article 680 governs pools, spas, and similar equipment, and many jurisdictions apply its provisions to immersion tanks and cold plunge units [6].
Not sure? Call your local building department and ask straight: "I'm installing a freestanding cold plunge tub on a wood platform in my backyard; does that need a permit?" They answer in two minutes and it costs nothing.
What special considerations apply to outdoor cold plunges on slopes?
Drainage comes first. A cold plunge dumps roughly 100 to 300 gallons when you change it, and on a slope that water runs somewhere. If it runs toward your foundation, you have a problem. Plan the path before you install: a dry creek bed, a french drain, or a direct tie to a yard drain. Many municipalities restrict discharging pool water to storm drains, so check local codes [7].
Frost heave comes second if you live anywhere that freezes. Posts that stop short of the frost line heave unevenly each winter and throw your carefully leveled tub off every spring. Set posts below the local frost depth (your county publishes it) or use helical piers, which handle heave better than shallow poured footings [4].
Slope and soil stability matter too. If your slope is part of a natural hillside or a retaining wall system, get a geotechnical assessment before you load it with a water-filled tub. Saturated soil already pushes hard, and adding 1,500 pounds of point load above a slope toe can contribute to failure in unstable ground [4].
Sun exposure affects the chiller. South-facing slopes in hot climates hit your equipment harder, shorten component life, and force the chiller to fight to hold temperature. Park the chiller in shade where you can, even if that means a longer hose.
Wondering which tubs earn a platform in the first place? Our cold plunge collection guide breaks down which units are truly outdoor-rated and which ones corrode in two seasons.
How do you level an inflatable or soft-sided cold plunge tub?
Inflatable and soft-sided tubs are a different animal from rigid shells. The sides flex, so the water always finds the low point and pools there, giving you a lopsided water line even when the base is only a little off. These tubs are more sensitive to slope, not less.
The target for a soft-sided plunge is within 1/4 inch of level across the full diameter, tighter than the 1/8-inch-per-foot most rigid tubs tolerate. On any real slope, these need a genuinely flat surface to work.
The practical move: build or buy a solid platform as described above, get it level, then lay a 3/4-inch rubber mat over it before you set the tub. The rubber protects the tub bottom and buys a little forgiveness if the platform top has minor high points.
Do not run an inflatable directly on grass on a slope. The tub creeps, the base goes uneven, and the seams take the stress. If you want a cheap way into cold water therapy without a permanent build, pair the inflatable with a proper platform from day one. Our ice bath options with rigid walls forgive minor slope far better.
How much does it typically cost to level a cold plunge on a sloped surface?
Cost swings hard by approach. Here is what to budget.
Rubber or HDPE leveling pads: $30 to $120 for a set, assuming you need no more than 2 inches of correction. Fully DIY.
Adjustable leveling feet (if your tub supports them): $40 to $200 for a set of four to six feet, plus about an hour of labor.
Lumber platform, DIY: $200 to $600 in materials depending on size and post depth. Pressure-treated lumber prices swing by region and have been volatile, so get a current quote at your local yard.
Lumber platform, contractor-built: $800 to $2,500 depending on size, complexity, and local labor. Permit fees add another $50 to $300 in most jurisdictions.
Poured concrete pad: $500 to $2,000 for a typical 6x8-foot pad including forming, rebar, and pour. Slopes that force you to form up one side cost more.
Helical piers for steep slopes: $200 to $600 per pier installed; most platforms on serious slopes need three to six.
One line item catches people off guard. Electrical for a chiller or circulation pump is separate. A dedicated 240V circuit with GFCI protection, installed by a licensed electrician, typically runs $300 to $800 depending on distance from the panel and local rates [8].
SweatDecks keeps install guides for the tubs it carries at sweatdecks.com, which help you size what your model needs before you budget.
Planning a sauna alongside the plunge for contrast therapy? Plan both bases at once. An outdoor sauna on a slope has similar leveling needs, and doing the concrete or platform work together saves real money.
What are the most common mistakes people make when leveling a cold plunge?
Using wood shims directly. Real wood shims compress, rot, and wander. Use HDPE composite shims or purpose-made rubber pads.
Checking level at the ground instead of at the tub. The ground or platform can read level while the tub rim does not, thanks to a warped frame or uneven feet. Always check level at the rim or a known-flat reference surface on the tub itself.
Forgetting load compression. Re-check level after adding water. A 1,500-pound load compresses rubber pads and settles into soft spots that were invisible when the tub was empty.
Ignoring drainage. Where the water goes when you drain is more than a convenience issue. Erosion under a platform from repeated drainage cycles undermines footings faster than you expect.
Overbuilding into a permit threshold. A platform that ends up 32 inches tall to clear a slope triggers permit requirements in most jurisdictions [3]. Sometimes a different tub position on the slope, or a concrete pad instead, keeps you under the line and saves weeks of permit time.
Skipping the freeze-thaw check. Install in fall, let the ground freeze, and re-check level in spring before you fill. Treat any ground-mounted install in a freeze climate as provisional until it has survived one full winter.
Building a bigger recovery setup at home? Read up on cold plunge benefits before you invest in a permanent base. Worth the 10 minutes.
Frequently asked questions
Can I put a cold plunge tub directly on grass on a slope?
Only for very temporary use with a portable tub. Grass compresses unevenly, especially wet, and a filled plunge on turf on any real slope shifts over days or weeks. For any tub you plan to use regularly, build or pour a level base first. Even a simple compacted gravel pad beats grass by a wide margin.
How level does a cold plunge tub actually need to be?
Most manufacturers recommend within 1/8 inch per foot for rigid tubs, about 1/2 inch across a 4-foot span. Soft-sided and inflatable tubs need to sit closer to 1/4 inch across the full diameter because their walls flex and the water pools visibly to the low side. Check your specific manufacturer's tolerance in the installation manual.
What type of pads work best for leveling a cold plunge?
HDPE or polypropylene composite shim pads are the best choice. They never compress, they ignore water and moisture, and they are rated for outdoor use. Rubber leveling mounts work for small corrections under 1 inch. Avoid real wood shims outdoors: they soak up water, compress, and eventually rot or split, letting the tub settle back out of level.
Do I need a permit to build a platform for a cold plunge?
It depends on your jurisdiction and the platform height. Most areas follow the International Residential Code, which typically requires a permit for platforms 30 inches or more above grade or any structure attached to the house. A ground-level platform is often exempt, but electrical work for the chiller or pump almost always needs a separate electrical permit regardless of height.
How do I level a cold plunge on a wood deck that is slightly sloped for drainage?
Most residential decks carry a 1/8-inch-per-foot pitch for drainage. Across a 4-foot tub that is only about 1/2 inch, well inside leveling foot or pad range. Measure the actual drop at your exact spot, then use adjustable feet or composite pads to bring the tub rim level. Do not use the deck boards as your reference; use a straight board and spirit level.
What happens if a cold plunge is not level?
Structural damage stacks up faster than you would guess. The shell sees uneven stress, pump fittings take constant side-load, and welds on metal tubs fatigue over months. On a slope you also risk the filled tub shifting, especially during entry and exit when the load distribution changes suddenly. Most manufacturers void warranties for tubs installed without level support.
Can I pour my own concrete pad to level a cold plunge on a slope?
Yes, but it takes more planning than a flat pour. You form the low side up to your finished height while the high side may sit at or near grade. Use tube or plywood forms, rebar, and a water level or laser level during the pour to confirm the top surface reads level before it sets. A 4-inch slab with 3/8-inch rebar on 12-inch centers handles typical cold plunge loads.
How do I stop my cold plunge platform from shifting after frost?
Set posts or footings below your local frost depth. Your county's frost depth is usually available from the local building department. Or use helical piers, which resist frost heave because they anchor into soil below the active freeze layer. Either way, check and re-level every spring as a routine maintenance step.
Is it safe to put a cold plunge tub on pavers on a slope?
Only if the pavers sit on a compacted base and are level with each other. Pavers on a slope are often laid following the slope, so the surface itself reads off-level. Measure the actual level across the paver area, not the slope of the ground. If the pavers read level, use rubber mats or pads to fine-tune. If they follow the slope, build a platform over them or reset them.
How do I level a cold plunge on a slope by myself without help?
Use a floor dolly or appliance rollers to position an empty tub solo. Slide pads under one side by tipping the tub slightly onto one edge, sliding the pad, and lowering it. Never tip a plunge far enough that it can roll. For any tub over about 150 pounds empty, get a second person. The injury risk from a tipping shell on a slope is real.
What slope is too steep for a cold plunge installation without major construction?
More than about 6 inches of drop across the tub's footprint is where most DIYers hit the limit of pads and simple frames. Past that, you are looking at a substantial raised platform, a retaining wall, or a poured pad with one formed-up side. For slopes steeper than 20 to 30 percent grade, get a structural or geotechnical opinion before loading the area.
How long does it take to level a cold plunge tub on a sloped surface?
Simple pad-based leveling on a mild slope runs about 1 to 2 hours for two people. A lumber platform build is typically a full day for two people once materials are on site. A concrete pad takes forming and pouring one day, then 28 days of curing before you load a full tub, though it is structurally usable at roughly 70 percent strength after 7 days in warm weather.
Sources
- CPSC, Portable Spa and Hot Tub Safety: Filled portable spa and similar immersion vessels can weigh 800 to over 2,000 pounds depending on size and water volume.
- USDA Forest Service, Forest Products Laboratory, Wood Handbook: UC4B retention level is required for lumber in ground contact; UC3B for above-grade outdoor exposure.
- International Code Council, International Residential Code (IRC), Chapter 3 and Chapter 5: IRC requires residential decks to be designed for 40 psf live load plus 10 psf dead load; permits generally required for decks 30 inches or more above grade.
- USDA Forest Service, Forest Products Laboratory, on wood foundations and frost-protected construction: Compacted crushed-stone bases over geotextile fabric and posts set below local frost depth resist settlement and frost heave.
- American Concrete Institute, ACI 332 Guide to Residential Concrete Construction: ACI recommends a minimum slab thickness of 4 inches for light residential loads on stable soil.
- NFPA, National Electrical Code (NEC) Article 680: NEC Article 680 governs electrical installations for pools, spas, and similar equipment; GFCI protection required for circuits serving immersion-type equipment.
- EPA, Managing Wastewater and Water Discharge: Local municipalities may restrict discharge of pool or immersion vessel water to storm drain systems; check local codes before draining.
- U.S. Bureau of Labor Statistics, Occupational Outlook Handbook: Electricians: Electrician labor rates vary by region; dedicated circuit installation costs typically $300 to $800 depending on run distance and local rates.

Share:
Stretching inside a sauna: what it actually does for your body
Sauna ceiling panels dripping condensation: how to fix it