
Last updated 2026-07-09
TL;DR
A DIY cold plunge costs as little as $50 (a kiddie pool and ice) or around $300, $800 for a chest-freezer build that holds temperature automatically. The three most popular methods are a stock tank with ice, a repurposed chest freezer, and a large cooler or barrel. Each has real tradeoffs in cost, effort, maintenance, and how cold you can actually get the water.
What is a DIY cold plunge and is it actually worth building?
A DIY cold plunge is any vessel you set up at home to hold cold water, usually between 50°F and 59°F (10°C, 15°C), long enough for a deliberate cold-water immersion session. That's the whole idea. No certification, no proprietary technology.
The interesting part is the gap between a quick cheap setup and one that's genuinely pleasant to use week after week. Tossing ice into a kiddie pool works, technically. But if you're spending $10, $15 on ice every session and wrestling with a shrinking pool that won't hold temperature past the first few minutes, you'll probably quit within a month. The builds that last are the ones where you solve the temperature problem automatically.
So is it worth building? Depends on what a pre-built unit costs you. Purpose-built cold plunges start around $1,200 on the low end and run past $5,000 for filtered, chilled units with real water circulation. [1] A chest-freezer conversion can deliver the same water temperature for $300, $800 total, including the freezer, a submersible pump, a GFCI outlet, and basic filtration. The savings are real. The tradeoff is your time, some DIY comfort, and the willingness to troubleshoot if something breaks.
For most people serious about cold therapy, building your own is a legitimate option, not a compromise. For people who want something ready to use by the weekend with zero tinkering, a cold plunge is probably worth the price premium.
What are the main DIY cold plunge methods?
There are five builds that actually get used and that people stick with. Here's how they compare.
| Method | Upfront cost | Temp range | Auto-chilling | Filtration possible | Durability |
|---|---|---|---|---|---|
| Kiddie pool + ice | $30, $80 | 45 to 55°F (with ice) | No | No | Low |
| Stock tank + ice | $100, $300 | 45 to 60°F (with ice) | No | Basic | Medium |
| Large cooler or barrel | $80, $200 | 45 to 60°F (with ice) | No | No | Medium |
| Chest freezer conversion | $300, $800 | 34 to 55°F | Yes | Yes | High |
| IBC tote | $150, $400 | Ambient to 55°F | No | Possible | High |
Kiddie pool or inflatable tub. Cheapest entry point. You fill it, dump in ice, get in. A standard kiddie pool holds about 100 to 250 gallons, and dropping water from 70°F to 55°F in a 200-gallon pool takes roughly 40 to 60 pounds of ice at $3, $5 per bag. [2] That math gets ugly fast if you're doing this three times a week. Fine for occasional use or for testing whether you even like cold immersion before spending more.
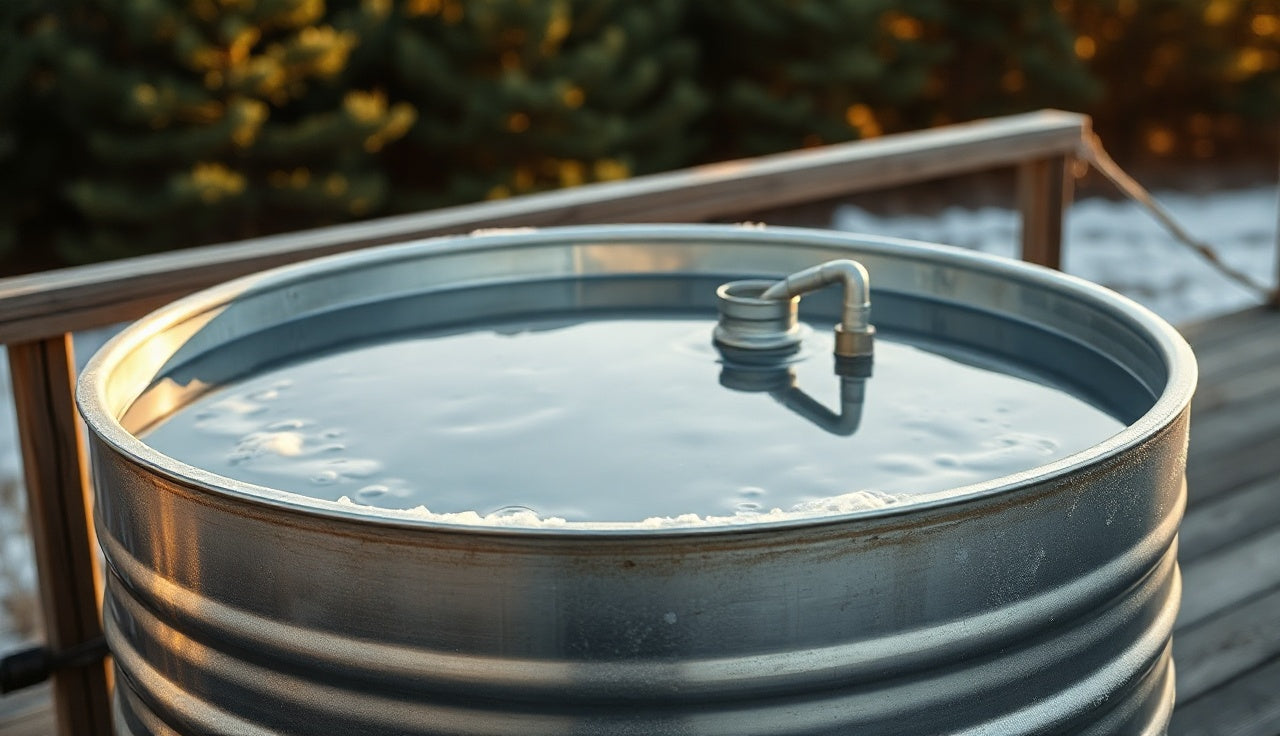
Stock tank. A galvanized or poly stock tank (the kind made for livestock watering) is the most popular intermediate option. A 100-gallon galvanized tank runs $100, $180 at farm supply stores. It's sturdy, it holds shape, and the metal stabilizes temperature a bit better than inflatable walls. You still need ice unless you add a chiller, but the build quality is solid. The Rubbermaid 150-gallon stock tank is the one most people settle on, around $150, $160. [3]
Chest freezer conversion. This is the build most serious DIYers end up at. You buy a chest freezer (7 to 15 cubic feet is the common range, holding roughly 55 to 120 gallons of water), seal the interior liner with a food-safe epoxy or use a vinyl liner, add a submersible pump for circulation, and plug the freezer in on its standard refrigeration cycle. Water temperature can reach the low 40s°F. This is as close to a commercial cold plunge as you'll get without spending $1,200+.
IBC tote. A 275-gallon intermediate bulk container turns up secondhand for $100, $200. They're large, durable, and some people add a simple pond pump and a chest-freezer cooling coil (using the freezer as a chiller without sitting in it) to circulate cold water through the tote. More of an advanced build, but extremely cheap per gallon of water.
Whatever you choose, plan your drainage from day one. Changing water in a 150-gallon tank with no hose bib nearby is genuinely miserable.
How do you build a chest freezer cold plunge step by step?
This is the build worth doing if you want a real, long-term cold plunge at home. Here's how it works in practice.
Step 1: Choose the right chest freezer. A 7.0 cubic foot chest freezer holds roughly 52 gallons, enough for most adults to submerge to the neck if you tuck your knees slightly. A 10.0 cu ft unit gives you more room. Look for models with a flat interior (no coil humps that would press against your back). Frigidaire, GE, and Midea all have well-reviewed options in the $200, $350 range. Avoid freezers with drain plugs on the inside bottom, since those tend to leak once you're using them with water weight instead of food.
Step 2: Address the liner. Freezer interiors are not designed for standing water. The exposed foam insulation and the liner seams can absorb water and grow mold over months. Two common fixes: (a) apply two to three coats of a food-safe epoxy sealant like Rust-Oleum's Leak Seal or a pool paint made for fiberglass, letting each coat cure fully (usually 24 hours between coats, 72 hours before filling with water); or (b) drop in a custom vinyl liner cut to fit the interior. Option (b) is faster and more reversible. Option (a) is a permanent fix.
Step 3: Add a submersible pump and filter. Standing cold water with no circulation grows bacteria quickly. A small submersible pond pump (400 to 800 GPH is plenty for a chest freezer volume) keeps water moving. Run it through a simple filter media bag or a small canister filter rated for ponds. Change or rinse the filter media monthly. This alone stretches how long you can go between full water changes from a few days to two to four weeks, depending on how often you use it and whether you shower before getting in.
Step 4: GFCI protection. Non-negotiable. You are sitting in water connected to a running appliance. The National Electrical Code (NEC) Article 680 requires ground-fault circuit-interrupter protection for outlets near water. [4] Your outdoor GFCI outlet or a portable GFCI adapter on an indoor outlet satisfies this. Do not skip this. A single GFCI outlet adapter costs $15, $25 at any hardware store.
Step 5: Add a thermometer. A waterproof digital thermometer or a simple candy thermometer zip-tied to the pump works fine. You want to know your water temp before you get in. Most people target 50°F, 59°F (10°C, 15°C), which matches the temperature ranges used in cold-water immersion research. [5]
Step 6: Fill, chill, and test before using. Fill with water, plug in the freezer, and wait 12 to 24 hours before your first session. A standard chest freezer on its coldest setting will chill a 52-gallon fill from 70°F to around 38 to 42°F in roughly 8 to 14 hours, though this varies with ambient temperature and how well you sealed the lid.
Ongoing maintenance: Drain and clean every four to six weeks. Add a small amount of hydrogen peroxide (2 to 4 oz per 50 gallons, food-grade 3%) or a non-toxic pool-compatible sanitizer to keep bacterial levels down between changes. Never use bleach at levels meant for swimming pools. The concentration that keeps a 50-gallon bath sanitary is much lower than a full pool, and excess chlorine irritates skin and mucous membranes.
| Kiddie pool + ice 3x/week | $880 |
| Stock tank + ice 3x/week | $1,010 |
| Chest freezer conversion | $820 |
| IBC tote + inline chiller | $1,100 |
| Purpose-built cold plunge (low end) | $1,440 |
Source: Consumer Reports 2023; DOE Energy Saver; SweatDecks cost modeling based on published retail prices
How much does a DIY cold plunge actually cost?
Here's the honest breakdown, including the things people forget in the initial excitement.
Budget build (stock tank + ice routine): $130, $220 upfront. A 100-gallon Rubbermaid or galvanized tank ($130, $160), a hose for filling and draining ($20, $30), and a waterproof thermometer ($10, $20). No pump, no filtration. You're buying ice every session. At $4 per 20-lb bag, getting from tap water (say 65°F) down to 55°F in 100 gallons takes roughly 25 to 30 pounds of ice, so about $5, $6 per session. That's $60, $72 per month if you plunge three times a week, which means $720, $860 on ice alone in a year. The stock tank pays for itself against a chest freezer build in some ways, but not in ongoing costs.
Mid build (chest freezer conversion): $350, $700 total. Chest freezer at $200, $350, epoxy liner sealant or vinyl liner at $30, $80, submersible pump at $20, $40, filter media at $10, $20, GFCI adapter at $15, $25, thermometer at $10, $20, and miscellaneous hardware (silicone, screws, hose connections) at $20, $40. Power runs roughly $15, $30 per month depending on your electricity rate and ambient temperature, based on a 7 to 10 cu ft freezer running a typical duty cycle. [6]
Premium DIY (IBC tote + dedicated chiller): $600, $1,200. Secondhand IBC tote at $100, $200, a dedicated inline water chiller at $300, $600 (the kind sold for homebrew fermentation or hydroponics), pump and filter at $50, $80, and plumbing fittings at $50, $100. This is genuinely overkill for most home users but gets you commercial-grade temperature control and a much larger plunge volume.
The honest summary: most people who commit to the chest freezer build spend $400, $600 all-in and find it works as well as pre-built units costing $1,500, $2,500.
What is the Aldi cold plunge tub and how does it compare to a DIY build?
Aldi sells inflatable cold plunge tubs periodically through its ALDI Finds program, usually priced around $30, $50 when they appear. They're basically insulated inflatable spa shells with no heating or chilling. You fill them, add ice, and use them. [7]
The Aldi cold plunge tub is a fine entry point if you genuinely don't know yet whether cold immersion is something you'll stick with. It's cheap, it stores flat, and it gets you in cold water with almost no commitment. The limitations match any ice-only setup: you buy ice every time, the water warms fast on a hot day, and the insulation on these units is basic at best.
Against a DIY chest freezer build, the Aldi tub loses badly on temperature consistency and long-term cost. Against a dedicated pre-built cold plunge, it wins only on upfront price. If you've already decided you're going to do cold therapy regularly, skip the Aldi tub and put that $30, $50 toward your chest freezer parts budget.
The Aldi tub does have one real advantage. If you live in an apartment with no outdoor space and no garage, it's one of very few options that fits indoors, drains into a bathtub, and stores in a closet. That's a legitimate use case. Just don't expect it to replace a real cold plunge setup.
How cold does the water actually need to be for benefits?
Most cold-water immersion research uses temperatures in the 10°C, 15°C range (50°F, 59°F), and some studies have gone as low as 8°C (46°F). A 2022 meta-analysis in the British Journal of Sports Medicine found that cold-water immersion reduced muscle soreness and perceived fatigue after exercise, with the most-studied protocol being 10 to 15 minutes at 10°C, 15°C. [5]
That same meta-analysis flagged real gaps in the evidence. Study sizes are small, protocols vary, and the mechanisms (norepinephrine release, reduced nerve conduction velocity, localized vasoconstriction) are reasonably understood at the physiological level, but the dose-response relationship, meaning exactly how cold for exactly how long to get a specific outcome, is not firmly established. Nobody has consistently good data on the minimum effective dose.
What this means for your build: you don't need to hit 38°F. A chest freezer set to its middle setting usually holds water in the 50°F, 55°F range, which sits well within the range used in most human research. The people pushing their water to 40°F are not getting dramatically better outcomes than the people at 52°F, at least not based on current evidence.
For reference: a US shower set to "cold" typically runs around 60°F, 70°F, which is too warm to drive the physiological responses studied in cold-water immersion research. That's why a real plunge vessel matters.
What are the safety rules for a home cold plunge?
Cold-water immersion carries real risks. None of this is meant to scare you off, but ignoring safety is how people get hurt.
Cold shock response. Immersing suddenly in water below 59°F triggers an involuntary gasp reflex, hyperventilation, and a spike in blood pressure and heart rate. This typically lasts 30 to 90 seconds. [8] In deep water, or if you can't control your breathing, this reflex can be dangerous. In a home cold plunge you control your entry speed, you're in shallow enough water to stand up, and you're not in open water, so the risk is much lower than cold-water swimming. Still: enter slowly the first few times.
Cardiovascular conditions. People with uncontrolled hypertension, known arrhythmias, or a history of cardiac events should talk to a physician before starting any cold-water immersion practice. The blood pressure spike during cold shock is significant. This isn't a theoretical concern.
Never plunge alone if you're new. The risk of syncope (fainting) is low in healthy adults, but it exists. Have someone nearby for the first few sessions at minimum.
GFCI outlets. Covered in the build section above, but worth repeating: this is the single most important electrical safety step for any DIY build.
Duration. Research protocols typically run 10 to 15 minutes. Hypothermia risk in an adult at 50°F water becomes meaningful past 30 minutes of continuous immersion. Keep sessions to 3 to 15 minutes, especially early on. [8]
Alcohol. Never combine alcohol and cold-water immersion. Alcohol impairs thermoregulation and masks the signals that tell you to get out.
Children. Standard home cold plunges are not appropriate for children without specific medical supervision. Their surface-area-to-volume ratio means they lose heat much faster than adults.
For the full picture on what cold immersion actually does, the cold plunge benefits guide covers the research in detail.
How do you maintain and keep a DIY cold plunge clean?
Water hygiene is the part of DIY cold plunges that most guides skip, and it's where a lot of setups go sideways after a few weeks.
The core problem: a warm, stagnant body of water is a good home for bacteria, algae, and biofilm. Cold water slows microbial growth a lot, which is one reason a chest freezer build holding 40°F, 50°F water stays cleaner longer than an outdoor stock tank baking in the sun at 65°F.
Circulation. A submersible pump running continuously (or on a timer for 15 minutes every two hours) keeps water moving and prevents the stagnant zones where biofilm builds fastest.
Filtration. A pond-style filter rated for 50 to 100 gallons with activated carbon and mechanical media removes particulate and odor between water changes. Rinse the media every one to two weeks.
Sanitization. Options include: (a) small amounts of hydrogen peroxide (food-grade 3%, about 2 to 3 oz per 50 gallons, added weekly); (b) ozone injection using a small ozone generator made for water sanitation; or (c) low-dose chlorine tablets designed for hot tubs (dosed for much smaller volumes than swimming pools, so follow the hot tub guidelines, not pool guidelines). Ozone is the cleanest option with no chemical residue but adds $80, $150 to the build cost.
Full water changes. Every three to six weeks, drain completely, wipe the interior with a dilute bleach solution (1 tablespoon per gallon), rinse thoroughly, and refill. This resets the biofilm clock regardless of how well you maintained it. [10]
Shower before you get in. This single habit probably extends water life more than any chemical treatment. Body oils, lotions, and dead skin cells are the main source of organic load in a home plunge.
Can you use a DIY cold plunge outdoors year-round?
Yes, with some planning. The answer depends heavily on where you live.
In climates where winter temperatures drop below 20°F regularly, an outdoor chest freezer build needs one of two things: a weatherproof enclosure to protect the compressor, or a plan to drain and store it between November and March. Chest freezer compressors are not rated for extreme cold ambient temperatures, and most manufacturers void the warranty if the unit runs or sits below about 0°F, 10°F ambient. Check your specific model's specifications.
The upside of winter: if you're using a stock tank or barrel outdoors in temperatures below 50°F, you may not need any chilling at all. Ambient air keeps your water cold, and you only need ice on unusually warm days.
Sunlight is the other outdoor variable. UV from direct sun helps inhibit algae and some bacteria in the water, but it also degrades vinyl liners faster and dulls the exterior finish on galvanized tanks. A simple shade structure or tarp between sessions extends the life of your build.
An outdoor setup also needs a drain plan. Draining 50 to 150 gallons of water somewhere it won't pool against your foundation or flood a garden is something to figure out before the first water change, not during.
If you want to pair your outdoor cold plunge with heat therapy, an outdoor sauna makes a contrast therapy setup that a lot of people find more sustainable than cold alone.
How does a DIY cold plunge compare to buying a dedicated unit?
Let's be honest about both sides.
A well-built DIY chest freezer setup gives you controlled temperature in the 38°F, 55°F range, a vessel big enough for full-body immersion, and ongoing costs that are just electricity (roughly $15, $30/month). Total investment: $400, $700.
A purpose-built cold plunge gives you a unit designed specifically for water immersion with sealed, waterproof surfaces from day one, real filtration and circulation built in, a warranty, a finished look, and typically a phone app or dial to set exact temperature. Cost: $1,200, $5,500+. [1]
The honest gaps in the DIY route: the chest freezer was not designed to hold a person. The appliance warranty dies the moment you fill it with water and sit in it. If the compressor fails after 18 months, you're buying a new freezer. A purpose-built unit from a reputable company typically carries a one- to three-year warranty on the cooling system and three to five years on the vessel.
The honest gap in the purpose-built route: you're paying a large premium for fit and finish. The cold water in a $3,500 unit is not physiologically different from the cold water in a $500 DIY build. If the outcome you care about is cold water at a controlled temperature, the DIY build delivers it.
SweatDecks has a cold plunge collection covering purpose-built units at multiple price points if you want to compare what you'd actually get for the premium. Worth a look before you decide either way.
For the ice bath angle specifically, the ice bath guide is a good companion read on what the research says about immersion depth and duration.
What tools and materials do you need for a DIY cold plunge build?
Here's the actual shopping list for the most popular build, the chest freezer conversion, so you can price it at your local stores or online before committing.
The vessel:
- Chest freezer, 7 to 15 cubic feet (look for a flat interior, no drain on the interior bottom)
Liner and sealing:
- Food-safe epoxy pool paint OR a custom-cut vinyl liner sized to your freezer interior
- Marine-grade silicone sealant for any seams or gaps
Circulation and filtration:
- Submersible pond pump, 400 to 800 GPH (look for models rated for continuous use, not intermittent)
- Clear plastic tubing, 3/4 inch diameter, to route water from pump to filter return
- Small canister or mesh filter bag with activated carbon media
Electrical safety:
- GFCI outlet adapter or a GFCI extension cord rated for outdoor use
Temperature monitoring:
- Waterproof digital thermometer (probe-style works better than floating)
Sanitation:
- Food-grade hydrogen peroxide (3%), sold at most pharmacies, or a small ozone generator for water use
Optional upgrades:
- A timer outlet ($10, $20) to run the pump on a cycle instead of continuously, which extends pump life
- A pool test strip kit ($10, $15) to check pH and oxidizer levels if you're using any chemical sanitizer
- Foam pipe insulation wrapped around the exterior of the freezer lid to cut temperature loss when the lid is propped open during a session
Total time to build: most people finish the chest freezer conversion in one weekend, with the epoxy cure time being the longest wait. Use a vinyl liner instead of epoxy and you can be in the water 24 hours after the freezer arrives.
Where should you put a DIY cold plunge at home?
Location matters more than most guides admit, because getting it wrong means either abandoning the habit or a major disruption to move it later.
Garage. The most common choice for chest freezer builds. Concrete floors drain easily, temperature is more stable than outdoors, and it's accessible year-round in most climates. The main limitation is summer heat: if your garage hits 95°F in July, your freezer works much harder to hold water temperature, and energy costs go up.
Backyard. Great for stock tanks and IBC totes. Easy drainage, sun exposure (which helps water quality), and the outdoor setting makes the contrast-therapy ritual feel more deliberate. Electrical access needs planning. A weatherproof outdoor GFCI outlet is the right solution, not an extension cord run under a door.
Deck or patio. Works for lighter builds like stock tanks or large coolers. Make sure your deck is rated for the load: a 150-gallon stock tank full of water weighs over 1,250 pounds. Most residential decks are rated for 40 to 60 pounds per square foot, and a tank concentrated on a small footprint can exceed that. [9]
Bathroom. A bathtub can technically serve as a cold plunge, and some people do exactly this, filling with cold water and ice. It's awkward, ties up a household bathroom for 30+ minutes per session, and the depth is usually too shallow for real immersion. Fine occasionally, not as a regular setup.
Basement. Good for temperature stability. Drainage planning is critical since you need either a floor drain or a plan for pumping water out. Manage mold risk from humidity with ventilation.
Frequently asked questions
What is the cheapest DIY cold plunge setup?
The cheapest working setup is a kiddie pool or inflatable tub filled with tap water and ice, at $30, $80 upfront. The ongoing ice cost is the real expense: about $5, $8 per session to drop 100 gallons from 65°F to 55°F. If you plunge three times a week, you'll spend more on ice in a year than a chest freezer conversion would cost upfront.
Can I use a chest freezer as a cold plunge?
Yes, and it's the most popular serious DIY option. You seal the interior with a food-safe epoxy or vinyl liner, add a submersible pump for circulation, use a GFCI outlet for electrical safety, and fill with water. A 7 to 10 cubic foot chest freezer holds 52 to 75 gallons and can chill water to the low 40s°F. Total build cost runs $350, $700 depending on parts.
How long does a DIY cold plunge stay cold without a chiller?
In a well-insulated vessel like a chest cooler or galvanized stock tank, water cooled to 50°F with ice will climb roughly 5°F, 10°F per hour in warm ambient conditions. A chest freezer running on its refrigeration cycle holds temperature indefinitely. An uninsulated stock tank in a 75°F garage returns to ambient temperature within three to five hours of your last ice addition.
How do I keep my DIY cold plunge water clean?
Run a submersible pump continuously or on a timer for circulation. Add a small pond filter with activated carbon. Use a low-dose sanitizer weekly: 2 to 3 oz of food-grade 3% hydrogen peroxide per 50 gallons is a common choice. Always shower before getting in. Do a full drain and clean every three to six weeks. Together these steps keep water safe and clear for weeks between full changes.
What temperature should a DIY cold plunge be?
Most cold-water immersion research uses 50°F, 59°F (10°C, 15°C). A 2022 meta-analysis in the British Journal of Sports Medicine found meaningful recovery benefits in that range at 10 to 15 minute sessions. You don't need to hit 38°F. A chest freezer on a mid setting typically holds water in the 45°F, 54°F range, which covers the research-supported zone comfortably.
Is the Aldi cold plunge tub any good?
The Aldi cold plunge tub (sold through the ALDI Finds program, typically $30, $50) is a basic inflatable tub with no chilling. It works for occasional ice-and-water immersion and helps beginners who aren't sure yet if cold therapy is for them. It's not a substitute for a temperature-controlled setup. The ice costs will pass the tub's price within a couple of months of regular use.
How long should I stay in a DIY cold plunge?
Research protocols typically run 10 to 15 minutes at 50°F, 59°F. Most practitioners start at two to three minutes and build up over weeks. Hypothermia risk in a healthy adult at 50°F water becomes meaningful past 30 minutes of continuous immersion. Three to 15 minutes covers the range where most documented recovery benefits show up, and staying under 15 minutes is a reasonable limit for most home users.
Do I need a GFCI outlet for a DIY cold plunge?
Yes, always. The National Electrical Code Article 680 requires GFCI protection for electrical outlets near water. A running appliance like a chest freezer or submersible pump in contact with water you're sitting in is a serious shock risk without it. A portable GFCI adapter costs $15, $25 at any hardware store and satisfies the requirement if you don't have a GFCI outlet installed at the location.
What size stock tank do I need for a cold plunge?
A 100-gallon stock tank is the minimum for most adults to submerge to chest depth. The Rubbermaid 150-gallon poly tank is the most commonly recommended size for home use, around $150, $160 at farm supply stores. Galvanized steel tanks in the 100 to 150 gallon range cost similarly and are slightly more temperature-stable, though they can oxidize at cut edges if the zinc coating is damaged.
Can I build a DIY cold plunge on a deck or balcony?
On a deck, yes, but check your deck's load rating first. A 150-gallon stock tank full of water weighs over 1,250 pounds. Most residential decks are rated for 40 to 60 pounds per square foot, and a concentrated load like a tank can exceed that on a small footprint. A structural engineer assessment is worth the cost before placing anything that heavy. Balconies in most apartment buildings are not rated for this load.
How much does a chest freezer cold plunge cost to run per month?
A 7 to 10 cubic foot chest freezer running a normal refrigeration cycle costs roughly $15, $30 per month in electricity, depending on your local rate and the ambient temperature of the room. In a hot garage in summer the compressor runs harder and costs more. In a cool basement it may cost closer to $10. Add filter media replacement (about $5, $10 per month) and occasional sanitizers for a realistic ongoing total of $20, $40 per month.
Are there safety risks with a DIY cold plunge?
Yes, and they're worth taking seriously. Cold shock response (involuntary gasp reflex, heart rate spike) hits most people entering water below 59°F and lasts 30 to 90 seconds. People with cardiovascular conditions should consult a physician first. Never plunge alone as a beginner. Use GFCI electrical protection without exception. Keep sessions under 15 minutes, especially early on. Never combine alcohol and cold immersion.
What's the difference between a DIY cold plunge and an ice bath?
The terms often get used interchangeably, but an ice bath usually means a temporary setup using a bathtub or bucket filled with ice and water, generally for a single session. A cold plunge implies a permanent or semi-permanent vessel kept at a controlled temperature, ready to use without building from scratch each time. A DIY cold plunge is built once and maintained; an ice bath is set up fresh each use. The research uses both protocols.
Do I need to add anything to my DIY cold plunge water to keep it safe?
Some sanitization is necessary for any water you're reusing across sessions. Common options: food-grade hydrogen peroxide (2 to 3 oz of 3% solution per 50 gallons weekly), low-dose hot tub chlorine tablets dosed for small volumes, or an ozone generator. Showering before each session and running a filter pump cuts how much chemical intervention you need. Plain tap water with no treatment turns visibly murky and biologically unsafe within one to two weeks of regular use.
Sources
- Consumer Reports, Cold Plunge Tub Buying Guide (2023): Purpose-built cold plunges start around $1,200 and run past $5,000 for filtered, chilled units
- Engineering Toolbox, Specific Heat of Water and Ice Calculations: Estimate of ice quantity needed to cool 200 gallons of water from 70°F to 55°F (roughly 40–60 lbs of ice)
- Rubbermaid Commercial Products, Stock Tank product specifications: Rubbermaid 150-gallon poly stock tank commonly retails for $150–$160 at farm supply stores
- NFPA, National Electrical Code (NEC) Article 680: NEC Article 680 requires GFCI protection for electrical outlets installed near water
- British Journal of Sports Medicine, 'The effectiveness of cold water immersion in reducing exercise-induced muscle soreness and inflammation' (2022 meta-analysis): Cold-water immersion at 10°C–15°C for 10–15 minutes reduced muscle soreness and perceived fatigue in the most-studied protocols
- U.S. Department of Energy, Energy Saver: Refrigerators and Freezers: A 7–10 cubic foot chest freezer running a standard refrigeration cycle costs approximately $15–$30 per month in electricity depending on local rates and ambient temperature
- ALDI US, ALDI Finds Program overview: ALDI sells inflatable cold plunge tubs periodically through its ALDI Finds program, typically priced $30–$50
- National Center for Cold Water Safety, Cold Shock and Cold Incapacitation: Cold shock response (gasp reflex, hyperventilation, blood pressure spike) occurs on sudden immersion below 59°F and typically lasts 30–90 seconds; hypothermia risk in adults at 50°F becomes meaningful past 30 minutes
- American Wood Council, Residential Deck Construction Guide (AWC DCA6): Most residential decks are designed for 40–60 pounds per square foot live load; concentrated loads from water-filled tanks can exceed this
- CDC, Healthy Swimming: Preventing Recreational Water Illnesses: Biofilm and waterborne bacteria are primary hygiene risks in standing recirculated water; sanitation and filtration practices reduce risk
- PubMed Central, 'Cold water immersion and recovery from exercise-induced muscle damage' — International Journal of Sports Physiology and Performance: Research on cold water immersion uses 8°C–15°C (46°F–59°F) temperature protocols with sessions of 10–15 minutes in most human trials

Share:
Durable cold plunge tubs: what actually holds up long-term
Durable cold plunge tubs: what actually holds up long-term