
Last updated 2026-07-09
TL;DR
A DIY cold plunge costs $300 to $1,500 depending on the vessel and whether you add a chiller. Popular builds start with a chest freezer ($150, $400) or a stock tank ($80, $300) paired with a chiller. Skip the chiller and you rely on ice or cold tap water. That works fine for casual use, but daily plunging burns through ice fast.
What is a DIY cold plunge and is it worth building one?
A DIY cold plunge is any vessel you convert into a cold water immersion bath at home, usually held between 45 and 59°F (7 to 15°C), the range most recovery research uses. [1] The appeal is money. A commercial cold plunge tub starts around $3,000 and climbs past $10,000. A chest freezer conversion does the same job for under $500.
"Worth it" depends entirely on how often you actually get in. Plunge three or more times a week and the savings are real. Plunge twice and forget about it, and even a $300 build is money down the drain. Be honest with yourself about your habits before you buy a single part.
The other honest caveat: DIY builds take time to set up, need some basic mechanical comfort, and can grow sanitation problems if you ignore water quality. Commercial tubs handle filtration, sanitation, and temperature in one package. You're trading money for effort and a little reliability.
What are the main DIY cold plunge build options?
Four build paths. Each has a different cost, labor load, and result.
Chest freezer conversion is the most popular approach. You buy a chest freezer (typically 7 to 15 cubic feet), line it with a food-safe liner or leave the interior as-is, fill it with water, and let the compressor do the work. A 7-cubic-foot freezer holds roughly 52 gallons, enough for a seated immersion. Cost: $150, $400 for the freezer, plus $0, $100 for a liner and submersible pump. You set the temperature with the built-in thermostat or a cheap external temperature controller (around $30, $50). [2]
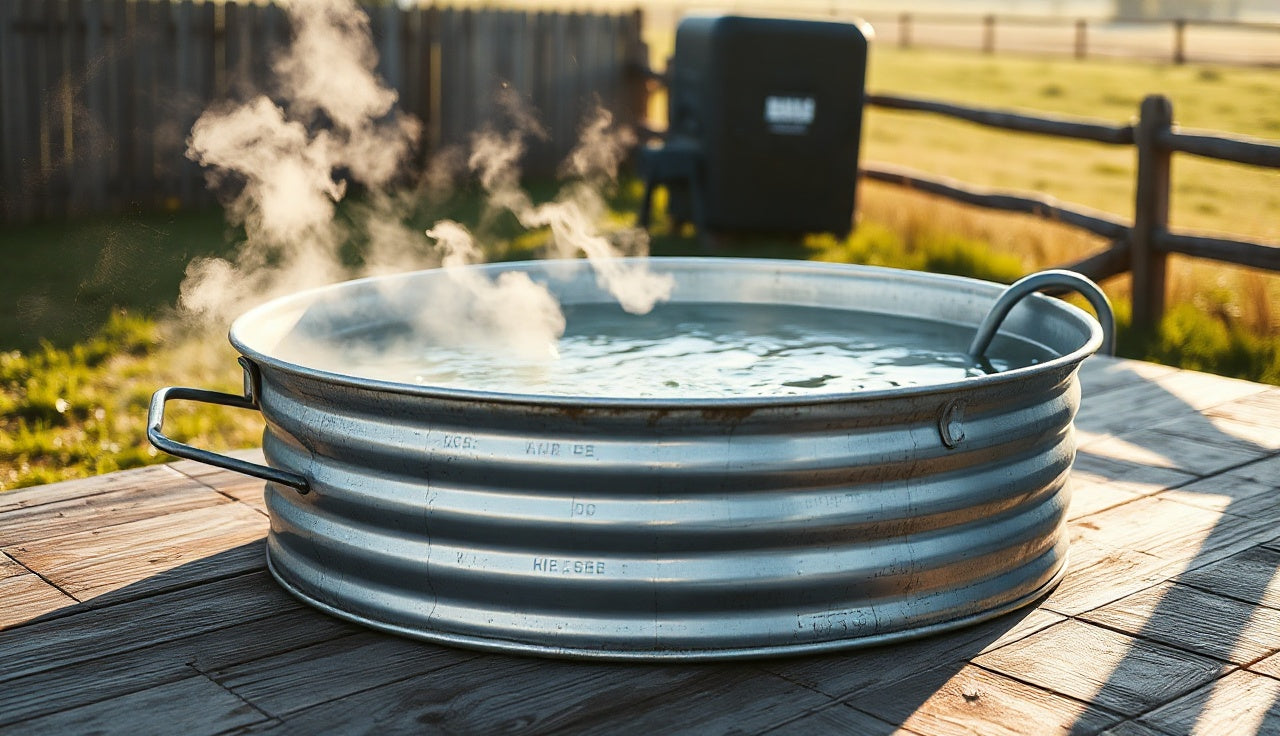
Stock tank or galvanized tub is the cheapest starting point. A 169-gallon galvanized stock tank runs $150, $300. Fill it with cold water and ice, and you're plunging the same day. No electricity required. The downside: ice costs $1, $3 per 10-pound bag, and daily summer plunging can eat 40+ pounds per session. That adds up.
Insulated trough with a chiller is the mid-range pick for serious users. You pair a stock tank or a purpose-built insulated tub with a standalone cold plunge chiller, which circulates and cools the water continuously. A chiller setup holds temperature within a degree or two, filters the water, and runs year-round. Total cost: $600, $1,500 depending on chiller size. Functionally, this is close to a commercial unit.
Repurposed container (old hot tub shell, IBC tote, large cooler) works if you already have one. The vessel cost is often zero. You'll still need insulation and either a chiller or an ice strategy. These setups work fine but can be harder to seal and sanitize.
| Build Type | Vessel Cost | Add-Ons | Total Range | Ice Needed? |
|---|---|---|---|---|
| Chest freezer | $150, $400 | Liner, pump | $200, $500 | No |
| Stock tank (ice) | $80, $300 | None | $80, $300 + ongoing ice | Yes |
| Stock tank + chiller | $80, $300 | Chiller $400, $900 | $600, $1,200 | No |
| Repurposed vessel | $0, $200 | Insulation, chiller | $400, $1,100 | Maybe |
| Commercial tub | N/A | Included | $3,000, $12,000+ | No |
How much does a DIY cold plunge actually cost?
The honest total splits into four buckets: vessel, temperature control, filtration and sanitation, and ongoing operating costs.
For a chest freezer build, the freezer is the biggest line item at $150, $400. A submersible pump ($20, $60) distributes temperature evenly. An external controller like an Inkbird ITC-308 lets you hold 50°F instead of a solid block ($30, $50). Optional: a food-safe liner ($40, $100), a simple skimmer, and pool sanitizer tablets ($10, $20 for a starter supply). Total first-year cost: $250, $600.
For a stock tank with a chiller, the chiller is the main cost. Smaller units built for 100 to 150 gallon tubs run $400, $600. Larger units with UV sanitation and filtration run $700, $900. Add the tank and you're at $600, $1,200. Ongoing costs drop to electricity and occasional sanitizer.
Electricity is real money. A chest freezer holding 50°F in a warm garage can draw 300 to 500 watts when the compressor runs, similar to a small refrigerator. A standalone chiller might draw 500 to 1,000 watts under load. At the U.S. average residential rate of about 16 cents per kWh (2024), running a mid-size chiller 8 hours a day costs roughly $0.65, $1.30 per day, or $20, $40 per month. [3]
Ice costs swing hard. Forty pounds of bagged ice runs $4, $10 and might drop a 100-gallon stock tank by 10 to 15°F depending on starting water temperature. In winter, tap water alone can get you to 55°F with no ice at all.
| Stock tank (ice only) | $300 |
| Chest freezer build | $450 |
| Stock tank + chiller | $950 |
| Repurposed vessel + chiller | $800 |
| Commercial cold plunge tub | $4,500 |
Source: SweatDecks editorial research; electricity cost per U.S. EIA 2024
How do you build a chest freezer cold plunge step by step?
This is the most common DIY build, and it's genuinely straightforward if you can plug in an appliance and manage basic water sanitation.
Step 1: Get the freezer. A 10 to 15 cubic foot chest freezer fits a seated immersion. Measure before you buy; your torso and legs need room. New units run $200, $350 at big box stores. Used ones on Craigslist or Facebook Marketplace often go for $50, $150.
Step 2: Install a temperature controller. Plug the freezer into an Inkbird ITC-308 or similar dual-stage controller. Set the cooling target to 50 to 55°F. The controller cuts power to the compressor when the water hits your target and restores it when temperature drifts up. Skip this and the freezer turns your water into a solid block.
Step 3: Fill it. Fill with water, leaving 6 to 8 inches of headspace so it doesn't overflow when you get in. A 10 cubic foot freezer holds roughly 75 gallons.
Step 4: Add circulation and sanitation. Drop in a small submersible pump ($20, $40) to circulate water and kill dead cold spots. Add chlorine or bromine to keep bacteria down. A free chlorine level of 1 to 3 parts per million (ppm) is the CDC recommendation for recreational water. [4] Test strips cost about $8 for 100.
Step 5: Wait for it to cool. Depending on starting temp, it takes 12 to 36 hours to reach 50°F. Don't rush it; the compressor needs to cycle down slowly to avoid overworking.
Step 6: Get in. Keep sessions to 2 to 10 minutes at cold temperatures. Ease in over 30 to 60 seconds. Don't plunge alone if you're new to cold immersion. Cold shock response is real and can cause involuntary gasping, or in rare cases cardiac events in susceptible people. [5]
Two things trip people up. Freezer lids can be tight and awkward to open from inside, so prop yours or pull the lid off entirely. Drainage is the other annoyance. Chest freezers have no drain plug, so you'll empty them with a submersible pump for water changes, or drill a drain hole (which voids the warranty but works).
Do you need a cold plunge chiller for a DIY build?
No, you don't need a chiller. But if you want to plunge daily at a steady temperature without buying ice or babysitting a chest freezer thermostat, a chiller makes life much easier.
A chiller is a refrigerating unit with an inlet and outlet hose that you drop into any vessel. Water circulates through the chiller, gets cooled, and returns to the tub. Good ones bundle a pump, a filter, and sometimes UV sanitation. Some sell specifically as cold plunge chillers; others are rebranded aquarium or industrial units.
Sizing is the whole game. Chiller capacity is rated in horsepower (HP) or BTUs. For a 100 to 150 gallon tub in a moderate climate, a 1/2 HP unit usually does it. For a larger tub, an outdoor setup in summer heat, or a heavily insulated vessel, you want 1 HP or more. Undersize the chiller and it runs constantly while never quite holding temperature.
If you're shopping for cold plunge chillers for sale, look for units that state a maximum water volume and include a built-in temperature display. Avoid anything with no stated BTU or HP rating. Those are usually underpowered for anything past 50 gallons.
For a diy cold tub cold plunge chiller combo, the realistic minimum spend is about $400, $500 for a decent chiller plus the vessel. Still a fraction of a commercial cold plunge tub from the major brands.
How cold should your DIY cold plunge actually be?
The research on cold water immersion doesn't point to one magic number. Most published studies use water between 50°F and 59°F (10 to 15°C). [1] Some protocols go lower, down to 39 to 41°F (4 to 5°C), but colder is not automatically better, and the risk of cold shock and hypothermia climbs as the temperature drops.
For home use, 50 to 59°F is a sensible target. In that range you get real vasoconstriction and the subjective jolt most people are after. Going below 50°F is harder on your chest freezer or chiller, costs more electricity, and adds risk without clear extra benefit for most people.
A study in the European Journal of Applied Physiology found that 10 minutes of cold water immersion at 57°F (14°C) significantly reduced muscle soreness compared to passive recovery. [6] That's a solid benchmark for recovery-focused plunging.
For safety, the American Red Cross notes that cold water (below 70°F) can cause cold shock, marked by an involuntary gasp and hyperventilation, within the first 30 to 90 seconds of immersion. [5] Easing in slowly instead of jumping cuts this response. People with cardiovascular conditions, high blood pressure, or Raynaud's disease should talk to a doctor before starting a regular cold immersion habit.
How do you keep a DIY cold plunge clean and safe?
Water sanitation is the part most people underestimate. Cold water still grows bacteria and biofilm. You're soaking in it with open skin. It matters.
The rules that apply to hot tubs apply here too, just at lower temperatures. Cold water slows some microbial growth, but it doesn't stop it. CDC guidelines for recreational water recommend free chlorine at 1 to 3 ppm and pH between 7.2 and 7.8. [4]
For a chest freezer or small stock tank (50 to 100 gallons), one or two small pool chlorine tablets in a floating dispenser usually holds the right level. Test every 2 to 3 days. Do a full water change every 1 to 4 weeks depending on how often you use it, whether you shower first, and how much the water clouds.
A submersible circulation pump helps a lot. Stagnant water sanitizes unevenly and builds biofilm faster. For chiller setups, the built-in filter handles particulates, but you still have to sanitize. Some chillers include a UV lamp that kills bacteria passing through; worth the premium if sanitation worries you.
Ozone generators and enzyme treatments are alternatives to chlorine for a chemical-free approach. They work, but they cost more and need more active management. If you want zero chemistry, do frequent full water changes (every 2 to 5 days for solo use). That works, but it wastes water and takes time.
What are the best materials and vessels for a DIY cold plunge tub?
The vessel is the foundation of your build, and the wrong pick creates problems down the line.
Galvanized stock tanks are popular because they're cheap, everywhere at farm supply stores, and tough. A 169-gallon round tank is big enough to sit in with legs extended. Downside: galvanized metal can leach zinc over time, and the sharp rim is uncomfortable. Many people add a foam pool noodle or rubber gasket to the rim.
Polyethylene stock tanks dodge the zinc concern and are gentler on the body. Same price range. They don't insulate as well as a chest freezer, so plan on ice or a chiller.
Chest freezers come with built-in insulation, which slashes the energy needed to hold temperature. They're watertight by design. The ergonomic catch is that they're made to be loaded from above, not entered from above, so you step over a 2 to 3 foot wall.
IBC totes (275 or 330 gallon intermediate bulk containers) are large, cheap (often free or $50, $100 used), and built to hold liquid. The food-grade polyethylene sits inside a stainless steel cage that gives structure, and a person can lie down inside. Downside: they're big and ugly.
Purpose-built insulated cold plunge tubs from manufacturers cost more ($300, $800 for the vessel alone) but have smooth interiors, real drainage, and integrated chiller ports. These sit between a true DIY build and a commercial unit. If you're looking at cold plunge tubs for sale in this middle category, SweatDecks carries several chiller-compatible insulated tubs that pair cleanly with aftermarket chillers.
Whatever you choose, make sure it's rated for water contact (food-safe), has drainage or pump access, and can hold up when full. Water weighs 8.34 pounds per gallon. A 150-gallon tub full of water weighs over 1,250 pounds. Your floor, deck, or patio has to carry that load.
DIY cold plunge vs buying a cold plunge tub: which makes more sense?
The honest answer hinges on four things: your budget, how much you value your time, how much temperature precision matters, and whether looks matter.
A DIY chest freezer build costs $250, $600 and does the job well. It looks like exactly what it is: a chest freezer in your garage. You'll spend 2 to 4 hours building it and maybe 20 to 30 minutes a month maintaining it.
A quality commercial cold plunge tub starts around $3,000, $5,000. At that price you get a purpose-designed vessel, a matched chiller, integrated filtration, and usually a warranty. You spend zero time building it. It looks good on a deck.
For a lot of people, the DIY route is the better financial call, plain and simple. You aren't getting worse cold water by spending less. But if your time is genuinely worth $50, $100 an hour, the $2,000, $4,000 you save by building might not survive the hours you sink into planning, sourcing, and troubleshooting.
Middle ground: a cold plunge tub & chiller combo sold as a matched set but priced under the premium brands. These run $1,500, $3,000, need little setup, and beat most DIY builds on consistency and looks. For someone who wants a real setup without a six-hour build project, that's a fair compromise.
Still in the "testing the habit" phase? Build the $300 chest freezer version first. Plunge for three months. If you're still at it, then spend more on a better setup. Most people who buy a $5,000 tub before the habit sticks end up with an expensive yard decoration.
Can you use a DIY cold plunge outdoors?
Yes, and outdoor setups have real upsides. Drainage is easier, water on the floor stops being a worry, and you can run a hose straight to it. Plenty of people keep stock tanks or insulated tubs on a deck or patio year-round.
The two outdoor headaches are summer heat and winter freeze.
In summer, holding water at 50°F outdoors in a hot climate demands a properly sized chiller. An undersized unit running all day in 95°F ambient heat won't pull a non-insulated stock tank much below 60 to 65°F. Insulating your vessel (rigid foam board glued to the outside, covered with weather-resistant material) makes a big difference and lightens the chiller's load. Some builders wrap the exterior of a stock tank in 1 to 2 inches of rigid foam and plywood for a simple insulated shell.
In winter, cold tap water in many regions naturally reaches 40 to 50°F, so cooling is effortless and cheap. The risk shifts to the equipment itself. A chiller or chest freezer not rated for outdoor use can be wrecked by hard freezes, rain, or UV. Keep any chiller or electrical parts under cover and off the ground.
For year-round outdoor use, a chest freezer in an unheated garage is often the most practical setup in cold climates. The garage buffers temperature extremes while letting you step out of the living space. Confirm your garage floor can carry the weight (see the 1,250-pound figure above).
Check local codes too. Some municipalities regulate outdoor water features or require electrical permits for outdoor receptacles. Running a 120V or 240V connection outdoors means you need a GFCI-protected outlet. The National Electrical Code (NEC) Article 680 covers requirements for permanently installed swimming pools and related equipment, and many inspectors apply similar logic to large outdoor water features. [7]
What safety rules should you follow with any cold plunge?
Cold water immersion carries real physiological risks worth understanding before you build anything.
Cold shock is the immediate response to sudden cold immersion: an involuntary gasp, hyperventilation, and a spike in heart rate and blood pressure. In people with underlying cardiovascular disease, that spike can trigger a cardiac event. The response peaks in the first 30 to 90 seconds and fades as you acclimate. [8] Always ease in. Never jump into a cold plunge headfirst.
Hypothermia becomes a concern with longer sessions. At 50°F water, the time to loss of useful consciousness is estimated at 30 to 60 minutes for an average adult. At 2 to 10 minute session lengths, you're nowhere near that. But if you fall asleep or lose consciousness in a cold plunge (rare, but documented in cases of extreme fatigue or alcohol use), the outcome is serious. Don't plunge alone if you're a beginner, intoxicated, or medically compromised.
Never plunge straight after intense heat exposure (like a sauna) without a minute or two of cool-down. Rapid temperature swings load the cardiovascular system hard, and while contrast therapy is common, the transition should be gradual. If you want ice bath and sauna contrast protocols, the general guidance is to end with cold, not hot, for the recovery effect.
For electrical safety, any equipment near water must be GFCI-protected. This is required and enforced in virtually every U.S. jurisdiction. [9] Don't run extension cords to a chest freezer sitting in a puddle. Mount your outlets properly, use outdoor-rated equipment outdoors, and don't modify the electrical components inside the freezer.
Keep your water clean. Skin infections from contaminated water are unpleasant and occasionally serious. Hold the 1 to 3 ppm free chlorine range and change water on a schedule.
What do you need to know before buying cold plunge chillers or tubs?
If you're shopping instead of building purely from scratch, a few specs matter more than anything in the marketing copy.
Chiller capacity vs vessel volume. The chiller has to be sized for your water. Rough rule: a 1/2 HP chiller handles 100 to 150 gallons in a moderate climate; 1 HP handles 150 to 300 gallons or a poorly insulated vessel in summer. Oversizing slightly is fine. Undersizing is the common, maddening mistake.
Flow rate. The pump should turn over your full tub volume at least once every 30 to 60 minutes. Check the flow rate in GPH (gallons per hour) and make sure your hose length doesn't exceed the pump's head pressure rating.
Temperature range. Most cold plunge chillers rate down to 39 to 41°F at minimum. Confirm that minimum is reachable in your ambient temperature. Some budget chillers list 39°F but only hit it in a 65°F room.
Noise. Chillers have compressors. They aren't silent. Noise runs from about 40 dB (quiet) to 65 dB (loud refrigerator). If your plunge is indoors or near a bedroom, this matters.
Warranty and support. DIY-oriented chillers from smaller brands often carry 1-year warranties and thin support. Premium brands offer 2 to 3 years and real customer service. When you're spending $600+ on a chiller, that gap is real.
For people who want a turnkey cold plunge tub diy hybrid, meaning a pre-built insulated vessel with chiller ports already cut, SweatDecks carries options that bridge a full DIY build and a $5,000+ commercial unit. Browse the cold plunge collection to compare vessel sizes and chiller compatibility before you commit to a build.
If cost drives the decision and you want to read what cold exposure actually does before you build, the cold plunge benefits and ice bath guides cover the physiology without the hype.
Frequently asked questions
How much does a DIY cold plunge cost to build?
A basic chest freezer build runs $250, $500 all-in. A stock tank with a cold plunge chiller runs $600, $1,200. A repurposed vessel with minimal additions can come in under $200 but usually needs ongoing ice. Commercial cold plunge tubs start at $3,000, so even a mid-range DIY setup saves $2,000 or more upfront.
What size chest freezer do I need for a cold plunge?
A 10 to 15 cubic foot chest freezer is the practical sweet spot for most adults. A 10 cubic foot unit holds about 75 gallons and fits a seated immersion with legs extended. Larger freezers (15+ cubic feet) give more room but cost more to cool. Measure your torso and leg length before buying; cold plunging in a cramped freezer is miserable.
How do I keep my DIY cold plunge water clean?
Hold free chlorine at 1 to 3 ppm and pH between 7.2 and 7.8, per CDC recreational water guidelines. Use pool test strips every 2 to 3 days. Add a small submersible pump for circulation to prevent stagnant zones. Change water fully every 1 to 4 weeks depending on use. Shower before each session to cut the contamination load.
Can I use a stock tank as a cold plunge?
Yes. A 169-gallon galvanized or polyethylene stock tank works well. Fill it with cold water and ice for immediate use, or add a cold plunge chiller for consistent temperature without ongoing ice costs. Stock tanks cost $80, $300 and sit on the shelf at most farm supply stores. The main downside is poor insulation, which raises ice or chiller demand in warm weather.
Do I need an external temperature controller for a chest freezer cold plunge?
Yes, almost certainly. Chest freezer thermostats are built to freeze food, not hold water at 50 to 55°F. Without an external controller (like an Inkbird ITC-308, around $30, $50), the freezer tries to drop water to 0°F and ices it solid. The controller cuts compressor power when you hit your target and restores it when the water warms up.
How long does it take a chest freezer cold plunge to reach temperature?
It typically takes 12 to 36 hours to cool a full chest freezer from tap water temperature to 50°F, depending on freezer size, ambient temperature, and starting water temperature. Run it overnight before your first planned session. Once it's at temperature, an insulated chest freezer holds it efficiently, cycling only occasionally to keep the setpoint.
Is a DIY cold plunge safe?
Yes, with precautions. Ease in over 30 to 60 seconds to blunt the cold shock response. Keep sessions to 2 to 10 minutes at 50 to 59°F. Never plunge alone as a beginner. Ensure all electrical equipment is GFCI-protected per the National Electrical Code. People with cardiovascular conditions, high blood pressure, or Raynaud's disease should consult a physician before starting cold immersion.
What temperature should a cold plunge be?
Most published research uses 50 to 59°F (10 to 15°C). A study in the European Journal of Applied Physiology found measurable soreness reduction at 57°F (14°C) after 10 minutes. Below 50°F raises physiological stress without proven added benefit for most people. Above 60°F is less effective for the cold shock and vascular response most users want.
How do I drain a chest freezer cold plunge?
Chest freezers have no built-in drain plug. Your options: use a submersible pump to move water to a drain or outdoor area (15 to 20 minutes for a 75-gallon tub), drill a drain hole in the bottom and add a threaded plug (voids the warranty, but works well long-term), or tip the freezer carefully if it's small enough and your drain location allows it.
Can I use a DIY cold plunge outdoors year-round?
Yes, with planning. In winter, cold tap water may reach 40 to 50°F in many climates, making outdoor plunging cheap. In summer, you need a properly sized chiller and good vessel insulation to hold temperature without running nonstop. Protect electrical components from rain and direct sun with a cover or shelter. GFCI-protected outdoor outlets are required for any outdoor electrical equipment.
How much does it cost to run a cold plunge chiller per month?
A mid-size chiller drawing 500 to 800 watts, running 8 hours a day, uses 4 to 6.4 kWh daily. At the U.S. average residential rate of about 16 cents per kWh, that's $0.64, $1.02 per day, or roughly $20, $31 per month. A well-insulated vessel cuts run time a lot. A poorly insulated stock tank in summer heat pushes that figure higher.
What is the difference between a cold plunge chiller and just using ice?
A chiller circulates and refrigerates water continuously, holding a precise temperature with no material cost beyond electricity. Ice is cheap upfront but expensive daily (40 pounds to cool 100 gallons by 10 to 15°F, at $4, $10 per 40 pounds). For casual use, ice is fine. For daily plunging, a chiller pays for itself in 3 to 6 months against buying ice, depending on local prices.
Can I convert a hot tub into a cold plunge?
Yes. Old hot tub shells are well-insulated, properly drained, and built for body immersion. The jets and heater are useless, but the shell and plumbing ports are genuinely handy. You'll connect a cold plunge chiller to the existing ports or add your own inlet and outlet. If you can grab a used hot tub shell free or cheap, it's one of the better DIY vessel options.
Does a DIY cold plunge provide the same benefits as a commercial tub?
The cold water is the same no matter the container. If your DIY build holds 50 to 59°F reliably and the water is clean, the physiological response matches a $10,000 commercial unit. Commercial tubs offer better ergonomics, looks, temperature consistency, and integrated filtration. They don't offer colder water or stronger benefits. You're paying for convenience and design, not better recovery.
Sources
- PubMed / National Library of Medicine: Bleakley et al., 'Cold-water immersion (cryotherapy) for preventing and treating muscle soreness after exercise,' Cochrane Database of Systematic Reviews, 2012: Most cold water immersion research uses water temperatures between 50°F and 59°F (10–15°C)
- Inkbird product specifications, ITC-308 dual-stage temperature controller: External temperature controllers like the Inkbird ITC-308 allow chest freezers to hold a target water temperature rather than freezing solid; price approximately $30–$50
- U.S. Energy Information Administration, Electric Power Monthly, Average Retail Price of Electricity: U.S. average residential electricity rate approximately 16 cents per kWh as of 2024
- Centers for Disease Control and Prevention (CDC), Healthy Swimming: Residential Pool Water Quality: CDC recommends free chlorine at 1–3 ppm and pH between 7.2 and 7.8 for recreational water to control pathogens
- American Red Cross, Water Safety: Cold Water Shock: Cold water below 70°F can cause cold shock including involuntary gasping and hyperventilation within 30–90 seconds of immersion; risk of cardiac events in susceptible individuals
- European Journal of Applied Physiology: Rowsell et al., 'Effects of cold-water immersion on physical performance between two simulated soccer matches,' 2009: 10 minutes of cold water immersion at approximately 57°F (14°C) significantly reduced muscle soreness compared to passive recovery
- National Fire Protection Association (NFPA), National Electrical Code (NEC) Article 680, Swimming Pools, Fountains, and Similar Installations: NEC Article 680 covers electrical requirements for permanently installed swimming pools and related water equipment; GFCI protection required
- PubMed / National Library of Medicine: Tipton MJ, 'The initial responses to cold-water immersion in man,' Clinical Science, 1989: Cold shock response is worst in first 30–90 seconds and fades with acclimatization; easing in slowly reduces the response
- U.S. Consumer Product Safety Commission (CPSC), electrical safety guidance: GFCI-protected outlets are required for electrical devices used near water in residential settings
- PubMed / National Library of Medicine: Versey et al., 'Water immersion recovery for athletes: effect on exercise performance and practical recommendations,' Sports Medicine, 2013: Cold water immersion temperatures of 10–15°C (50–59°F) are the most commonly studied range for recovery applications
Share:
Sauna benefits for women: what the research actually shows
Sauna benefits for women: what the research actually shows